A kangaroo pocket is a popular design element in clothing‚ offering both style and functionality. It creates a cozy pouch for hands or small items‚ perfect for hoodies‚ dresses‚ and more. This guide provides resources for finding free kangaroo pocket pattern PDFs‚ helping sewists of all levels create this practical feature.
1.1 What is a Kangaroo Pocket?
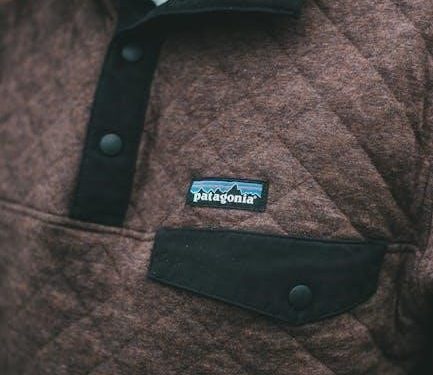
A kangaroo pocket is a large‚ pouch-like pocket typically found on hoodies‚ sweatshirts‚ and casual garments. It is characterized by its double opening‚ allowing easy access for hands or small items. The pocket is usually centered on the front of the garment‚ offering both functionality and a stylish design element. Its popularity stems from its practicality and comfort‚ making it a favorite for sewists looking to add a cozy and functional feature to their projects. The kangaroo pocket is a versatile design that suits various clothing types‚ from hoodies to dresses.
Benefits of Using a Free Kangaroo Pocket Pattern PDF
Using a free kangaroo pocket pattern PDF is cost-effective and streamlines your sewing project. It provides flexibility‚ allowing customization while saving money on design costs.
2.1 Cost-Effective Sewing Solution
Free kangaroo pocket pattern PDFs offer a budget-friendly way to enhance your sewing projects. They eliminate the need to purchase expensive patterns‚ allowing you to allocate resources to fabric or other materials. Printable and downloadable‚ these designs provide instant access without additional costs. Perfect for sewists of all skill levels‚ they enable you to create professional-looking pockets at no extra expense. This cost-effective solution is ideal for those seeking to add functionality and style to garments without financial strain‚ making it a practical choice for both casual and advanced sewing endeavors.
Where to Find Free Kangaroo Pocket Patterns Online
Discover free kangaroo pocket patterns on websites like Pinterest‚ Craftsy‚ and Etsy. These platforms offer downloadable PDFs for instant access to various designs and sizes.
3.1 Popular Websites for Downloading Free Sewing Patterns
Popular websites like Pinterest‚ Craftsy‚ and Etsy offer a wide variety of free kangaroo pocket patterns in PDF format. These platforms provide easy access to downloadable designs‚ often with size charts and tutorials. Additionally‚ websites like Sewing Parts Online and Free Sewing Patterns.net specialize in offering free sewing resources‚ including kangaroo pocket templates. Many independent designers also share their patterns on personal blogs or through social media‚ making it easy to find the perfect design for your project.

How to Download and Print the Kangaroo Pocket Pattern
To download a kangaroo pocket pattern‚ visit reputable websites like Pinterest or Craftsy‚ and search for “free kangaroo pocket pattern PDF.” Once found‚ download the PDF and ensure your printer is set to letter size (8.5×11 inches) in portrait orientation. Print at 100% scale to maintain accuracy. Check for a test square to verify the print size. If the pattern is tiled‚ print all pages‚ then assemble by matching symbols. Use a large surface to tape pages together neatly. Store the assembled pattern in a protective envelope for future use.
4.1 Step-by-Step Guide for Proper Printing
Begin by downloading the kangaroo pocket pattern PDF from a trusted source like Pinterest or Craftsy. Ensure your printer is set to print on letter-sized paper (8.5×11 inches) in portrait orientation; Select “Actual Size” or “100% Scale” in your printer settings to avoid resizing. Print a test page to verify the 1-inch registration square is accurate. If the pattern is tiled across multiple pages‚ print all pages‚ then assemble them by aligning the provided match lines or symbols. Use clear tape or a similar adhesive to secure the pages neatly. Once assembled‚ store the pattern in a protective sleeve or envelope to prevent damage.
Choosing the Right Fabric for Your Kangaroo Pocket
Select fabrics like fleece‚ cotton‚ or French terry for a kangaroo pocket. These materials are soft‚ durable‚ and suitable for casual wear‚ ensuring comfort and style.
5.1 Recommended Materials and Their Properties
For a kangaroo pocket‚ fleece‚ cotton‚ and French terry are ideal. Fleece offers warmth and softness‚ while cotton provides durability and breathability. French terry combines the best of both‚ with a smooth exterior and looped interior for comfort. These fabrics are perfect for casual wear and ensure the pocket retains its shape. When sewing‚ choose materials that match your garment for a cohesive look. Proper fabric selection enhances both functionality and style‚ making your kangaroo pocket a practical and fashionable addition to any project.

Sewing Tutorials for Kangaroo Pocket Patterns
Find video and written guides to help you master the kangaroo pocket. These tutorials are perfect for beginners‚ offering step-by-step instructions to ensure a professional finish.
6.1 Video and Written Guides for Beginners
Beginners can benefit from detailed video and written guides that walk through each step of creating a kangaroo pocket. These tutorials often include tips on fabric selection‚ pocket placement‚ and stitching techniques. Many guides feature projects like the Terra Tunic‚ where you can add a kangaroo pocket for a sporty look. Some tutorials even show how to incorporate hidden phone pockets for extra functionality. Whether you prefer visual or written instructions‚ these resources make it easy to learn and master the kangaroo pocket design.
Customizing Your Kangaroo Pocket Design
Personalize your kangaroo pocket by experimenting with fabrics‚ embroidery‚ or unique shapes. Add decorative elements like buttons or appliques for a standout look. Tailor the size and style to suit your garment‚ ensuring functionality and flair.
7.1 Tips for Adding Unique Features
Enhance your kangaroo pocket with creative elements like contrasting linings‚ embroidery‚ or appliques. Consider adding buttons‚ zippers‚ or ribbons for a decorative touch. Experiment with different fabrics‚ such as fleece or corduroy‚ to create texture. Adjust the pocket’s shape or size for a personalized fit. Incorporate functional details like hidden compartments or phone sleeves. For a modern look‚ add reflective strips or neon stitching. These tweaks allow you to make the pocket truly unique while maintaining its practicality.

Common Mistakes to Avoid When Sewing a Kangaroo Pocket
- Incorrect pocket alignment can ruin the garment’s symmetry.
- Using thin fabrics may result in a saggy pocket.
- Forgetting to pre-wash fabric can cause shrinking issues.
- Not following pattern scaling instructions leads to poor fit.
8.1 Troubleshooting Tips for Perfect Results
- Ensure proper alignment by using pins and markers to guide placement.
- Choose fabrics with structure to prevent sagging and maintain shape.
- Double-check measurements to avoid resizing issues during sewing.
- Use seamless patterns to minimize errors and ensure symmetry.
- Test pocket placement on a muslin prototype before final stitching.

Free Kangaroo Pocket Patterns for Different Garments
Discover versatile kangaroo pocket patterns for hoodies‚ dresses‚ skirts‚ and tunics. These designs offer easy integration into various garments‚ ensuring functionality and style. Download now for your next project!
9.1 Patterns for Hoodies‚ Dresses‚ and More
Kangaroo pocket patterns are versatile and can be incorporated into various garments. For hoodies‚ they add a cozy‚ practical touch‚ while for dresses and skirts‚ they offer a stylish‚ functional detail. Sweaters and tunics also benefit from this design‚ providing a modern aesthetic. Free PDF patterns are available for these garments‚ ensuring you can easily sew a kangaroo pocket into your next project. Whether you’re making casual wear or a trendy dress‚ these patterns cater to diverse sewing needs‚ allowing you to customize your creations with ease and creativity.
Kangaroo pockets are a fantastic addition to hoodies‚ dresses‚ and more. With free PDF patterns available‚ they’re easy to incorporate into your sewing projects‚ enhancing both style and functionality. Give it a try today!
10.1 Why You Should Try a Kangaroo Pocket Pattern Today
Kangaroo pockets are a timeless and versatile feature that adds both style and functionality to any garment. With free PDF patterns readily available‚ you can easily incorporate this design into your projects. Whether you’re making a cozy hoodie‚ a trendy dress‚ or a practical skirt‚ a kangaroo pocket enhances comfort and usability. It’s perfect for keeping hands warm or storing small essentials. The pattern is customizable‚ allowing you to tailor it to your skill level and creative vision. Plus‚ it’s a great way to elevate your sewing projects with minimal effort. Give it a try and see how it transforms your creations!