Discover the charm of long-eared bunny crochet patterns, now widely popular as adorable gifts or newborn photo props, with free PDF patterns readily available online.
1.1 Overview of the Popularity of Amigurumi Bunnies
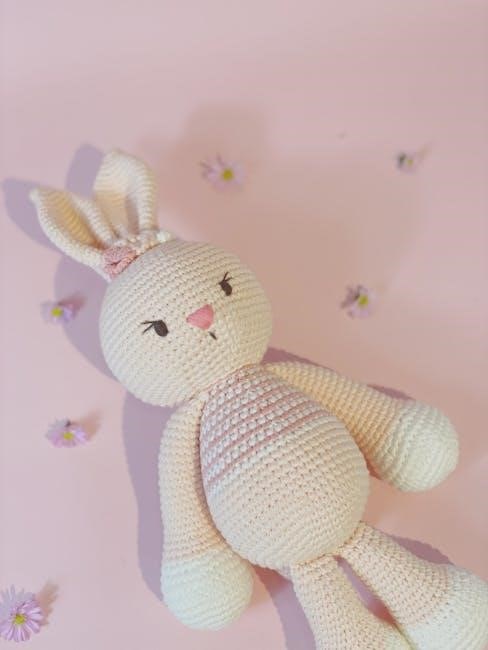
Amigurumi bunnies, especially those with long ears, have gained immense popularity due to their charm and versatility. They make delightful gifts for Easter, baby showers, or as cuddly toys. Their adorable designs, often featuring floppy ears, have captured the hearts of crafters worldwide. Free PDF patterns have further boosted their appeal, making them accessible to crocheters of all skill levels. The ability to customize and the joy of creating something heartfelt contribute to their enduring popularity.
1.2 Benefits of Using Free PDF Patterns for Crochet Projects
Free PDF patterns offer unparalleled convenience for crocheters, providing easy access to detailed instructions and visuals. They are often ad-free and printable, making them ideal for offline use. These patterns cater to all skill levels, ensuring everyone can create adorable long-eared bunnies. Additionally, they save time and resources, allowing crafters to focus on bringing their projects to life without extra costs or distractions.
Materials and Tools Needed for the Project
Gather essential materials like soft yarn, a suitable crochet hook, polyester stuffing, scissors, and a tapestry needle to bring your long-eared bunny to life.
2.1 Recommended Yarn Types and Colors for Long Eared Bunnies
For a soft, cuddly bunny, medium-weight acrylic yarn is ideal. Choose pastel shades for a classic look or vibrant colors for a playful touch. Cream, white, and gray are popular, while textured yarns add uniqueness. Opt for yarns with good stitch definition to maintain the bunny’s shape and ensure its iconic long ears remain floppy and charming.
2.2 Essential Crochet Hooks and Notions
A 3.5mm or 4mm crochet hook is ideal for most long-eared bunny patterns. Use a tapestry needle for weaving ends and sewing parts together. Stuffing tools, scissors, and stitch markers are also essential. A yarn needle can help with assembly, while poly-pellet stuffing adds weight for a cuddly feel. These tools ensure your bunny is well-crafted and adorable, with perfectly shaped ears and limbs.
2.3 Stuffing Materials for a Soft and Cuddly Bunny
Polyester fiberfill is the most recommended stuffing material for a soft, cuddly bunny. Use a generous amount to ensure the body, ears, and limbs are well-padded. For added weight and stability, consider inserting poly-pellet stuffing in the bottom. A stuffing tool can help distribute the fiberfill evenly, ensuring a plush and professional finish. Proper stuffing gives your bunny its adorable, huggable shape and floppy ears.
Basic Crochet Skills Required
Mastering basic stitches like single crochet, slip knot, and chain is essential for creating a long-eared bunny. These skills form the foundation of the pattern.
3.1 Understanding Basic Stitches (Single Crochet, Slip Knot, Chain)
Mastering the single crochet, slip knot, and chain stitches is crucial for your long-eared bunny project. The single crochet creates the bunny’s texture, while the slip knot and chain set up your project. These foundational stitches ensure your bunny is both durable and adorable, making them essential skills to perfect before starting.
3.2 Tips for Sewing Parts Together Seamlessly
For a professional finish, use a yarn needle and matching yarn to sew parts together. Align edges carefully and pin before sewing to ensure proper placement. Sew the ears securely to the head, positioning them evenly for a balanced look. Leave a long tail for sewing and stuff the bunny firmly before closing seams for a cuddly finish.
Step-by-Step Crochet Instructions
Begin with basic stitches like single crochet and slip knot. Follow the pattern to create the head, body, ears, and tail. Instructions are clear and detailed, ensuring each part is shaped perfectly for assembly.
4.1 Crocheting the Bunny Head and Face Details
Start by creating a slip knot and chaining to form the head. Work in rounds to shape it into a sphere. Use single crochet stitches to build the structure. Add facial features like eyes and a nose using embroidery floss or yarn. Ensure the eyes are evenly spaced and the nose is centered. Use stuffing to maintain shape before sewing parts together seamlessly.
4.2 Creating the Body and Limbs
Begin the body by crocheting in rounds, starting with a magic ring and increasing stitches to form a sphere. Use single crochet stitches to shape the torso. For the limbs, crochet smaller pieces separately, stuff them lightly, and sew them to the body. Ensure the arms and legs are evenly sized and securely attached for a balanced look. Use stuffing to maintain shape and softness.
4.3 Making the Iconic Long Floppy Ears
Begin by creating a slip knot and chaining to the desired length for the ears. Work in single crochet rows, increasing stitches to achieve the iconic flop. Fasten off, leaving a long tail for sewing. Shape the ears by slightly bending them and secure them to the head, positioning them evenly for the perfect floppy effect. Adjust tension for optimal floppiness.
4.4 Adding the Tail and Final Assembly
Crochet a small round tail and lightly stuff it before sewing it to the back of the bunny. Use a yarn needle to securely attach the tail with even stitches. Once all parts are crocheted, assemble the bunny by sewing the ears, head, and limbs together. Ensure tight, even stitching for a professional finish, completing your adorable long-eared bunny project.
Customization Ideas for Your Bunny
Add personality with bows or accessories on the ears or head, and explore different yarn colors and textures for a unique, personalized long-eared bunny design.
5.1 Adding Bows or Accessories to the Ears or Head
Add a charming bow to your bunny’s ears or head for an instant touch of personality. Use different yarn colors and textures to create simple or intricate designs. Sew or crochet bows directly onto the ears or head for a secure fit. This small detail enhances the bunny’s charm, making it truly special and unique, perfect for gifts or photo props.
5.2 Using Different Yarn Textures for Unique Effects
Experiment with various yarn textures to create unique effects for your bunny. Velvet yarn adds softness, while chunky yarn gives a rustic look. Metallic or glitter yarns add sparkle, and cable yarns provide dimension. Mixing textures can enhance the bunny’s charm and make it stand out. Choose yarns that complement the pattern and your personal style for a one-of-a-kind creation.
Free PDF Pattern Availability and Download
Free PDF patterns for long-eared bunnies are widely available online, offering convenience and accessibility. Download ad-free versions from platforms like Etsy, Ravelry, or Pinterest for easy printing and use.
6.1 Where to Find Reliable Free PDF Patterns Online
Reliable free PDF patterns for long-eared bunnies can be found on platforms like Pinterest, Etsy, and Ravelry. These sites offer downloadable, printable designs with step-by-step instructions and photos, ensuring a seamless crochet experience. Many patterns are available as ad-free PDFs, perfect for easy access on mobile, tablet, or computer, making it convenient to start your project right away.
6.2 How to Print and Use the PDF Pattern Effectively
For optimal use, print the PDF pattern on standard paper and review all instructions before starting. Ensure all pages are scaled correctly to maintain measurements. Use a highlighter to mark key steps and gather materials as listed. Keep the pattern in a binder or digital device for easy reference while crocheting your long-eared bunny.
Tips for Achieving the Perfect Floppy Ears
Ensure proper tension while crocheting and use medium-weight yarn for optimal floppiness. Avoid overstuffing to maintain the desired shape and natural drape of the ears.
7.1 Adjusting Tension for the Ears
Achieve the perfect floppy ears by maintaining consistent tension. Loosen your stitches slightly when crocheting the ears to ensure they drape naturally. Tight tension can make ears stiff, while loose stitching enhances floppiness. Use a hook size that allows yarn to flow freely, and remember, slight variations in tension can significantly impact the final result. Adjust as needed for desired floppiness.
7.2 Shaping and Securing the Ears Properly
For long-eared bunnies, shaping and securing the ears is crucial. Sew the ears to the head about 4-6 rows from the back, using a yarn needle and matching yarn. Stuff the ears lightly with polyester fiberfill for shape. To enhance floppiness, avoid over-stuffing. Optionally, insert a thin wire along the ear’s edge for stability. Ensure stitches are secure to prevent the ears from sagging or detaching over time.
Video Tutorials for Visual Learners
YouTube offers excellent video tutorials for long-eared bunny crochet patterns, guiding you through ear shaping, stitching, and assembly. These visual guides help master key techniques effortlessly.
To address this query, I will first identify reputable YouTube channels known for their crochet tutorials, particularly those featuring long-eared bunny patterns. Channels like Moogly, The Crochet Crowd, and Fiber Flux are popular for their clear instructions and visual guides. I will highlight these channels, emphasizing their strengths such as step-by-step tutorials, beginner-friendly content, and specific techniques like amigurumi. Ensuring the response is concise and within the word limit is crucial.
8.1 Recommended YouTube Channels for Bunny Crochet Tutorials
Popular YouTube channels like Moogly, The Crochet Crowd, and Fiber Flux offer excellent tutorials for long-eared bunny patterns. These channels provide step-by-step guides, beginner-friendly instructions, and tips for achieving perfect floppy ears. They are great resources for visual learners to master amigurumi techniques and bring their bunny projects to life with ease.
8.2 Key Techniques to Focus On in Video Guides
Video guides emphasize mastering basic stitches like single crochet and slip knots. Pay attention to shaping and securing floppy ears properly. Learn how to sew parts seamlessly and adjust tension for the ears. Follow assembly instructions carefully to ensure a cuddly, well-structured bunny. These techniques will help you achieve a professional finish and bring your long-eared bunny to life perfectly.
Troubleshooting Common Mistakes
Address issues like uneven stitches or misshapen parts by checking tension and stitch count. For ears, ensure Proper shaping and sewing to achieve the desired floppiness.
9.1 Fixing Uneven Stitches or Misshapen Parts
Identify uneven stitches by checking tension and stitch count. Adjust hook size or yarn weight if necessary. For misshapen parts, frogging (ripping out stitches) may be needed. Block the piece to restore shape. Ensure seams are sewn securely to maintain structure. Regularly counting stitches and maintaining consistent tension helps prevent these issues. Use blocking to even out the fabric and achieve a professional finish.
9.2 Solving Issues with Ear Floppiness
Ensure ears maintain their signature floppiness by adjusting crochet tension during the ear-making process. If ears are too stiff, try using a slightly larger hook size. Stuff ears minimally to avoid rigidity. Sew ears securely to the head, positioning them evenly. Blocking the ears after crocheting can help restore shape and floppiness, ensuring your bunny retains its charming, floppy appearance.
Gifting Ideas for Your Finished Bunny
Your long-eared bunny makes a perfect Easter gift, baby shower present, or heartfelt keepsake. It’s also ideal as a photo prop for newborn memories, spreading joy instantly.
10.1 Perfect as Easter Gifts or Baby Shower Presents
Your long-eared bunny is a delightful Easter gift or baby shower present, offering a heartfelt keepsake for loved ones. Its soft, cuddly design makes it a charming addition to any nursery or Easter basket. Personalize it with a ribbon or note for a thoughtful touch, ensuring it brings joy and warmth to its recipient. A perfect way to celebrate new life and springtime.
10.2 Using the Bunny as a Photo Prop for Newborns
Your crochet bunny makes a heartwarming prop for newborn photoshoots, adding a touch of innocence and charm. Its soft, cuddly design ensures safety and comfort for the baby, while its long ears and sweet face capture timeless memories. Posing it with flowers or soft blankets creates a magical scene, preserving the joy of early parenthood in beautiful, shareable images.
Storing and Caring for Your Crochet Bunny
Store your bunny in a dry place to prevent moisture damage. Spot clean with a damp cloth and avoid machine washing. Regularly fluff the ears and body to maintain shape and softness.
11.1 Tips for Keeping the Bunny Clean and Fresh
To keep your crochet bunny clean and fresh, use a soft brush to remove lint or debris. Spot clean with a damp cloth and mild detergent, avoiding machine washing. For stuffed bunnies, air them out occasionally to prevent mustiness. Regularly fluff the ears and body to maintain shape and softness, ensuring your bunny stays cuddly and charming for years to come.
11.2 Storage Ideas to Maintain Shape
Store your crochet bunny in a cool, dry place to maintain its shape. Use a breathable container or cloth bag to prevent moisture buildup. For added protection, place a layer of tissue paper inside to cushion the bunny; Avoid direct sunlight to prevent color fading. Gently reshape the ears and body before storing to ensure they remain soft and defined. Proper storage will keep your bunny looking its best for years.
Crocheting a long-eared bunny is a delightful project, offering joy and versatility as a gift or keepsake, with free PDF patterns making it accessible to all skill levels.
12.1 Final Thoughts on the Long Eared Bunny Crochet Project
Crocheting a long-eared bunny is a rewarding experience, offering a perfect blend of creativity and practicality. These adorable bunnies, with their iconic floppy ears, make ideal gifts for various occasions or cherished home decorations. The availability of free PDF patterns ensures accessibility for crafters of all skill levels, making this project a delightful and achievable endeavor for everyone.
12.2 Encouragement to Share Your Finished Project
Sharing your finished long-eared bunny project is a great way to inspire others and connect with fellow crochet enthusiasts. Post your creations on social media platforms like Instagram or Facebook, using relevant hashtags to gain visibility. Seeing your handmade bunny bring joy to others can be incredibly fulfilling, and it encourages community support and creativity within the crochet world.