Welcome to the LiftMaster Wall Control Manual, your guide to installing, operating, and troubleshooting your garage door opener wall control. This manual provides detailed instructions and essential safety information to ensure optimal functionality and user safety. Discover features like Timer-to-Close and myQ compatibility for enhanced convenience.
1.1 Overview of the LiftMaster Wall Control
The LiftMaster Wall Control is a sleek and functional interface designed to operate your garage door opener. Featuring an intuitive design, it includes a push-button for door operation, an adjustable light timer, and a Timer-to-Close feature for added convenience. Equipped with motion detection, it provides hands-free lighting and enhances home security. Compatible with myQ technology, it allows remote monitoring and control via smartphone. The wall control is easy to install and integrates seamlessly with LiftMaster garage door openers, offering a reliable and user-friendly experience for homeowners.
1.2 Importance of Reading the Manual
Reading the LiftMaster Wall Control Manual is essential for safe and effective use of your garage door opener system. It provides critical safety precautions, installation guidelines, and troubleshooting tips to ensure proper functionality. The manual outlines features like the Timer-to-Close and motion detection, helping you maximize convenience and security. By following the instructions, you can avoid potential hazards and ensure compliance with manufacturer recommendations. This guide is your key to understanding and maintaining your wall control system efficiently.
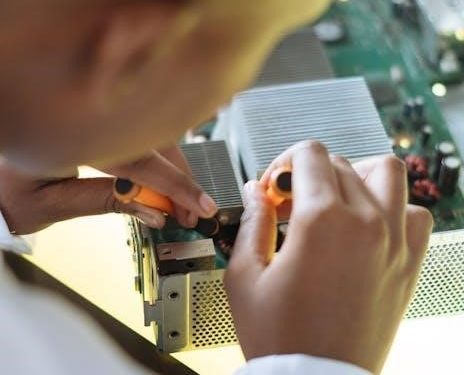
Installation Instructions
Secure the wall control to the wall, connect wires to the garage door opener, and plug in the opener. Ensure proper installation by checking the LED confirmation.
2.1 Securing the Wall Control to the Wall
To secure the LiftMaster wall control, locate a stud in the wall and mark the screw holes. Drill pilot holes if necessary, then screw the control firmly into place. Ensure it is level and at a height of at least 5 feet to prevent accidental activation by children. Tighten all screws securely to avoid any movement or loosening over time. Proper installation ensures safe and reliable operation of your garage door system.
2.2 Connecting Wires to the Garage Door Opener
Identify the wires from the wall control and match them to the garage door opener terminals. The white wire connects to the door control terminal, while the red/white wire connects to the opener’s control input. Gently strip the wire ends and secure them to the corresponding terminals. Ensure all connections are tight and correctly aligned. Refer to the opener’s terminal labels for proper wiring. After connecting, route the wires neatly and secure them to the wall or ceiling using staples to prevent damage or interference.
2.3 Plugging in the Garage Door Opener and Reconnecting the Battery
Plug the garage door opener into a nearby electrical outlet, ensuring the voltage matches the opener’s requirements. Reconnect the battery to restore remote functionality. After plugging in, the command LED on the wall control will blink, confirming proper installation. Test the wall control to ensure it operates the door correctly. Verify that all features, including lights and timers, function as expected. This step finalizes the electrical setup, enabling full operation of your garage door system with the wall control and remote accessories.

Synchronizing the Garage Door Opener and Wall Control
Synchronize your garage door opener with the wall control for seamless operation. Follow the manufacturer’s instructions to ensure proper pairing and functionality. Check the LED for confirmation.
3.1 Pressing the Push Bar for Synchronization
To synchronize, press the push bar on the wall control up to three times until the garage door opener activates. This ensures proper communication between devices. Ensure the LED blinks to confirm synchronization. Follow these steps carefully for a successful setup. Proper synchronization guarantees smooth operation of your garage door system. Refer to the manual for detailed instructions and troubleshooting tips if issues arise. Always verify synchronization by testing the door’s response after pressing the push bar.
3.2 Verifying Proper Installation Through LED Indication
After installation, check the LED on the wall control for confirmation. A blinking LED indicates successful synchronization with the garage door opener. If the LED does not blink, review the installation steps or consult the manual. Proper LED indication ensures the system is functioning correctly. For further assistance, refer to the troubleshooting section or contact manufacturer support. Always verify LED status to confirm a successful setup and ensure safe operation of your garage door system.
Operating the Wall Control
Operate your garage door seamlessly with the LiftMaster wall control. Use the Door Control Push Button to open or close the door. Adjust the light timer and Timer-to-Close feature for added convenience and safety.
4.1 Using the Door Control Push Button
The Door Control Push Button allows you to open or close your garage door with a simple press. Press once to initiate movement, and press again to stop or reverse the door mid-operation. This feature ensures quick and easy control over your garage door. Additionally, the push button integrates seamlessly with other features like the Timer-to-Close function, enhancing both convenience and safety. Always ensure the wall control is installed at a safe height to prevent accidental activation by children or pets.
The Door Control Push Button on your LiftMaster wall control offers straightforward operation. Press once to open or close the garage door. If you need to stop or reverse the door while it’s moving, press the button again. This feature ensures immediate control and adds a layer of safety by allowing you to intervene if something is obstructing the door. Proper installation at a height out of children’s reach is recommended to prevent accidental activation. Always refer to the manual for specific instructions on positioning and usage.
4.2 Adjusting the Light Timer and Timer-to-Close Feature
Adjusting the light timer and Timer-to-Close feature on your LiftMaster wall control is a convenient way to customize your garage door’s behavior. To adjust the light timer, press and hold the push button until the lights begin to flash, indicating the timer adjustment mode. Each press increases the timer duration. For the Timer-to-Close feature, press the button three times to enable it, and the door will automatically close after the set time. Ensure no obstructions are present when using the Timer-to-Close feature for safe operation. Refer to the manual for detailed steps and safety guidelines.
Safety Features and Precautions
Ensure safety by installing warning labels and placing the wall control at least 5 feet high to prevent accidental activation by children. Follow manual guidelines for proper installation and operation to avoid hazards.
5.1 Placement of Warning Labels
Proper placement of warning labels is crucial for safety. Install the entrapment warning label next to the wall control and the manual release/safety reverse test label on the inside of the garage door. These labels ensure visibility and remind users of potential hazards, such as moving door parts. Always follow the manual’s instructions for label placement to maintain compliance with safety standards and prevent accidents. Regularly check labels for wear and replace them if necessary to ensure clear visibility and understanding. This step is essential for maintaining a safe operating environment for your garage door system.
5.2 Ensuring Proper Height Installation
Ensure the wall control is installed at a minimum height of 5 feet (1.5 meters) to prevent accidental activation by small children. Position the control within clear sight of the garage door and away from moving parts. This installation height enhances safety and visibility, reducing the risk of accidents. Always follow the manufacturer’s guidelines for secure mounting using screws or brackets provided. Proper height installation is crucial for maintaining safety standards and ensuring the wall control operates effectively without interference or hazards. This step is essential for a safe and functional garage door system.

Troubleshooting Common Issues
Identify and resolve common issues like connectivity problems or LED indication malfunctions. Test the wall control for proper operation and consult the manual for detailed solutions.
6.1 Testing the Wall Control for Proper Operation
Ensure the wall control functions correctly by pressing the push button to open or close the garage door. Verify LED indicators blink during synchronization and remain steady when connected. If issues arise, check wire connections and battery status. Refer to the manual for diagnostic steps and solutions to restore functionality.
6.2 Resolving Connectivity Problems
If the wall control fails to connect, ensure wires are securely attached to both the control and garage door opener. Check for loose connections or damage. Restart the system by unplugging and reconnecting the garage door opener. Re-sync the devices by pressing the push bar up to three times until the opener activates. If issues persist, consult the manual for advanced troubleshooting or contact manufacturer support for further assistance.
Accessing Additional Resources
Downloadable manuals for various LiftMaster models are available online, offering detailed instructions and troubleshooting guides. Visit the official website for PDF downloads, model-specific resources, and customer support.
7.1 Downloadable Manuals for Different Models
LiftMaster offers downloadable manuals for various models, such as the 398LM, 882LMW, and 8500, ensuring easy access to instructions tailored to your specific device. These PDF manuals provide detailed installation steps, operational guidance, and troubleshooting tips. Visit the official LiftMaster website or authorized portals to find your model’s manual. Additionally, resources like the myQ Control Panel guide and troubleshooting FAQs are available for advanced features. Downloading the correct manual ensures you have the most accurate information for your garage door opener and wall control system.
7.2 Manufacturer Support and Online Guides
LiftMaster provides comprehensive manufacturer support through online guides, FAQs, and customer service. Their official website offers resources for troubleshooting, installation, and feature activation. For models like the 882LMW and 8500, online tutorials and video guides are available to assist with setup. Additionally, LiftMaster’s myQ app support allows users to monitor and control their garage door from smartphones. With 24/7 customer service and an extensive library of downloadable materials, LiftMaster ensures users have the support they need for optimal functionality and ease of use.

Maintenance and Best Practices
Regularly inspect and clean the wall control for optimal performance. Check wires for damage, replace batteries as needed, and ensure firmware is up to date.
8.1 Regular Checks for Optimal Functionality
Perform monthly inspections of the wall control and garage door opener system. Check for loose wires, clean dust from buttons, and ensure all lights are functioning properly. Test the door’s operation by opening and closing it to verify smooth movement. Inspect the LED indicators on the wall control to ensure they are blinking correctly during synchronization. Additionally, review the battery levels for wireless components and replace them as needed. Regular checks help prevent malfunctions and ensure reliable performance.
8.2 Cleaning and Upkeep Tips
Regularly clean the wall control panel with a soft cloth to remove dirt and fingerprints, ensuring buttons function smoothly. Inspect and tighten any loose screws or wires to prevent connectivity issues. Use a mild detergent if necessary, but avoid harsh chemicals that may damage the surface. Check the wires for signs of wear and secure them properly to the wall or ceiling. Ensure the control panel is installed at the recommended height to maintain functionality and safety. Regular upkeep helps extend the lifespan of your LiftMaster wall control and ensures reliable performance.