Welcome to the Safety 1st family! This manual provides essential guidance for using your Safety 1st car seat, ensuring your child’s safety and comfort. Follow the instructions carefully to install, adjust, and maintain the seat properly. Always refer to the official Safety 1st website for recalls and updates.
Welcome to the Safety 1st family! Safety 1st car seats are designed to provide superior protection, comfort, and convenience for your child. With a wide range of models, including the popular Ever Safe, OnBoard 35LT, and Grow and Go series, Safety 1st offers versatile solutions for infants, toddlers, and older children. These seats are engineered to meet rigorous safety standards, ensuring your child’s well-being on every journey. Whether you’re looking for a convertible, infant, or booster seat, Safety 1st delivers innovative features like adjustable harnesses, easy installation systems, and durable materials. The brand is trusted by parents worldwide for its commitment to safety, ease of use, and long-lasting quality. This manual will guide you through the proper use, installation, and maintenance of your Safety 1st car seat, helping you ensure your child’s safety and comfort from day one.
Key Features of Safety 1st Car Seats
Safety 1st car seats are renowned for their innovative design and advanced safety features. One of the standout features is their versatility, with models like the Grow and Go series offering 3-in-1 functionality, adapting from rear-facing to forward-facing and booster modes. These seats are designed to grow with your child, providing long-lasting protection and comfort. Many models include easy-to-use harness systems, adjustable headrests, and one-click LATCH connectors for secure installation. The Ever Safe and OnBoard 35LT models also boast lightweight yet durable construction, making them easy to transfer between vehicles. Additionally, Safety 1st car seats often feature side-impact protection and energy-absorbing materials to enhance safety in the event of a collision. The Summit ISO 30 model, for instance, includes a anti-rebound bar for added stability in rear-facing installations. These features, combined with their stylish designs and washable fabrics, make Safety 1st car seats a practical and reliable choice for parents.
Benefits of Using Safety 1st Car Seats
Using a Safety 1st car seat offers numerous benefits for parents and children alike. These seats are designed with safety and convenience in mind, providing peace of mind for parents while ensuring the child’s comfort. One key benefit is the extended use of the seat, as many models, like the Grow and Go series, grow with the child from infancy through early childhood. This eliminates the need for frequent replacements, saving time and money. Additionally, Safety 1st car seats are equipped with advanced safety features, such as side-impact protection and energy-absorbing materials, which significantly reduce the risk of injury in the event of a collision. The easy-to-use installation systems, including one-click LATCH connectors, make securing the seat a hassle-free process. Furthermore, the lightweight and durable construction of models like the OnBoard 35LT makes them easy to transfer between vehicles. These features, combined with comfortable padding and washable fabrics, ensure a safe and pleasant travel experience for children. Overall, Safety 1st car seats are a practical and reliable choice for families seeking superior protection and convenience.
Installation Guide for Safety 1st Car Seats
Installing a Safety 1st car seat requires careful attention to ensure your child’s safety. Begin by selecting a suitable location in your vehicle, preferably in the rear seat and away from active airbags. Before installation, read both your vehicle’s owner’s manual and the Safety 1st car seat instructions thoroughly. For rear-facing installations, place the seat snugly against the vehicle’s backrest and ensure it is level. Use the built-in recline adjustment feature if necessary. Secure the seat using either the vehicle’s seat belt or the LATCH system, tightening until there is no movement. For forward-facing installations, follow similar steps but ensure the seat is upright and the harness is properly positioned. Always check the seat’s level indicator to confirm correct positioning. After installation, test the seat by gently tugging it to ensure it is secure. Regularly inspect the installation and adjust as needed to accommodate your child’s growth. Refer to the specific model’s manual for detailed instructions, as procedures may vary slightly between models like the Ever Safe, OnBoard 35LT, or Summit ISO 30.
Rear-Facing Installation Instructions
For rear-facing installation, place the Safety 1st car seat in the back seat of your vehicle, ensuring it is snug and level. Begin by locating the vehicle’s seat belt or LATCH connectors. If using a seat belt, thread it through the rear-facing belt path, securing it tightly. Tighten the seat belt until the car seat is firmly in place with no more than 1 inch of movement. If using LATCH, attach the lower anchors to the car seat’s connectors, ensuring they click securely into place. Tighten the LATCH straps until the seat is snug against the vehicle’s seat. Next, adjust the recline angle to ensure the car seat is at the correct level, using the built-in recline adjustment feature if available. Check the level indicator on the seat to confirm proper positioning. Finally, test the installation by gently rocking the seat from side to side and front to back to ensure it is secure. Refer to your specific model’s manual, such as the OnBoard 35LT or Grow and Go All-in-One, for detailed instructions, as procedures may vary slightly. Always ensure compliance with Safety 1st’s safety guidelines and vehicle manufacturer recommendations.
Forward-Facing Installation Instructions
For forward-facing installation, ensure your child meets the minimum weight and height requirements, typically 22-65 lbs (10.1-29 kg) and 29-49 inches (73.6-125 cm), and is at least 1 year old. Move the car seat to the forward-facing position and secure it using either the vehicle’s seat belt or LATCH connectors. If using a seat belt, thread it through the forward-facing belt path and tighten until the seat is snug with no more than 1 inch of movement. For LATCH, attach the connectors to the vehicle’s anchors and tighten the straps until secure. Adjust the harness to fit your child snugly, ensuring the buckle is at armpit level. Check the car seat’s level indicator to confirm proper positioning. Test the installation by gently rocking the seat side to side and front to back to ensure it is firmly in place. Refer to your specific model’s manual, such as the OnBoard 35LT or Grow and Go All-in-One, for detailed instructions, as procedures may vary slightly. Always ensure compliance with Safety 1st’s safety guidelines and vehicle manufacturer recommendations.
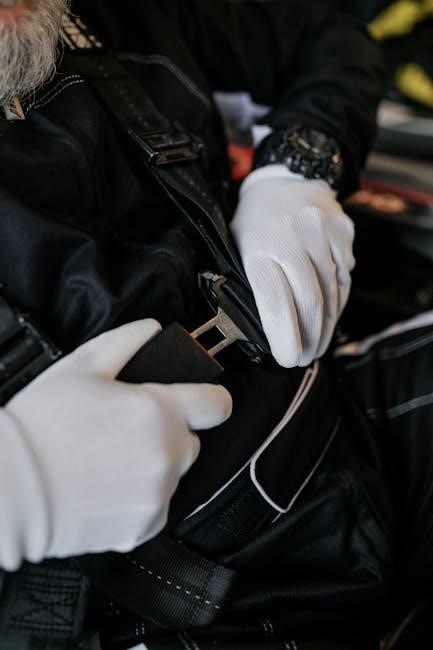
Securing Your Child in the Car Seat

Securing your child in the Safety 1st car seat is crucial for their safety. Always ensure the harness is properly fitted, with the straps snug against your child’s body. The chest clip should be positioned at armpit level, and the buckle should be securely fastened. Tighten the harness until it fits firmly, with no excess slack. For forward-facing seats, the top harness slots should be at or above your child’s shoulders, while rear-facing seats require the harness to be at or below shoulder level. Regularly check the fit as your child grows, adjusting the harness height and tightening the straps as needed. Ensure the car seat is installed correctly in your vehicle, following the manufacturer’s instructions for seat belt or LATCH installation. Always verify that the car seat is snug and level, with no more than 1 inch of movement side to side or front to back. Refer to your specific Safety 1st model’s manual for detailed guidance, such as the OnBoard 35LT or Grow and Go All-in-One, to ensure proper securing of your child.

Adjusting the Harness and Buckle

Adjusting the harness and buckle on your Safety 1st car seat is essential for ensuring your child’s safety and comfort. Begin by loosening the harness straps, typically located at the back or bottom of the seat, to allow for proper fit. For rear-facing seats, the harness should be at or below your child’s shoulders, while forward-facing seats require it to be at or above shoulder level. Tighten the harness until it fits snugly, with no excess slack, and ensure the chest clip is positioned at armpit level. The buckle should be securely fastened and lie flat against your child’s hips. Regularly check and adjust the harness as your child grows, ensuring it remains snug and properly aligned. Always refer to your specific Safety 1st model’s manual, such as the Grow and Go or OnBoard 35LT, for detailed instructions on adjusting the harness and buckle to meet your child’s needs and ensure optimal safety.

Ensuring Proper Fit for Your Child
Ensuring a proper fit for your child in their Safety 1st car seat is critical for their safety and comfort. Always check that your child’s weight, height, and age match the seat’s specifications. For rear-facing seats, the child’s head must be at least 1 inch below the top of the seat, while forward-facing seats require the harness to be at or above shoulder level. Regularly monitor your child’s growth and adjust the seat accordingly. Tighten the harness until it fits snugly, with no excess slack, and ensure the chest clip is at armpit level. For older children using a booster seat, the vehicle’s seat belt must cross the shoulder and hip correctly. Refer to your Safety 1st manual, such as the Grow and Go or OnBoard 35LT, for specific guidance tailored to your model. Proper fit ensures optimal protection and compliance with safety standards. Always verify the manufacture date on the seat meets the manual’s effective date for safety compliance.
Maintenance and Cleaning of the Car Seat

Regular maintenance and cleaning of your Safety 1st car seat are essential to ensure its longevity and effectiveness. Always follow the manufacturer’s instructions for cleaning and care. Start by removing any loose debris from the seat. For fabric covers, check the labels for washing instructions—most can be machine washed with mild detergent, but avoid bleach or harsh chemicals. Allow the covers to air dry completely before reattaching them to the seat. For tough stains, gently scrub with a soft-bristled brush and a mild soap solution. The harness and buckle can be cleaned with a damp cloth, ensuring no water seeps into the seat’s interior. Never submerge the seat or its components in water. Regularly inspect the seat for signs of wear, such as frayed straps or cracked plastic, and replace it immediately if damage is found. Store the seat in a cool, dry place when not in use. Refer to your Safety 1st manual, such as the Grow and Go or OnBoard 35LT, for specific cleaning guidelines. Proper maintenance ensures your child’s car seat remains safe and functional for years to come.
Troubleshooting Common Issues
If you encounter issues with your Safety 1st car seat, troubleshooting can help resolve them quickly. One common problem is difficulty with installation, often due to improper seatbelt routing or base alignment. Ensure the base is level and tightly secured, following the manual’s instructions. Another issue is harness adjustment—check that the straps are snug but not too tight, and the buckle is at the correct height. If the seat moves excessively, recheck the installation and consult the vehicle’s owner’s manual for compatibility. For older models, issues like worn-out labels or faded instructions can arise; visit the Safety 1st website for updated guides. If the car seat is part of a recall, address it promptly by contacting customer support. Always inspect the seat for damage or wear before use. If problems persist, refer to the troubleshooting section in your specific model’s manual or contact Safety 1st customer service for assistance. Regular checks ensure your child’s safety and the seat’s optimal performance.
Recall Information and Safety Alerts
It is crucial to stay informed about any recalls or safety alerts related to your Safety 1st car seat. Recently, certain models, such as the Safety 1st Grow and Go Sprint All-in-One car seats, were recalled due to potential choking hazards caused by the foam headrest. Affected models include CC321GYU, CC321GYUD, CC321GYY, CC321GYYD, CC321HAO, and CC321HAR. If your car seat is part of a recall, discontinue use and contact Safety 1st customer support for a free repair kit or replacement.
- Regularly check the Safety 1st website for updates or recalls specific to your model.
- Register your car seat with the manufacturer to receive direct notifications about safety alerts.
- Inspect your car seat for any damage or wear, especially the harness, buckle, and foam components.
Never ignore recall notices, as they are issued to protect your child’s safety. For more information, visit the National Highway Traffic Safety Administration (NHTSA) website or contact Safety 1st support directly. Your child’s safety depends on ensuring the car seat is free from defects and properly maintained.
Compliance with Safety Regulations
Safety 1st car seats are designed to meet or exceed federal safety regulations, ensuring your child’s protection in the event of a crash. All Safety 1st car seats comply with Federal Motor Vehicle Safety Standard (FMVSS) 213, which governs the performance of child restraint systems. Additionally, they meet NHTSA (National Highway Traffic Safety Administration) standards for crash testing, structural integrity, and labeling requirements.
- Federal Compliance: Safety 1st car seats are rigorously tested to meet FMVSS 213, ensuring they can withstand the forces of a collision.
- NHTSA Standards: Seats are evaluated for proper restraint, crashworthiness, and ease of use, aligning with NHTSA guidelines.
- Labeling: Clear labels and instructions are provided to help parents install and use the seat correctly.
While Safety 1st car seats are compliant with safety regulations, proper installation and use are essential to ensure your child’s safety. Always follow the manual’s instructions and check for recalls or updates. For more information, visit the NHTSA website.