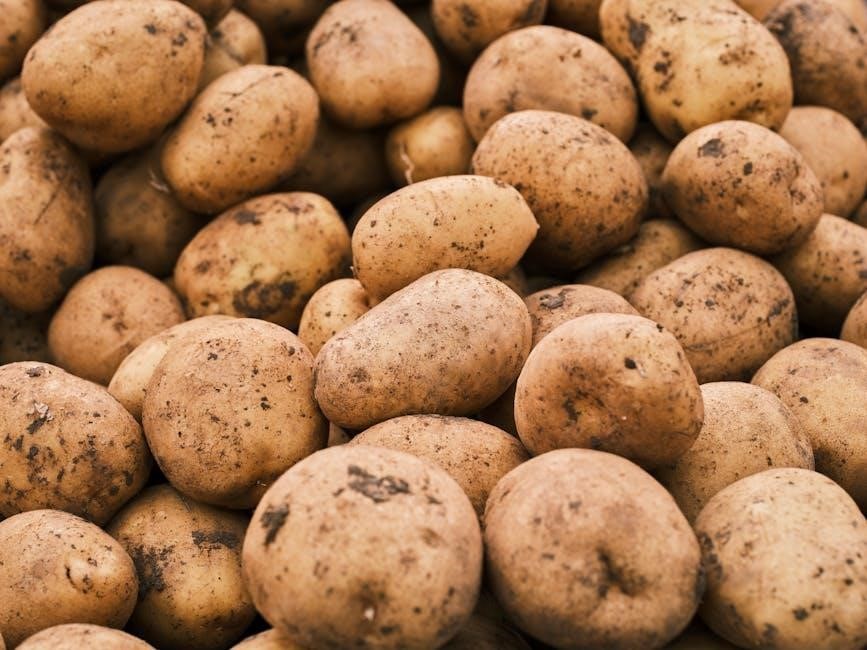
saalt cup instructions

The Saalt Cup is a flexible‚ reusable menstrual solution offering comfort and convenience. Made from medical-grade silicone‚ it provides an eco-friendly and cost-effective alternative to traditional products.

1.1 What is a Saalt Cup?

The Saalt Cup is a reusable‚ bell-shaped menstrual solution made from medical-grade silicone‚ designed to collect menstrual blood. It offers a comfortable and eco-friendly alternative to pads and tampons. The cup is inserted into the vagina‚ where it creates a light seal to prevent leaks. Its flexible design allows for easy insertion and removal‚ making it a practical choice for individuals seeking a sustainable and discreet menstrual product.

1.2 Benefits of Using a Saalt Cup

The Saalt Cup offers numerous benefits‚ including up to 12 hours of leak-free protection‚ comfort‚ and ease of use. It is reusable‚ eco-friendly‚ and cost-effective‚ making it a sustainable alternative to disposable products. The cup is made from medical-grade silicone‚ ensuring safety and durability. It allows for hassle-free movement and can be worn overnight‚ providing peace of mind and freedom from frequent changes. This makes it an ideal choice for individuals seeking a reliable and discreet menstrual solution.

Choosing the Right Size and Fit

Size selection depends on menstrual flow and comfort. Proper fit ensures comfort and effectiveness. Choosing the right size is key for a seamless experience.

2.1 How to Determine Your Size

To determine your size‚ consider your menstrual flow‚ cervix height‚ and comfort preferences. Saalt offers two sizes: smaller for lighter flow and larger for heavier flow. If unsure‚ start with the smaller size for comfort and ease of use. Assessing your needs ensures the best fit for a comfortable experience.

2.2 Ensuring Proper Fit

Proper fit is crucial for comfort and functionality. Ensure the cup is fully opened inside to create a light seal. Check the air holes are clear to maintain suction. Experiment with folds and angles during insertion to find what works best for your body. Rotate the cup slightly once inserted to ensure proper positioning and comfort. Adjust as needed for a secure‚ leak-free experience.

Preparation and Sterilization

Rinse the cup with water for easier insertion. Before first use‚ sterilize by boiling in water for 5-7 minutes. Use silicone-safe soap for daily cleaning.

3.1 Sterilizing Your Saalt Cup

Before first use‚ sterilize your Saalt Cup by boiling it in water for 5-7 minutes. Ensure the cup is fully submerged and use a clean pot. After boiling‚ rinse with clean water before insertion. Repeat sterilization after each menstrual cycle for optimal hygiene. This process ensures the cup remains safe and ready for reuse. Always follow proper sterilization steps to maintain cleanliness and prevent any potential risks.

3.2 Preparing for First Use

Before first use‚ wash your hands thoroughly. Rinse the Saalt Cup with clean water for easier insertion. Use a mild‚ silicone-safe soap to clean the cup. Ensure all air holes are open to maintain proper suction. Gently fold the cup for comfortable insertion. Proper preparation ensures a smooth and hygienic experience. Follow these steps to get ready for using your Saalt Cup effectively.

Insertion Techniques

Insertion involves folding the cup and guiding it toward the back‚ not straight up‚ ensuring it opens inside for a secure seal and leak-free experience.

4.1 How to Fold the Cup

To fold the Saalt Cup‚ press the sides together to form a “C” shape or a punch-down fold‚ ensuring easy insertion. This helps the cup open properly inside‚ creating a secure seal. Always fold with clean hands to maintain hygiene. Proper folding is essential for comfortable placement and effective leak prevention during use.

4.2 Correct Insertion Method

To insert the Saalt Cup‚ rinse it with water for easier gliding. With clean hands‚ fold the cup and gently guide it into the vagina at a slight angle‚ toward the back. Once inserted‚ the cup should open naturally‚ creating a light seal. You may need to rotate it slightly for proper positioning. Ensure the stem is inside and not protruding excessively for comfort and effectiveness.

4.3 Ensuring Proper Positioning

After insertion‚ gently rotate the cup to ensure it opens fully and forms a proper seal. The cup should sit low in the vaginal canal‚ with the stem trimmed to comfort. Check that the air holes at the top are open to ensure proper suction. If needed‚ adjust the position by squatting or sitting to help the cup settle correctly. Proper positioning prevents leaks and discomfort.

The Removal Process

To remove the Saalt Cup‚ relax‚ pinch the base to break the seal‚ and gently pull down; Empty and clean before reinserting.

5.1 Steps to Remove the Cup

To remove the Saalt Cup‚ relax your body and sit comfortably. Locate the base of the cup by feeling for the stem or loop. Gently pinch the base to release the suction seal. Slowly pull the cup downward without twisting; Once removed‚ empty the contents into the toilet. Rinse the cup with water before cleaning and reinserting. Ensure proper hygiene throughout the process.

5.2 Using the Stem or Loop

The stem or loop on the Saalt Cup aids in easy removal. When ready to remove‚ gently grasp the loop or stem with your fingers. This helps guide the cup out smoothly. Avoid pulling the loop forcefully‚ as it may cause discomfort. Instead‚ use a gentle rocking motion to ease the cup out‚ ensuring a comfortable and secure removal process. Proper technique is essential for a hassle-free experience.

Cleaning and Maintenance

Regularly wash the Saalt Cup with a mild‚ silicone-safe soap and rinse thoroughly. Avoid harsh chemicals to maintain its quality and ensure proper hygiene.

6.1 Cleaning the Cup

To clean the Saalt Cup‚ rinse it with clean water and mild‚ silicone-safe soap. Avoid harsh chemicals or abrasive materials that could damage the surface. After washing‚ rinse thoroughly to ensure no residue remains. For sterilization‚ boil the cup in water for 5-7 minutes before and after your menstrual cycle. This process ensures hygiene and maintains the cup’s quality for safe and effective use.

6.2 Maintenance Tips

Regular maintenance ensures your Saalt Cup remains hygienic and durable. After cleaning‚ dry the cup thoroughly with a clean towel. Store it in a breathable container‚ avoiding airtight spaces. Never use harsh chemicals or scented soaps‚ as they can damage the silicone. For travel‚ keep it in a protective pouch to maintain cleanliness. Proper care extends the life of your Saalt Cup.

Troubleshooting Common Issues

Address leaks by ensuring proper sealing and checking air holes. Discomfort may require adjusting size or insertion technique. Cleanliness and correct positioning are key to resolving issues.

7.1 Addressing Leaks

Leaks often occur due to improper sealing or clogged air holes. Ensure the cup is fully unfolded and the rim is snug against the vaginal walls. Clean the air holes regularly to maintain proper suction. Adjusting the fold or trying a different insertion method can also help prevent leaks. Proper positioning is essential for a leak-free experience.

7.2 Alleviating Discomfort

Discomfort can often be resolved by ensuring the cup is properly positioned and sized. Relaxing during insertion and using water to aid glide can reduce irritation. Trimming the stem to a comfortable length and ensuring the cup isn’t inserted too high or too low also helps. Proper cleaning and maintenance of the cup‚ including cleaning air holes‚ can improve comfort and prevent issues.

Care and Storage

Sterilize by boiling 5-7 minutes‚ clean with silicone-safe soap‚ ensure air holes are clear‚ and store properly in a clean‚ dry place.

8.1 Storing the Cup

Store your Saalt Cup in a clean‚ dry place‚ away from direct sunlight. Use a breathable container‚ like a cotton pouch‚ to maintain hygiene. Ensure the cup is fully dry before storage to prevent moisture buildup. Avoid airtight containers to promote airflow. Always sterilize the cup before reuse‚ following proper cleaning and boiling instructions. Proper storage ensures longevity and maintains the cup’s quality for safe and effective use.

8.2 Travel Care Tips

When traveling‚ store your Saalt Cup in a small‚ leak-proof container to keep it clean and discreet. Use a silicone-safe wash for cleaning‚ even without access to clean water. For sterilization‚ boil the cup when possible or use a microwave-safe sterilization bag. Carry wipes for quick cleaning and rinse thoroughly once water is available. Always ensure the cup is dry before storing to maintain hygiene and longevity while on the go.

When to Seek Professional Advice

Consult a healthcare provider if you experience persistent discomfort‚ leaks‚ or difficulty with insertion or removal. Seek advice if you have medical conditions or concerns.

9.1 Consulting a Healthcare Provider

If you experience persistent discomfort‚ leaks‚ or difficulty with insertion or removal‚ consult a healthcare provider. They can address concerns and provide personalized advice. If you have medical conditions or allergies‚ seek professional guidance to ensure safe use. Additionally‚ if you notice unusual symptoms‚ like severe pain or irritation‚ professional consultation is recommended to prevent complications. Always prioritize your health and safety.

9.2 Signs for Professional Consultation

If you experience severe pain‚ unusual odor‚ or prolonged discomfort while using the Saalt Cup‚ seek medical advice. Signs like irritation‚ persistent leaks‚ or difficulty removing the cup may indicate improper placement or other issues. If you notice unusual symptoms‚ such as heavy bleeding or infections‚ consult a healthcare provider promptly. Always prioritize your health and safety when using menstrual products.

crazy stir popcorn popper instructions

The Crazy Stir Popcorn Popper is a popular, easy-to-use kitchen gadget designed for effortless popcorn making. Its durable design and compact size make it perfect for home use, offering a fun and healthy way to enjoy popcorn with minimal oil. Ideal for family movie nights, parties, or quick snacks, this popper ensures evenly cooked kernels with its unique stirring mechanism, delivering delicious results every time.

Overview of the Popcorn Popper

The Crazy Stir Popcorn Popper, a 6-quart electric model by West Bend, is a versatile and efficient kitchen appliance designed for homemade popcorn. It features an automatic stirring mechanism that ensures even cooking and minimal kernel waste. With its compact design and durable construction, it is ideal for home use, providing a quick and healthy way to enjoy popcorn. The popper operates with minimal oil, making it a popular choice for families and movie enthusiasts alike. Its ease of use and consistent results have made it a favorite among popcorn lovers.

Key Features of the Crazy Stir Popcorn Popper

The Crazy Stir Popcorn Popper features a 6-quart capacity, automatic stirring mechanism, and minimal oil usage, ensuring evenly cooked popcorn with less mess and easy cleanup.

Design and Build Quality

The Crazy Stir Popcorn Popper boasts a durable and compact design, featuring a sturdy base and high-quality materials for long-lasting performance. Its non-stick popping surface ensures easy cleaning and prevents kernels from sticking, while the transparent lid allows users to monitor the popping process. The ergonomic handle provides a comfortable grip, making it easy to pour freshly made popcorn. Built with safety in mind, the popper includes cool-touch handles and secure latches, ensuring a stable and safe cooking experience. Its classic design blends seamlessly into any kitchen decor.

Capacity and Performance

The Crazy Stir Popcorn Popper offers an impressive 6-quart capacity, making it ideal for large families or gatherings. Its electric design ensures quick and efficient popping, with most batches ready in under 5 minutes. The automatic stirring mechanism guarantees even cooking, minimizing unpopped kernels. Designed for optimal performance, it distributes heat evenly and uses minimal oil, resulting in light and healthy popcorn. This popper is a reliable choice for consistent results, perfect for movie nights or everyday snacking.

Safety Guidelines for Using the Crazy Stir Popcorn Popper

Always supervise the popper during operation and unplug it when not in use. Avoid contact with moving parts and keep children away to ensure safe usage.

Precautions Before First Use

Before using the Crazy Stir Popcorn Popper, read the manual thoroughly. Wash your hands and ensure all parts are dry. Plug the device into a grounded outlet and avoid modifying it. Never insert metal utensils or hands into the popper while in operation. Keep children away and ensure the area is clear. Avoid overheating by adding corn and oil as instructed. Follow all safety guidelines to ensure safe and efficient popcorn making. Proper preparation ensures a better experience and longevity of the appliance.

Important Safety Tips During Operation

Always monitor the Crazy Stir Popcorn Popper while it’s in use. Never leave it unattended to prevent overheating. Avoid touching hot surfaces, as they can cause burns. Ensure the stirring rod moves freely to prevent kernel buildup. Keep children away from the popper and cords. Do not add water or other liquids, as this can damage the unit. Unplug the device after use and allow it to cool before cleaning. Following these tips ensures safe and efficient popcorn making every time.

Setting Up Your Crazy Stir Popcorn Popper

Unbox and wash all parts with mild soap. Dry thoroughly before first use. Place the popper on a heat-resistant surface, ensuring the cord is secure and accessible.

Unboxing and Initial Setup

When you unbox the Crazy Stir Popcorn Popper, you’ll find the main unit, a popping chamber, a stirring rod, and a lid. Ensure all components are included and undamaged. Before first use, wash the popping chamber, lid, and stirring rod with mild soap and warm water. Rinse thoroughly and dry with a clean towel. This step ensures cleanliness and prepares the popper for its first operation.

Preparing for First Use

Before using your Crazy Stir Popcorn Popper for the first time, ensure all parts are clean and dry. Place the popper on a heat-resistant surface and plug it in. Read the manual thoroughly to understand the machine’s settings and operation. Familiarize yourself with the stirring mechanism and ensure it moves freely. This preparation ensures smooth and safe operation for your first batch of freshly popped popcorn.

Operating Instructions for the Crazy Stir Popcorn Popper

Add oil, kernels, and set the machine. Ensure the stirring rod moves freely. Place on a heat-resistant surface. Follow guidelines for best results.

Step-by-Step Guide to Making Popcorn

Preheat the Crazy Stir Popcorn Popper by plugging it in and letting it warm up for 2-3 minutes.
Add 1-2 tablespoons of oil to the base, spreading it evenly.
Pour in 1/3 to 1/2 cup of popcorn kernels, depending on desired quantity.
Place the lid securely and ensure the stirring rod is in place for even cooking.
Turn on the popper and let it work its magic. The stirring mechanism ensures all kernels pop evenly.
Once popping slows, unplug the device and sprinkle with salt or seasonings.
Serve immediately and enjoy your freshly made popcorn!

Understanding the Stirring Mechanism

The Crazy Stir Popcorn Popper features a built-in stirring rod that rotates continuously during operation. This mechanism ensures kernels are evenly coated with oil and heat, promoting consistent popping. The rod prevents kernels from burning by keeping them in motion and allowing popped corn to escape. Its design maximizes popping efficiency, reducing unpopped kernels and ensuring a light, fluffy texture. The stirring mechanism is a key feature that sets this popper apart, making it both efficient and easy to use for perfect popcorn every time.

Maintenance and Cleaning of the Popcorn Popper

Regular cleaning is essential for optimal performance. Allow the popper to cool, then wash the lid and butter melter in warm, soapy water. Avoid abrasive cleaners.

How to Clean the Popper After Use

Cleaning the Crazy Stir Popcorn Popper is straightforward. Allow it to cool completely before wiping the exterior with a damp cloth. Remove the lid and butter melter, washing them in warm, soapy water with a soft sponge. Rinse thoroughly and dry to prevent water spots. For stubborn residue, soak parts in warm water before cleaning. Avoid using abrasive cleaners or scouring pads, as they may damage the finish. Regular cleaning ensures optimal performance and longevity of your popper.

Tips for Longevity and Performance

To maintain your Crazy Stir Popcorn Popper, clean it thoroughly after each use and avoid using abrasive cleaners. Store it in a dry place to prevent rust. Regularly check and replace worn-out parts, such as the stirring rod or non-stick coating, to ensure even popping. Always use the recommended amount of oil and kernels to prevent overheating. Follow the user manual instructions for optimal performance and extend the lifespan of your popper. Proper care ensures consistent results and keeps your device in great condition.

Troubleshooting Common Issues

If popcorn pops too slowly, ensure the stirring rod spins freely. Clean the popper regularly to prevent kernel buildup and maintain even heating for optimal performance;

Resolving Popping Efficiency Problems

To address popping efficiency issues, ensure the stirring rod moves freely and the popper is clean. Avoid overloading with kernels, as this can reduce airflow and slow popping. Regularly clean the popping chamber to prevent kernel residue buildup, which can hinder performance. Use the recommended amount of oil and kernels, and preheat the popper before adding ingredients. If popping becomes uneven, check for blockages or worn parts. Proper maintenance ensures consistent, efficient popping results every time.

Addressing Heating and Stirring Concerns

If the Stir Crazy Popcorn Popper overheats or the stirring mechanism falters, inspect the unit for blockages. Ensure the lid is secure to maintain heat distribution. Avoid adding too many kernels, as this can obstruct airflow and strain the motor. Keep the stirring rod clean and free from residue. If the popper overheats, unplug it and let it cool before resuming use. Regular cleaning and proper usage as per instructions help maintain optimal heating and stirring performance for consistent popping results.

Creative Recipes Using the Crazy Stir Popcorn Popper

From spicy cheese to caramel corn, explore endless flavor possibilities with the Crazy Stir Popcorn Popper. Experiment with unique seasonings and creative recipes for a delicious twist on classic popcorn.

Unique Flavor Ideas and Seasonings

Explore savory, sweet, and spicy flavors with the Crazy Stir Popcorn Popper. Try truffle parmesan, dill pickle, or honey chipotle for a bold twist. For dessert, drizzle with melted chocolate or caramel and sprinkle with sea salt. Add a zesty kick with lime zest and chili powder or go exotic with Korean BBQ seasoning. Mix in crushed nuts, seeds, or dried fruit for added texture. These creative flavor ideas let you customize every batch to your taste, making snack time endlessly exciting and delicious.

Specialty Popcorn Recipes for Different Occasions

Elevate your gatherings with specialty popcorn recipes tailored to any event. For holidays, try cinnamon-sugar popcorn with dried cranberries and white chocolate. Movie nights call for spicy nacho cheese or smoky BBQ flavors. Kids love colorful rainbow popcorn with melted candy pieces. Romantic evenings can feature buttery parmesan with a hint of garlic. Create a tropical twist with coconut-lime popcorn for summer parties. These recipes make the Crazy Stir Popcorn Popper a versatile and exciting addition to every celebration, offering something for everyone.

The Crazy Stir Popcorn Popper is a must-have for popcorn enthusiasts, offering effortless, delicious results with minimal effort. Its durability and ease of use make it a standout choice for any occasion, ensuring countless enjoyable moments with perfectly popped popcorn every time.

Final Thoughts and Recommendations

The Crazy Stir Popcorn Popper is a fantastic addition to any kitchen, offering a fun and efficient way to make delicious popcorn. Its durable design and easy-to-use interface make it perfect for families and movie nights. The ability to use minimal oil ensures a healthier snack option without sacrificing flavor. For the best results, follow the instructions carefully and experiment with creative seasonings. Cleaning is straightforward, and proper maintenance will extend its lifespan. Highly recommended for anyone looking to elevate their popcorn game!

nurture right 360 incubator instructions

The Nurture Right 360 Incubator is a user-friendly, high-performance device designed for optimal egg incubation and hatching. It features automatic egg turning, precise temperature control, and a clear viewing window for monitoring development, making it ideal for both beginners and experienced breeders.

1.1 Overview of the Nurture Right 360 Incubator

The Nurture Right 360 Incubator, designed by Manna Pro Harris Farms, is an advanced, user-friendly incubation system. It features automatic egg turning, precise temperature, and humidity control, ensuring optimal conditions for egg development. With its clear viewing window and robust design, it supports high hatch rates and is suitable for both novices and experienced breeders. The incubator is easy to set up and operate, making it a reliable choice for achieving successful incubation and hatching results in a controlled environment.

1.2 Importance of Proper Setup and Maintenance

Proper setup and maintenance of the Nurture Right 360 Incubator are crucial for ensuring optimal performance and high hatch rates. Incorrect assembly or neglecting regular checks can lead to temperature and humidity fluctuations, affecting egg development. Always follow the manufacturer’s instructions for unboxing, placing the incubator in a stable environment, and connecting the power supply. Regular cleaning and sanitizing are essential to prevent bacterial growth and maintain a healthy incubation environment. Proper maintenance ensures reliable operation and consistent results.

Unboxing and Initial Setup

Unboxing the Nurture Right 360 Incubator requires careful handling to identify all components. Place the incubator in a stable, draft-free environment and connect the power supply securely.

2.1 Unboxing and Identifying Components

When unboxing the Nurture Right 360 Incubator, carefully inspect the contents to ensure all components are included. The package typically contains the incubator base, top section, water pots, air vent, egg trays, and power supply unit. Familiarize yourself with each part to ensure proper assembly. Refer to the manual for a detailed diagram of components and their functions. Proper identification of parts is essential for a smooth setup process and optimal performance of the incubator.

2.2 Placing the Incubator in a Suitable Environment

Place the Nurture Right 360 Incubator in a room with a stable temperature between 74-80°F. Avoid direct sunlight and drafts to maintain consistent conditions. Ensure the incubator is on a flat, stable surface to prevent tilting, which can disrupt egg development. This setup ensures optimal incubation conditions and maximizes hatch rates. Proper environmental placement is crucial for the incubator’s performance and the success of your hatching process.

2.3 Connecting the Power Supply

Connect the power supply unit to the incubator’s top and ensure it is securely attached. Place the incubator top onto the base, making sure the clear viewing window is completely closed. Plug the power cord into a nearby electrical outlet, ensuring the voltage matches the incubator’s requirements. Allow the incubator to run for 24 hours before adding eggs to ensure proper functioning. This step ensures a stable power connection and prepares the unit for optimal performance during incubation. Always follow safety guidelines when handling electrical components.

Pre-Incubation Checks

Ensure the incubator is in a stable environment with consistent temperature and humidity. Verify all components are functioning correctly and run the incubator for 24 hours before use.

3.1 Ensuring Proper Temperature and Humidity Levels

Proper temperature and humidity levels are critical for successful incubation. Set the incubator to maintain a temperature of 99-100°F and humidity at 45-50%. Fill water pot A and partially open the grey air vent. Allow the incubator to run for 24 hours before adding eggs to ensure stability. Monitor these levels daily, as fluctuations can affect hatch rates. The Nurture Right 360’s automatic controls simplify maintenance, but manual adjustments may be needed to sustain optimal conditions throughout the incubation process.

3.2 Testing the Incubator Before Use

Before adding eggs, test the incubator to ensure all systems function correctly. Fill water pot A, open the grey air vent halfway, and plug in the power supply. Allow the incubator to run for 24 hours to stabilize temperature and humidity levels. Check that the digital display shows consistent readings and the automatic egg turner operates smoothly. Verify that all components, including the heating element and fan, are working properly. This test ensures optimal conditions for incubation and minimizes risks during the hatching process.

Operating the Nurture Right 360 Incubator

The Nurture Right 360 Incubator offers seamless operation with automatic egg turning and precise humidity control, ensuring optimal conditions for egg development and successful hatching.

4.1 Setting Up for the First Stage of Incubation

Begin by filling water pot A and opening the grey air vent halfway to maintain proper humidity. Set the incubator to the recommended temperature of 99-100°F and allow it to stabilize for 24 hours. Place the eggs gently on the tray, ensuring they are clean and dry. Close the clear viewing window securely and monitor the temperature and humidity levels closely during the first few days to ensure optimal conditions for embryo development.

4.2 Managing Heat and Humidity During Incubation

During incubation, maintain a consistent temperature of 99-100°F and humidity levels between 50-60%. Adjust the grey air vent as needed to regulate humidity, ensuring optimal conditions for embryo growth. Use a hygrometer to monitor humidity accurately. Avoid sudden temperature fluctuations, as they can harm developing embryos. Regularly check water levels in the reservoir and refill as necessary to maintain stable humidity throughout the incubation period.

4.3 Monitoring Egg Development

Regularly monitor egg development by candling every 7-10 days to observe growth. Use the incubator’s clear window to check for visible veining and embryo movement without opening the unit. Ensure eggs are turning automatically and maintain proper alignment. Avoid over-handling eggs, as this can disrupt development. Track progress to identify any issues early, but refrain from frequent checks to prevent disturbing the incubation environment. Proper monitoring ensures a healthy and successful hatching process.

Hatching Phase Guidelines

The hatching phase requires maintaining stable temperature and humidity levels, typically between 99-100°F and 70-80% humidity, to ensure proper development and successful emergence of the chicks.

5.1 Preparing for Hatching

Preparing for hatching involves stopping egg turning and ensuring the incubator is ready for the final stage. Fill water pot A and open the grey air vent halfway to maintain humidity. Allow the incubator to run dry for 24 hours before adding water to ensure proper conditions. Monitor temperature and humidity closely, keeping them stable between 99-100°F and 70-80% humidity. Avoid disturbances and ensure the incubator is in a quiet, stable environment to support successful hatching.

5.2 Maintaining Stable Conditions During Hatching

Maintaining stable conditions during hatching is critical for successful results. Ensure the incubator remains at a consistent temperature of 99-100°F and humidity levels of 70-80%. Avoid opening the incubator during this phase to prevent disrupting the delicate process. Keep the room environment quiet and stable, minimizing disturbances. Proper airflow and consistent power supply are also essential. Monitor the incubator closely but avoid interference, allowing nature to take its course for optimal hatching success.

Post-Hatching Care and Maintenance

After hatching, carefully remove chicks and transition them to a brooder. Clean and sanitize the incubator thoroughly, ensuring all components are dry before storage for future use.

6.1 Cleaning and Sanitizing the Incubator

After removing chicks and eggs, unplug the incubator and disassemble all components. Use mild detergent and warm water to clean surfaces, ensuring no residue remains. Rinse thoroughly and dry with a clean towel to prevent microbial growth. Sanitize using a pet-safe disinfectant, paying attention to cracks and crevices. For tough stains, a mixture of water and white vinegar can be effective. Regular cleaning ensures optimal performance and prevents bacteria or odors from affecting future hatching success.

Okay, so I need to help the user generate the text for the subheading ‘

6.2 Storing the Incubator After Use

‘ under the topic ‘nurture right 360 incubator instructions’. The user has provided specific instructions, so I need to make sure I follow them carefully.

Looking at the previous responses, the user seems to value clear, concise instructions. They also provided some example text from the internet, which I can use for reference. I notice that in the previous storage section, points like drying the incubator, disconnecting the power, using original packaging, storing in a cool place, and avoiding extreme conditions were mentioned. I should make sure to include similar points but in a new way to avoid repetition.

I should start by mentioning drying the incubator to prevent moisture buildup. Then, disconnect the power supply and secure all parts. Using the original packaging is a good idea for protection. I should also include storing it upright to protect components and keeping it away from pests and direct sunlight. Including a note about consulting the manual for long-term storage could be helpful.

Drafting: After cleaning, ensure the incubator is completely dry. Disconnect the power supply and store in original packaging. Place in a cool, dry area away from direct sunlight and pests. Store upright to protect internal components. For long-term storage, refer to the manual for specific instructions to maintain functionality and ensure readiness for future use.
Let me count the words: After (1) cleaning, (2) ensure (3) the (4) incubator (5) is (6) completely (7) dry. (8) Disconnect (9) the (10) power (11) supply (12) and (13) store (14) in (15) original (16) packaging. (17) Place (18) in (19) a (20) cool, (21) dry (22) area (23) away (24) from (25) direct (26) sunlight (27) and (28) pests. (29) Store (30) upright (31) to (32) protect (33) internal (34) components. (35) For (36) long-term (37) storage, (38) refer (39) to (40) the (41) manual (42) for (43) specific (44) instructions (45) to (46) maintain (47) functionality (48) and (49) ensure (50) readiness (51) for (52) future (53) use. (54)

Wait, that’s only . I need to reach 78. Maybe I can expand some parts. Let me think of additional details. Maybe mention cleaning before storage, using a soft cloth, ensuring all parts are secure, and perhaps checking for any damage before storing.

Revised draft: After cleaning and sanitizing, ensure the incubator is completely dry. Use a soft, dry cloth to wipe down all surfaces. Disconnect the power supply and secure all components in their original packaging. Store the incubator in a cool, dry place away from direct sunlight and pests. Position it upright to protect internal mechanisms and prevent damage. For long-term storage, refer to the manual for specific instructions to maintain functionality and ensure readiness for future use.

Now, let me count: After (1) cleaning (2) and (3) sanitizing, (4) ensure (5) the (6) incubator (7) is (8) completely (9) dry. (10) Use (11) a (12) soft, (13) dry (14) cloth (15) to (16) wipe (17) down (18) all (19) surfaces. (20) Disconnect (21) the (22) power (23) supply (24) and (25) secure (26) all (27) components (28) in (29) their (30) original (31) packaging. (32) Store (33) the (34) incubator (35) in (36) a (37) cool, (38) dry (39) place (40) away (41) from (42) direct (43) sunlight (44) and (45) pests. (46) Position (47) it (48) upright (49) to (50) protect (51) internal (52) mechanisms (53) and (54) prevent (55) damage. (56) For (57) long-term (58) storage, (59) refer (60) to (61) the (62) manual (63) for (64) specific (65) instructions (66) to (67) maintain (68) functionality (69) and (70) ensure (71) readiness (72) for (73) future (74) use. (75)

Still at . Maybe add a bit more about checking for damage or ensuring all accessories are included. Let me adjust:

After cleaning and sanitizing, ensure the incubator is completely dry. Use a soft, dry cloth to wipe down all surfaces. Disconnect the power supply and secure all components in their original packaging. Check for any damage and ensure all accessories are included. Store the incubator in a cool, dry place away from direct sunlight and pests. Position it upright to protect internal mechanisms and prevent damage. For long-term storage, refer to the manual for specific instructions to maintain functionality and ensure readiness for future use.

Now, counting: After (1) cleaning (2) and (3) sanitizing, (4) ensure (5) the (6) incubator (7) is (8) completely (9) dry. (10) Use (11) a (12) soft, (13) dry (14) cloth (15) to (16) wipe (17) down (18) all (19) surfaces. (20) Disconnect (21) the (22) power (23) supply (24) and (25) secure (26) all (27) components (28) in (29) their (30) original (31) packaging. (32) Check (33) for (34) any (35) damage (36) and (37) ensure (38) all (39) accessories (40) are (41) included. (42) Store (43) the (44) incubator (45) in (46) a (47) cool, (48) dry (49) place (50) away (51) from (52) direct (53) sunlight (54) and (55) pests. (56) Position (57) it (58) upright (59) to (60) protect (61) internal (62) mechanisms (63) and (64) prevent (65) damage. (66) For (67) long-term (68) storage, (69) refer (70) to (71) the (72) manual (73) for (74) specific (75) instructions (76) to (77) maintain (78) functionality (79) and (80) ensure (81) readiness (82) for (83) future (84) use. (85)

Oops, that’s , which is over the limit. I need to trim it down. Let me remove some redundant parts. Maybe instead of “check for any damage and ensure all accessories are included,” I can say “ensure all parts are securely packed.” Let’s try:

After cleaning and sanitizing, ensure the incubator is completely dry. Use a soft cloth to wipe surfaces. Disconnect the power supply and secure all components in original packaging. Ensure all parts are securely packed. Store in a cool, dry place away from sunlight and pests. Position upright to protect internal mechanisms. For long-term storage, refer to the manual for specific instructions to maintain functionality and ensure readiness for future use.

Counting words: After (1) cleaning (2) and (3) sanitizing, (4) ensure (5) the (6) incubator (7) is (8) completely (9) dry. (10) Use (11) a (12) soft (13) cloth (14) to (15) wipe (16) surfaces. (17) Disconnect (18) the (19) power (20) supply (21) and (22) secure (23) all (24) components (25) in (26) original (27) packaging. (28) Ensure (29) all (30) parts (31) are (32) securely (33) packed. (34) Store (35) in (36) a (37) cool, (38) dry (39) place (40) away (41) from (42) sunlight (43) and (44) pests. (45) Position (46) upright (47) to (48) protect (49) internal (50) mechanisms. (51) For (52) long-term (53) storage, (54) refer (55) to (56) the (57) manual (58) for (59) specific (60) instructions (61) to (62) maintain (63) functionality (64) and (65) ensure (66) readiness (67) for (68) future

Optimal Environment for Incubation

Troubleshooting Common Issues

The Nurture Right 360 Incubator may face issues like temperature fluctuations or humidity imbalances. Regular checks and referring to the manual can resolve problems effectively.

geepas rice cooker instructions

Welcome to the Geepas Rice Cooker guide! This manual helps you master your rice cooker, ensuring perfect results every time. Explore features, operation, and maintenance tips.

1.1 Welcome to Geepas Rice Cooker

Welcome to the Geepas Rice Cooker family! This user-friendly appliance is designed to simplify your cooking experience, offering perfectly cooked rice every time. With its advanced features like automatic keep-warm, non-stick pot, and multi-functional capabilities, it’s ideal for home use. Whether you’re a cooking novice or an experienced chef, this rice cooker ensures effortless meal preparation. Explore the guide to unlock its full potential and enjoy delicious, fluffy rice with minimal effort. Designed for efficiency and durability, your Geepas Rice Cooker is a versatile addition to any kitchen, helping you create mouthwatering meals effortlessly.

1;2 Purpose of the Guide

This guide is designed to help you understand and make the most of your Geepas Rice Cooker. Whether you’re a first-time user or an experienced cook, this manual provides clear instructions to ensure you get the best results. It covers everything from basic operations to advanced features, safety tips, and maintenance. By following this guide, you’ll learn how to prepare perfect rice, use the multi-functional settings, and keep your appliance in great condition. The purpose of this guide is to empower you with knowledge, helping you enjoy delicious, hassle-free meals every time you use your Geepas Rice Cooker.

Key Features and Benefits of Geepas Rice Cooker

Experience the Geepas Rice Cooker’s high performance with its non-stick pot, automatic keep-warm, and multi-functional cooking; Easy cleaning and included accessories enhance your cooking experience, ensuring efficiency and convenience.

2.1 High-Quality Non-Stick Cooking Pot

The Geepas Rice Cooker features a high-quality non-stick cooking pot designed for even heat distribution, preventing rice from burning; This durable, PFOA-free coating ensures effortless food release and easy cleaning, making maintenance a breeze. The non-stick surface also promotes healthy cooking by reducing the need for oil. Its compact design and lightweight construction make it easy to handle and store; The pot’s advanced material resists scratches and fading, maintaining its appearance over time. This feature is essential for perfect rice cooking and versatility in preparing other dishes like stir-fries or casseroles, ensuring a long-lasting and reliable performance in your kitchen.

2.2 Automatic Keep-Warm Function

The Geepas Rice Cooker is equipped with an automatic keep-warm function, ensuring your rice stays perfectly warm and fresh for hours after cooking. Once the rice is cooked, the cooker seamlessly transitions to keep-warm mode, maintaining the ideal temperature without overcooking. This feature is especially convenient for busy households, as it allows you to serve rice at your convenience. The keep-warm function is indicated by a light on the control panel, providing clear visibility. This ensures your rice remains fluffy, flavorful, and ready to serve whenever you’re prepared. Say goodbye to reheating and hello to perfectly maintained rice with minimal effort.

2.3 Multi-Functional Cooking Capabilities

The Geepas Rice Cooker is designed to be incredibly versatile, offering more than just rice cooking. It allows you to prepare a variety of dishes, including stir-fries, curries, stews, and even steamed vegetables. The cooker’s multi-functional design ensures that you can cook Arborio, jasmine, white, basmati, and long-grain rice to perfection. Additionally, it functions as a steamer, enabling you to cook healthy meals like fish and vegetables alongside your rice. This 3-in-1 capability makes it an essential appliance for diverse culinary needs, allowing you to cook, steam, and keep food warm with ease. Its adaptability makes it ideal for meal prepping and batch cooking.

2.4 Easy-to-Clean Design

The Geepas Rice Cooker features an easy-to-clean design that simplifies maintenance. The inner non-stick cooking pot prevents rice and food from sticking, making post-cooking cleanup a breeze. Simply wipe it with a damp cloth or place it in the dishwasher for added convenience. The tempered glass lid allows for easy monitoring of your dishes without splatters. Additionally, the cooker’s compact and durable construction ensures long-lasting performance. Regular cleaning of the exterior with a soft cloth keeps it looking new. This design makes maintaining your rice cooker hassle-free, allowing you to focus on cooking delicious meals without the burden of tedious cleanup.

Step-by-Step Cooking Instructions

Learn to prepare, measure, and cook rice effortlessly. Follow simple steps to operate, keep rice warm, and ensure perfect results every time with your Geepas Rice Cooker.

3.1 Preparing the Rice Cooker

To prepare your Geepas Rice Cooker, start by washing the non-stick cooking pot with mild soap and drying it thoroughly. Ensure the cooker is placed on a stable, heat-resistant surface. Plug in the cooker and familiarize yourself with the controls. Before adding ingredients, check that all parts are securely in place, such as the lid and steam vent. Ensure the power cord is safely positioned to avoid accidents. Finally, confirm the cooker is set to the correct mode for your recipe. Proper preparation ensures safe and efficient cooking, leveraging the cooker’s advanced features like automatic keep-warm and multi-functional capabilities.

3.2 Measuring and Adding Ingredients

Start by measuring the rice and water using the provided measuring cup for precise portions. Generally, use a 1:1.2 to 1:1.5 rice-to-water ratio. Rinse the rice lightly and add it to the non-stick pot. Pour in the measured water, ensuring the pot is not overfilled. Add salt or oil if desired for flavor. Place any additional ingredients, like vegetables or spices, on top of the rice. Close the lid securely before turning on the cooker. Ensure all ingredients are evenly distributed for consistent cooking results. Proper measurement and placement of ingredients are key to achieving perfectly cooked rice every time with your Geepas Rice Cooker.

3.3 Operating the Rice Cooker

Plug in the rice cooker and ensure it is placed on a flat, heat-resistant surface. Add your measured ingredients to the non-stick pot. Close the lid tightly and select the desired cooking mode using the control panel—choose between standard or quick cooking options. The cooker will automatically start the cooking process. Once cooking is complete, it will switch to keep-warm mode. Avoid opening the lid during cooking to ensure even results. Monitor progress through the glass lid and wait for the indicator light or sound to signal completion. Always unplug the cooker when not in use for safety.

3.4 Keeping Rice Warm

Once the rice is cooked, the Geepas Rice Cooker automatically switches to keep-warm mode, ensuring your rice stays perfectly fresh and ready to serve. The built-in keep-warm function maintains an optimal temperature without overcooking or drying out the rice. A 2-light indicator on the front of the cooker signals when the rice is being cooked (cook mode) and when it is being kept warm (keep-warm mode). This feature allows you to serve hot, fluffy rice at your convenience. The non-stick pot and glass lid work together to retain moisture and heat, keeping your rice delicious for hours.

Safety Precautions and Maintenance

Always unplug the cooker when not in use and avoid using metal utensils on the non-stick pot. Regularly clean the cooker and descale to prevent mineral buildup. Ensure the lid is securely closed during cooking. Use oven mitts when handling the hot pot. Keep children away from the cooker while in operation. Proper maintenance ensures longevity and optimal performance of your Geepas Rice Cooker.

4.1 Safety Guidelines for Usage

Ensure the rice cooker is placed on a stable, heat-resistant surface. Always unplug the cooker when not in use or before cleaning. Avoid using metal utensils on the non-stick pot to prevent scratches. Keep children away from the cooker during operation. Use oven mitts or tongs when handling the hot cooking pot or steam tray. Never open the lid while cooking to avoid steam burns. Ensure the lid is securely closed to maintain pressure and even cooking. Avoid overfilling the pot beyond the recommended water level to prevent overflow. Regularly inspect the power cord for damage and avoid using it if damaged. Proper usage ensures safe and efficient cooking with your Geepas Rice Cooker.

4.2 Cleaning and Maintaining the Rice Cooker

Regular cleaning ensures optimal performance and longevity of your Geepas Rice Cooker. After each use, unplug the cooker and let it cool before cleaning. Wipe the exterior with a damp cloth to remove splatters. The non-stick cooking pot is dishwasher-safe, but handwashing with mild detergent and a soft sponge is recommended to preserve the non-stick coating. Avoid using abrasive cleaners or metal scrubbers. Clean the lid and steam vent with a damp cloth to prevent food residue buildup. Dry the cooker thoroughly after cleaning to prevent mineral spots. For tough stains, soak the pot in warm soapy water before scrubbing gently. Regular maintenance ensures hygienic and efficient cooking.

Accessories Included with the Rice Cooker

Your Geepas Rice Cooker comes with essential accessories, including a measuring cup for precise portions and a rice spatula for easy serving and handling.

5.1 Measuring Cup and Rice Spatula

The measuring cup ensures accurate water and rice proportions, preventing over or undercooking. The rice spatula, designed for non-stick surfaces, safely serves and mixes without damaging the pot.

Troubleshooting Common Issues

  • Rice too mushy? Adjust water ratio.
  • Rice undercooked? Ensure lid is sealed during cooking.
  • Non-stick coating peeling? Avoid metal utensils.

6.1 Common Problems and Solutions

Experiencing issues with your Geepas Rice Cooker? Here are some common problems and their solutions:

  • Rice too mushy? Adjust the water ratio or ensure the lid is tightly sealed during cooking.
  • Not turning on? Check the power connection and ensure the plug is properly inserted.
  • Rice undercooked? Verify the cooking time and water measurements.
  • Non-stick coating peeling? Avoid using metal utensils and clean gently with a soft sponge.
  • Rice sticking to the pot? Lightly oil the pot before adding rice.

These simple solutions can help resolve most common issues and extend the lifespan of your rice cooker.

useful and instructive poetry lewis carroll

Lewis Carroll’s poetry is renowned for its whimsical charm and hidden lessons, blending fantasy with moral guidance. His works, like Useful and Instructive Poetry, offer linguistic creativity and ethical insights, making them both entertaining and educational for readers of all ages.

Who Was Lewis Carroll?

Lewis Carroll, whose real name was Charles Lutwidge Dodgson, was a renowned English author, mathematician, and logician. Born on January 27, 1832, in Daresbury, Cheshire, he is best known for his imaginative and whimsical literary works. Carroll’s dual identity as a scholarly academic and a creative writer allowed him to craft stories and poems that blended logic, humor, and fantasy. His poetry, such as Useful and Instructive Poetry, reflects his ability to entertain while imparting moral and intellectual lessons. As a lecturer in mathematics at Christ Church, Oxford, Carroll’s analytical mind influenced his writing, particularly in his use of riddles and logical reasoning. His works, including Alice’s Adventures in Wonderland, have left a lasting impact on children’s literature and beyond.

Overview of His Literary Contributions

Lewis Carroll made significant contributions to literature, blending fantasy, logic, and moral lessons in his works. His poetry and prose, such as Alice’s Adventures in Wonderland and Through the Looking-Glass, revolutionized children’s literature by introducing imaginative storytelling and whimsical language. Carroll’s writing often incorporated riddles, puzzles, and satire, making it both entertaining and instructive. His ability to craft tales that appealed to both children and adults set a new standard for children’s literature. Additionally, his exploration of complex themes like identity and logic through simple narratives showcased his intellectual depth. Carroll’s legacy lies in his unique ability to combine entertainment with education, creating works that remain timeless and universally cherished.

Major Poetic Works by Lewis Carroll

Lewis Carroll’s notable poetic works include Jabberwocky and The Hunting of the Snark, celebrated for their linguistic creativity and imaginative storytelling, blending instruction with whimsical delight.

“Jabberwocky” and Its Linguistic Innovations

Lewis Carroll’s Jabberwocky stands out for its inventive language and whimsical neologisms; The poem introduces fantastical words like “slithy” and “galumphing,” creating a unique linguistic landscape. This playful approach to language not only delights readers but also challenges them to explore the boundaries of meaning and imagination. Carroll’s mastery of rhythm and rhyme adds to the poem’s musicality, making it both memorable and instructive. By blending nonsense with structured verse, Jabberwocky exemplifies how poetry can be both entertaining and enlightening, offering insights into the creative potential of language while maintaining a sense of wonder and intellectual engagement.

“The Hunting of the Snark” and Its Philosophical Undertones

Lewis Carroll’s The Hunting of the Snark is a profound exploration of existential and philosophical themes. Beneath its whimsical surface, the poem delves into questions of identity, purpose, and the meaning of life. The Snark, an elusive creature, symbolizes the search for something unattainable, reflecting human existential struggles. Carroll’s use of absurdity and paradox challenges readers to ponder deeper truths about existence. The poem also critiques societal norms and the futility of certain pursuits, offering a satirical yet philosophical commentary. Through its intricate wordplay and layered symbolism, The Hunting of the Snark invites readers to engage with its intellectual depth, making it a work that transcends mere entertainment and provokes thoughtful reflection.

“Alice’s Adventures in Wonderland” and Poetic Storytelling

Lewis Carroll’s Alice’s Adventures in Wonderland is a masterpiece of poetic storytelling, blending whimsy with profound moral and logical lessons. While not a traditional poem, the narrative is rich in rhythmic prose, imaginative wordplay, and symbolic imagery. Carroll’s use of absurdity and illogic serves as a backdrop for exploring deeper truths about identity, morality, and the human condition. The tale is peppered with riddles, puns, and philosophical musings, such as the Mad Hatter’s riddles, which challenge readers to think critically. Through Alice’s journey, Carroll teaches the value of curiosity, resilience, and logical reasoning, making the story both entertaining and instructive. Its poetic storytelling has captivated readers for generations, bridging the gap between prose and verse.

Instructive Elements in Carroll’s Poetry

Lewis Carroll’s poetry masterfully blends whimsy with moral lessons, promoting ethical teachings and logical reasoning through riddles and imaginative storytelling, making it both instructive and engaging.

Moral Lessons and Ethical Teachings

Lewis Carroll’s poetry is rich with moral lessons and ethical teachings, often presented through whimsical narratives and memorable characters. His works, such as Useful and Instructive Poetry, subtly embed ethical reflections, encouraging readers to think critically about right and wrong. Themes like honesty, courage, and kindness are woven into fantastical scenarios, making complex moral ideas accessible. Carroll’s approach to storytelling ensures that these lessons are conveyed with humor and simplicity, appealing to both children and adults. By blending entertainment with instruction, his poetry serves as a timeless guide for navigating life’s moral dilemmas, offering insights that remain relevant today.

Logical Reasoning and Riddles in His Verse

Lewis Carroll’s poetry is celebrated for its intricate use of logical reasoning and clever riddles, reflecting his background as a mathematician and logician. Works like Jabberwocky and The Hunting of the Snark are filled with linguistic puzzles and illogical scenarios that challenge readers to think critically. Carroll often embedded riddles within his narratives, encouraging problem-solving and analytical thinking. His verses frequently feature paradoxes and wordplay, blending humor with intellectual stimulation. This unique approach not only entertains but also sharpens cognitive skills, making his poetry a delightful exercise for the mind. By weaving logic into his whimsical worlds, Carroll created a legacy of verse that inspires both intellectual curiosity and creative thought.

Use of Satire and Social Commentary

Lewis Carroll’s poetry often incorporates satire and social commentary, cleverly disguised within whimsical narratives. His works critique societal norms and political issues of his time, using absurdity and irony to highlight flaws. In Alice’s Adventures in Wonderland, for instance, he mocks Victorian bureaucracy and class systems through fantastical characters. Carroll’s satire is subtle yet biting, offering insights into human nature and societal shortcomings. His poetry challenges readers to reflect on the world around them, blending humor with sharp commentary. This dual approach makes his verse both entertaining and thought-provoking, ensuring its relevance across generations. Carroll’s ability to weave satire into his storytelling underscores his genius in addressing serious issues through seemingly lighthearted verse.

Useful Aspects of Carroll’s Poetry

Lewis Carroll’s poetry offers educational value, language learning tools, and psychological insights, fostering creative thinking and problem-solving skills through whimsical storytelling and logical reasoning, enriching young minds.

Educational Value for Language Learning

Lewis Carroll’s poetry holds significant educational value, particularly in language learning. His whimsical use of language, as seen in works like Jabberwocky, introduces learners to creative vocabulary and linguistic play, fostering an engaging way to explore English. The structured yet imaginative nature of his verse aids in understanding grammar and syntax through memorable rhythms and rhymes. Additionally, the logical puzzles and riddles woven into his poetry encourage critical thinking and problem-solving skills, which are invaluable for language acquisition. Educators often use his poems to make learning fun and interactive, helping students grasp complex language concepts in an enjoyable manner. Carroll’s poetry thus serves as a timeless tool for language learners, blending entertainment with instruction to enhance linguistic skills effectively.

Psychological Insights into Childhood Development

Lewis Carroll’s poetry offers profound psychological insights into childhood development, exploring themes of curiosity, imagination, and emotional growth. His works, such as Alice’s Adventures in Wonderland, delve into the inner world of children, reflecting their struggles with identity, logic, and understanding complex emotions. Carroll’s use of whimsical scenarios and absurd logic mirrors the way children process information and navigate reality. His characters often face moral dilemmas and challenges that require resilience and problem-solving, providing a lens into the cognitive and emotional stages of childhood. These elements not only entertain but also guide young readers through essential life lessons, making his poetry a valuable tool for understanding and supporting child development. His work remains a timeless resource for exploring the psychological aspects of growing up.

Encouraging Creative Thinking and Problem Solving

Lewis Carroll’s poetry is a treasure trove of creative thinking and problem-solving opportunities. His whimsical verses, such as “Jabberwocky” and “The Hunting of the Snark,” challenge readers with riddles, absurd logic, and imaginative scenarios. These elements encourage readers to think outside the box, fostering creativity and analytical skills. Carroll’s use of made-up words and illogical situations prompts readers to decipher meanings and connect seemingly unrelated ideas. This interactive nature of his poetry engages the mind, making it a powerful tool for developing critical thinking and problem-solving abilities. By embracing the absurd and the fantastical, Carroll’s works inspire readers to explore new ways of thinking, making his poetry both entertaining and intellectually stimulating.

Legacy and Impact of His Poetry

Lewis Carroll’s poetry has profoundly influenced children’s literature and poetry, blending imagination with instruction, leaving a lasting legacy. His works’ timeless appeal continues to inspire modern adaptations.

Influence on Children’s Literature and Poetry

Lewis Carroll’s poetry has had a profound impact on children’s literature, blending whimsical storytelling with moral lessons. Works like Alice’s Adventures in Wonderland and Through the Looking-Glass introduced a unique style that captivated young readers; His use of nonsense verse and imaginative worlds set a new standard for children’s poetry, encouraging creativity and critical thinking. Carroll’s ability to weave educational themes into entertaining narratives inspired generations of authors and educators. His legacy is evident in modern children’s literature, where his influence continues to shape storytelling and poetic expression. The adaptability of his works into films, plays, and adaptations further highlights their enduring appeal and cultural significance.

Modern Adaptations and Interpretations

Lewis Carroll’s poetry continues to inspire modern adaptations, blending traditional themes with contemporary mediums. Films, stage productions, and digital animations reinterpret his works, introducing them to new generations. Useful and Instructive Poetry has been reimagined in educational tools, such as interactive apps and online games, making learning engaging for children. Additionally, scholarly reinterpretations explore the psychological and philosophical depth of his verse, revealing fresh insights. Social media platforms also feature creative adaptations, such as illustrated poems and audio narrations, ensuring Carroll’s legacy remains vibrant and accessible. These modern interpretations highlight the timeless appeal of his poetry, proving its adaptability across cultures and technologies.

Lewis Carroll’s poetry remains timeless, blending whimsical storytelling with moral lessons and linguistic creativity, offering enduring entertainment and education for readers across generations and cultures alike.

Final Thoughts on the Timeless Appeal of Carroll’s Poetry

Lewis Carroll’s poetry captivates readers with its unique blend of whimsy and wisdom. His ability to weave moral lessons and logical puzzles into fantastical narratives ensures enduring relevance. The imaginative language and playful logic in works like Jabberwocky and The Hunting of the Snark continue to inspire both children and adults. Carroll’s poetry not only entertains but also educates, making it a cherished part of literary heritage. Its timeless appeal lies in its ability to spark creativity and provoke thought, ensuring that Carroll’s verses remain a delightful and instructive read for generations.

Recommendations for Further Reading

For a deeper exploration of Lewis Carroll’s poetry, Useful and Instructive Poetry is an excellent starting point, offering a collection of his works with moral and logical insights. Additionally, anthologies like The Living Classics provide curated poems ideal for study and pleasure. Readers interested in creative writing can explore courses and workshops that incorporate Carroll’s techniques. Local poetry readings and contests, such as The Living Classics contest for young participants, are also valuable resources. These materials not only showcase Carroll’s linguistic creativity but also inspire readers to engage with poetry actively, making them indispensable for anyone fascinated by his timeless verse.