Proprioception is the body’s ability to sense its position and movement in space‚ essential for balance‚ coordination‚ and injury prevention. It involves nerve endings in muscles‚ tendons‚ and joints‚ which send signals to the brain to regulate movement. Enhancing proprioception through targeted exercises improves overall physical stability and reduces the risk of falls‚ particularly in older adults or those recovering from injuries. Regular proprioception exercises‚ such as single-leg balances or wobble board training‚ can strengthen this sensory system‚ promoting better mobility and confidence in daily activities.
1.1 Definition of Proprioception
Proprioception‚ often referred to as the “sixth sense‚” is the body’s ability to sense its position‚ orientation‚ and movement in space. It relies on nerve endings in muscles‚ tendons‚ and joints that send signals to the brain‚ enabling precise control of movements without conscious awareness. This sensory system is crucial for maintaining posture‚ balance‚ and coordination‚ and it plays a key role in preventing injuries and falls. Impairments in proprioception can occur due to injuries‚ aging‚ or neurological conditions‚ leading to difficulties in movement and stability. Understanding and enhancing this sensory function is vital for overall physical performance and independence.
1.2 Importance of Proprioception in Movement and Balance
Proprioception is vital for efficient movement and balance‚ as it enables the body to adjust and respond to environmental changes seamlessly. Without proper proprioceptive function‚ even simple tasks like walking or standing can become challenging. It helps maintain posture by ensuring muscles are engaged appropriately and prevents excessive movement that could lead to injuries. In athletes‚ strong proprioception enhances performance by improving coordination and reducing the risk of sprains or strains. Additionally‚ in older adults‚ good proprioception reduces the likelihood of falls‚ promoting independence and overall quality of life. Strengthening this sensory system through targeted exercises is essential for maintaining optimal physical function and safety.

Benefits of Proprioception Exercises
Proprioception exercises enhance balance‚ coordination‚ and overall physical stability‚ reducing injury risks and improving athletic performance. They strengthen neuromuscular connections‚ boosting confidence and mobility in daily activities and sports.
2.1 Injury Rehabilitation and Prevention
Proprioception exercises play a crucial role in injury rehabilitation by restoring joint stability and neuromuscular control. After injuries‚ especially to the ankles‚ knees‚ or wrists‚ proprioceptive training helps regain position sense‚ reducing reinjury risks. Techniques like single-leg balances and wobble board exercises enhance joint stability‚ while eyes-closed drills improve sensory feedback. For athletes‚ incorporating these exercises into routines prevents common issues like sprains and strains. Additionally‚ proprioception workouts aid in post-surgery recovery‚ ensuring smoother transitions back to activity. By strengthening the body’s internal navigation system‚ these exercises are vital for both recovery and long-term injury prevention‚ promoting resilience and optimal physical function.
2.2 Enhanced Athletic Performance
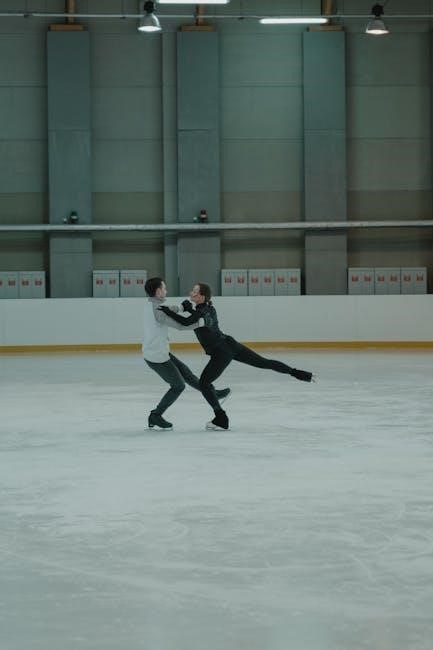
Proprioception exercises significantly enhance athletic performance by improving balance‚ coordination‚ and overall body awareness. Athletes benefit from better movement efficiency‚ as their bodies can sense and adjust positions more effectively during dynamic actions. Enhanced proprioception reduces the risk of injuries and allows for faster reaction times‚ crucial in sports requiring quick changes of direction. Techniques like plyometric training and wobble board exercises strengthen neuromuscular connections‚ enabling athletes to maintain proper form under fatigue. By integrating proprioception drills into their routines‚ athletes can achieve greater precision‚ power‚ and endurance‚ giving them a competitive edge in their respective sports while minimizing the risk of performance-related injuries.
2.3 Improved Balance and Coordination
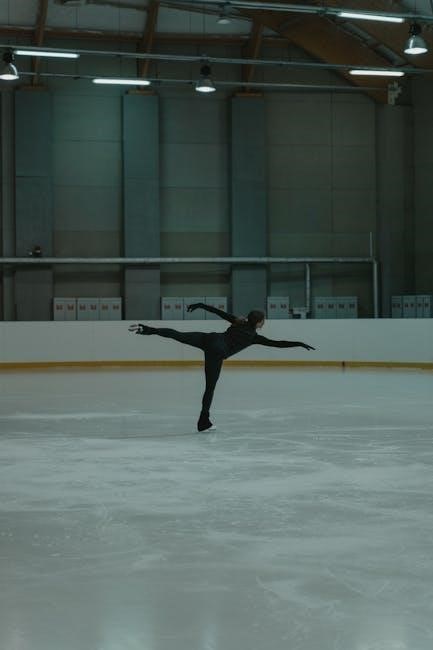
Proprioception exercises are fundamental for improving balance and coordination by enhancing the body’s ability to sense its position and movements. These exercises strengthen the connection between sensory inputs and motor responses‚ allowing individuals to maintain stability during various activities. Techniques such as single-leg balances‚ heel-to-toe walking‚ and eyes-closed drills challenge the proprioceptive system‚ fostering greater body awareness. Improved balance reduces the likelihood of falls and injuries‚ while enhanced coordination enables smoother‚ more efficient movements. Regular practice of these exercises can lead to better overall physical stability‚ making daily tasks and physical activities easier and safer. This is particularly beneficial for individuals recovering from injuries or those seeking to enhance athletic performance.
2.4 Fall Prevention in Older Adults
Proprioception exercises play a crucial role in fall prevention among older adults by enhancing balance and stability; Aging often diminishes proprioceptive sensitivity‚ increasing the risk of falls. Simple exercises like heel-to-toe walking‚ single-leg balances‚ and eyes-closed drills can improve body awareness and reduce this risk. These activities strengthen the connection between sensory inputs and motor responses‚ helping older adults maintain equilibrium. Regular practice of proprioception exercises not only boosts confidence but also enhances overall physical stability‚ reducing the likelihood of injuries from falls. Incorporating these exercises into daily routines can significantly promote safety and independence in older adults‚ making them a vital component of fall prevention strategies.
Types of Proprioception Exercises
Proprioception exercises include single-leg balances‚ wobble board training‚ eyes-closed drills‚ and heel-to-toe walking. These activities enhance body awareness‚ stability‚ and coordination‚ improving overall physical control and balance.
3.1 Single-Leg Balance Exercises
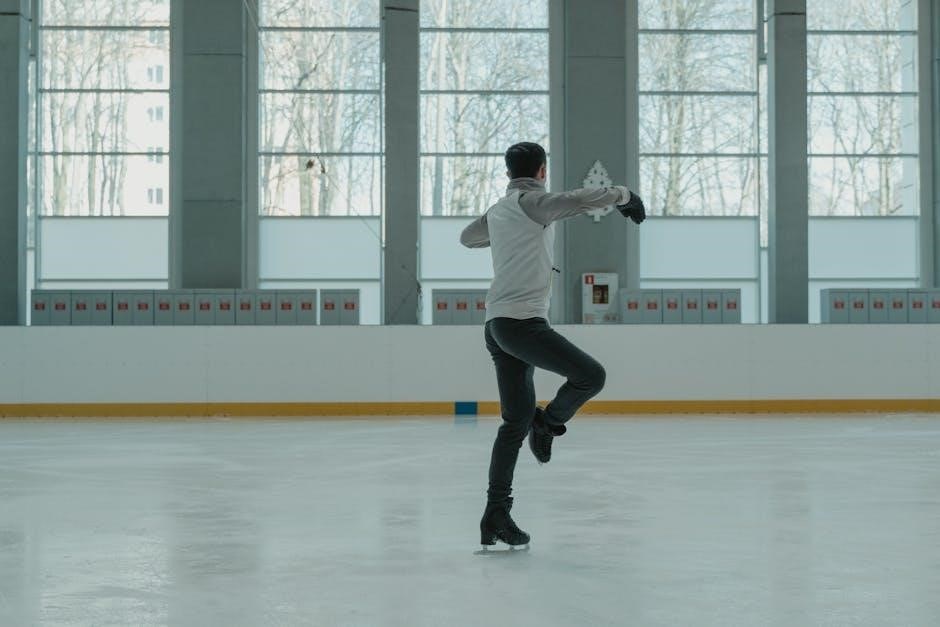
Single-leg balance exercises are a cornerstone of proprioception training‚ focusing on improving stability and control. By standing on one leg‚ individuals challenge their body to maintain equilibrium‚ engaging the core and lower limb muscles. These exercises can be modified‚ starting with eyes open and progressing to eyes closed for increased difficulty. They are particularly beneficial for injury rehabilitation‚ enhancing joint stability‚ and preventing future issues. Regular practice improves balance‚ reduces the risk of falls‚ and boosts overall physical confidence‚ making them an essential component of any proprioception workout plan.
3.2 Wobble Board Training
Wobble board training is a highly effective tool for improving proprioception and balance. By standing or performing exercises on an unstable surface‚ individuals challenge their body to maintain equilibrium‚ enhancing neuromuscular control. This type of training is particularly beneficial for ankle proprioception‚ as it strengthens the muscles and ligaments around the joint‚ reducing the risk of sprains. Exercises range from simple mobility circles to more advanced movements like single-leg squats with eyes closed. Wobble boards are widely used in injury rehabilitation and sports training‚ offering a versatile and dynamic way to improve overall stability and coordination. Regular use can significantly enhance balance and reduce the risk of falls or injuries.
3.3 Eyes-Closed Balance Drills
Eyes-closed balance drills are a powerful way to enhance proprioception by eliminating visual input‚ forcing the body to rely on internal sensory feedback. Standing on one leg or a wobble board with eyes closed challenges the neuromuscular system to maintain stability. This method strengthens the connection between sensors in muscles‚ joints‚ and the brain‚ improving overall balance and coordination. Advanced variations include heel-to-toe walking or dynamic movements while eyes are closed. These exercises are particularly beneficial for athletes and individuals recovering from injuries‚ as they enhance proprioceptive awareness and reduce the risk of falls or re-injury. Regular practice can significantly improve balance and stability in daily activities and sports performance.
3.4 Heel-to-Toe Walking
Heel-to-toe walking is a simple yet effective exercise for improving proprioception. It involves walking in a straight line‚ placing the heel of one foot directly in front of the toes of the other. This drill enhances balance and body awareness by requiring precise coordination and alignment. Perform this exercise with or without support‚ and gradually increase difficulty by adding arm movements or closing the eyes. Heel-to-toe walking strengthens the connection between sensory receptors and the brain‚ reducing the risk of falls and improving overall stability. It is particularly beneficial for older adults and individuals recovering from lower limb injuries‚ as it challenges the body to maintain proper posture and alignment without visual feedback.

Proprioception Exercises for Specific Body Parts
Targeted exercises improve stability and sensory feedback in specific joints‚ such as ankles‚ knees‚ hips‚ and wrists‚ enhancing movement precision and reducing injury risk.
4.1 Ankle Proprioception Exercises
Ankle proprioception exercises focus on improving stability and sensory feedback in the ankle joint‚ crucial for preventing injuries and enhancing balance. Common exercises include wobble board training‚ single-leg balances‚ and heel-to-toe walking. These activities strengthen the muscles and ligaments around the ankle‚ restoring proper joint position sense. For individuals recovering from ankle sprains or chronic instability‚ proprioception exercises help rebuild confidence and reduce the risk of reinjury. Additionally‚ these exercises are beneficial for older adults‚ promoting better balance and fall prevention. Regular practice can significantly improve functional mobility and overall lower limb coordination.
4.2 Knee Proprioception Exercises
Knee proprioception exercises are designed to enhance sensory feedback and stability in the knee joint‚ crucial for individuals recovering from injuries like ACL tears or those seeking improved athletic performance. Common exercises include single-leg squats‚ balance drills on unstable surfaces‚ and mini-trampoline activities. These exercises strengthen the surrounding muscles and ligaments‚ improving joint position sense and reducing the risk of reinjury. Additionally‚ techniques like perturbation training and plyometric exercises challenge the knee’s stability‚ promoting better neuromuscular control. Regular practice of these exercises can significantly enhance functional mobility‚ making them ideal for both rehabilitation and sports performance.

4.3 Hip Proprioception Exercises
Hip proprioception exercises focus on improving the sensory feedback and stability of the hip joint‚ essential for maintaining proper alignment and movement. Exercises like single-leg stands‚ hip bridges‚ and lateral band walks enhance neuromuscular control and strength around the hip. Balance drills on unstable surfaces‚ such as a wobble board or foam pad‚ further challenge proprioceptive awareness. Additionally‚ plyometric exercises and perturbation training can be incorporated to simulate real-world movements‚ improving reflexive stability. These exercises are particularly beneficial for individuals with hip injuries or chronic pain‚ as they restore functional mobility and reduce the risk of further injury‚ promoting better overall lower limb coordination and balance.
4.4 Wrist and Hand Proprioception Exercises
Wrist and hand proprioception exercises target the sensory receptors in the joints and muscles of the forearm‚ wrist‚ and fingers. Activities such as wrist extensions with light weights‚ finger bends on a soft ball‚ and tactile exercises with textured surfaces enhance sensory feedback. Mirror exercises‚ where one hand mimics the other‚ improve coordination and awareness. Using resistance bands or putty can also strengthen grip and joint stability. These exercises are particularly beneficial for individuals recovering from wrist injuries or surgeries‚ as they restore functional dexterity and reduce the risk of re-injury‚ promoting better hand-eye coordination and overall upper limb function in daily activities and sports.
Advanced Proprioception Techniques
Advanced techniques like plyometric training and mini-trampoline exercises challenge dynamic balance and neuromuscular coordination‚ enhancing proprioception for high-level athletic performance and injury resilience in complex movements.
5.1 Plyometric Training
Plyometric training involves explosive movements like jump squats and box jumps‚ which challenge the body’s ability to sense and adapt to rapid changes in position. These exercises enhance proprioception by requiring precise neuromuscular coordination during high-impact activities. As the body learns to control these dynamic movements‚ it improves its ability to maintain balance and generate force efficiently. Regular plyometric exercises can lead to better overall athletic performance and reduce the risk of injuries by strengthening the connection between the muscles and the central nervous system. Incorporating plyometric drills‚ such as burpees or depth jumps‚ into a workout routine can significantly boost proprioceptive awareness and functional strength‚ making it an essential component of advanced training programs for athletes seeking to enhance their power and agility.
5.2 Mini-Trampoline Exercises
Mini-trampoline exercises are a fun and effective way to enhance proprioception by engaging the body in dynamic movements that challenge balance and coordination. Simple bouncing or jumping on the trampoline requires the body to constantly adjust its position‚ strengthening the sensory feedback loop between muscles and the brain. Advanced exercises‚ such as single-leg jumps or eyes-closed bouncing‚ further intensify proprioceptive awareness. These drills are particularly beneficial for improving balance‚ reducing the risk of falls‚ and enhancing overall physical stability. Mini-trampoline training is versatile‚ suitable for both rehabilitation and advanced fitness levels‚ making it a valuable addition to proprioception-focused workout routines.
5.3 Pilates and Proprioception

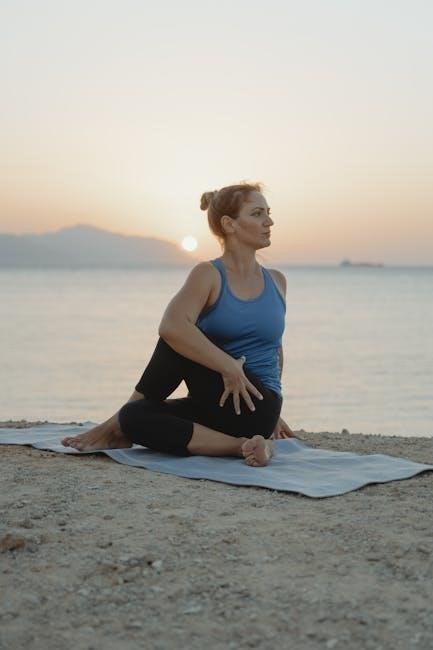
Pilates is a highly effective method for enhancing proprioception by improving body awareness and movement control. The core-focused exercises in Pilates‚ such as single-leg stretches and rolling movements‚ challenge the body to maintain proper alignment and balance. By engaging the mind-body connection‚ Pilates strengthens the communication between muscles‚ joints‚ and the brain‚ enhancing sensory feedback. The use of equipment like the Reformer adds resistance‚ further stimulating proprioceptive receptors. Regular Pilates practice can significantly improve balance‚ reduce the risk of falls‚ and aid in injury rehabilitation. Its slow‚ controlled movements make it an ideal choice for individuals seeking to refine their proprioceptive skills and achieve better overall physical stability.
5.4 Tai Chi for Proprioception
Tai Chi‚ a traditional Chinese exercise‚ is renowned for its ability to enhance proprioception through slow‚ flowing movements. By emphasizing balance‚ posture‚ and controlled transitions‚ Tai Chi strengthens the connection between the body’s sensory receptors and the brain. This practice is particularly beneficial for improving joint stability and reducing fall risks‚ especially in older adults. The meditative aspect of Tai Chi also enhances focus and body awareness‚ further refining proprioceptive skills. Studies suggest that regular Tai Chi practice can significantly improve balance control and overall physical stability‚ making it a valuable addition to proprioception training programs. Its holistic approach promotes both physical and mental well-being‚ aligning with the goals of enhancing sensory-motor function.
Creating a Proprioception Workout Plan
A well-structured workout plan focuses on improving balance‚ coordination‚ and body awareness. Tailor exercises to individual needs‚ incorporating techniques like single-leg balances and wobble board training. Progress safely‚ monitor improvements‚ and adjust as needed to enhance overall proprioception effectively.

6.1 Setting Goals and Objectives
Setting clear‚ achievable goals is essential for an effective proprioception workout plan. Start by assessing your current abilities and defining specific objectives‚ such as improving balance‚ reducing injury risk‚ or enhancing athletic performance. Goals should be SMART: specific‚ measurable‚ achievable‚ relevant‚ and time-bound. For example‚ aim to hold a single-leg balance for 30 seconds or complete a series of wobble board exercises without losing stability. Regularly track progress and adjust goals as needed. Personalize the plan based on individual needs‚ ensuring exercises align with overall fitness or rehabilitation targets. This structured approach ensures a focused and meaningful improvement in proprioception over time.
6.2 Progressing Exercises Safely
Progressing proprioception exercises safely requires a gradual approach to avoid overloading the body. Start with supported exercises‚ such as standing near a wall or using a chair for balance‚ and remove support as confidence grows. Introduce challenges like closing eyes or using unstable surfaces‚ such as wobble boards‚ only when basic stability is mastered. Increase difficulty by extending hold times or adding dynamic movements. Monitor progress and adjust exercises based on individual responses‚ ensuring proper form to prevent injury. Avoid rushing through stages‚ as this can hinder improvement and safety. Professional guidance can help tailor progression to specific needs and abilities.
6.3 Incorporating Equipment
Incorporating equipment into proprioception exercises enhances challenge and variety. Wobble boards‚ balance pads‚ and mini-trampolines are popular tools for improving stability and coordination. Resistance bands can add strength training to proprioceptive drills‚ while Pilates reformers offer controlled movements for advanced practice. Soft surfaces‚ like cushions or foam pads‚ can simulate unstable environments for better balance training. Additionally‚ tools like balance beams or BOSU balls provide dynamic challenges for refining proprioceptive skills. These devices help individuals progress safely by introducing controlled instability‚ making exercises more engaging and effective for rebuilding or enhancing body awareness and motor control. Professional guidance ensures proper use and safety when incorporating equipment into routines.
6.4 Monitoring Progress
Monitoring progress in proprioception exercises is crucial for ensuring effectiveness and safety. Track improvements in balance‚ stability‚ and coordination over time. Use specific metrics‚ such as the duration of single-leg stands or the number of repetitions of wobble board exercises. Measure reductions in wobble or sway during balance drills. Incorporate standardized tests‚ like timed heel-to-toe walking‚ to assess progress. Regularly document performance to identify patterns and adjustments needed. For advanced levels‚ introduce more challenging tasks‚ such as eyes-closed balance or dynamic movements. Consistent monitoring ensures exercises are tailored to current abilities‚ promoting gradual improvement and preventing plateaus. Adjustments should be based on observable gains and individual goals.