
Jack Daniel’s Pulled Pork combines tender pork shoulder with rich, smoky whiskey-infused BBQ sauce, creating a flavorful, crowd-pleasing dish perfect for casual gatherings or special occasions.
Overview of the Recipe
This recipe combines tender pork shoulder with the rich, smoky flavor of Jack Daniel’s whiskey, creating a mouthwatering pulled pork dish. The pork is marinated in a mixture of Jack Daniel’s, cola, and spices, then slow-cooked to perfection. After hours of cooking, the meat is shredded and tossed in a tangy BBQ sauce infused with whiskey, resulting in a flavorful, fall-apart texture. The dish is easy to prepare and offers a delicious, crowd-pleasing meal for any occasion.
Popularity and Unique Flavor Profile
Jack Daniel’s Pulled Pork has gained immense popularity for its rich, bold flavor profile, combining the smokiness of whiskey with the tanginess of BBQ sauce. The slow-cooked pork shoulder becomes tender and juicy, absorbing the deep, velvety notes of Jack Daniel’s, creating a truly unique taste experience. This dish is a crowd favorite, perfect for casual gatherings or special events, offering a delicious blend of Southern-inspired flavors that leave a lasting impression on the palate.
Why Choose Jack Daniel’s for Pulled Pork?
Jack Daniel’s adds a unique, bold flavor to pulled pork, with its smoky, slightly sweet whiskey notes enhancing the dish’s depth. The slow-cooking process ensures tender, juicy meat, while the whiskey-infused BBQ sauce creates a rich, velvety texture. This combination makes Jack Daniel’s Pulled Pork a standout choice for its flavor complexity and ease of preparation, perfect for impressing guests or enjoying a hearty meal. It’s a reliable option for achieving mouthwatering results every time.
Ingredients and Equipment
Essential ingredients include pork shoulder, Jack Daniel’s whiskey, Coca-Cola, BBQ sauce, salt, pepper, and paprika. Equipment needed: slow cooker, oven, or smoker for tender results.
Essential Ingredients
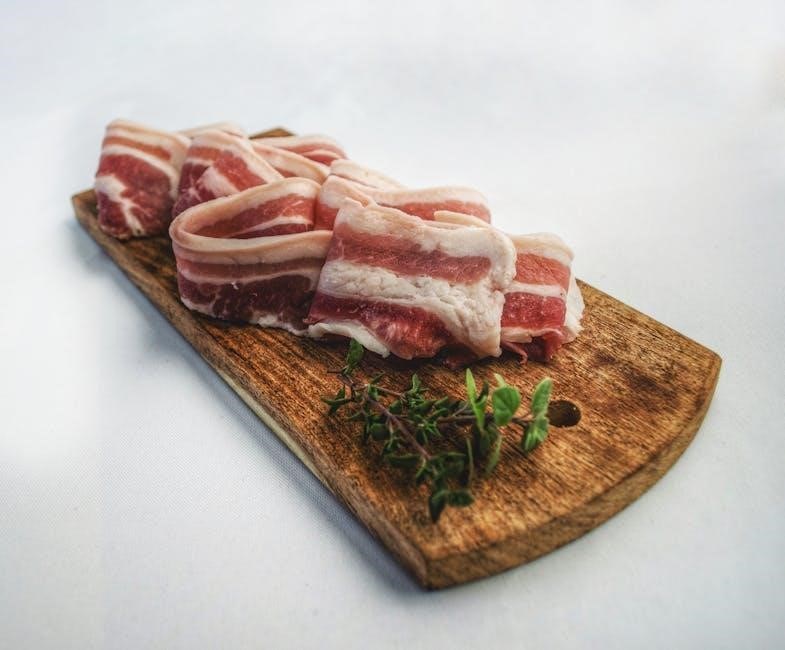
The core ingredients for Jack Daniel’s Pulled Pork include a pork shoulder, Jack Daniel’s whiskey, Coca-Cola, BBQ sauce, salt, pepper, and paprika. Optional additions like onions, garlic, and wood chips enhance flavor. The pork shoulder is the star, providing tender, juicy meat when slow-cooked. Jack Daniel’s whiskey adds a rich, smoky depth, while Coca-Cola contributes sweetness and helps tenderize the meat. BBQ sauce binds the flavors, creating a tangy, savory profile. These ingredients combine to create a dish that’s both hearty and full of complex, satisfying flavors.
Equipment Needed
To prepare Jack Daniel’s Pulled Pork, essential equipment includes a slow cooker, oven, or smoker for tenderizing the meat. A large Dutch oven or casserole dish is ideal for baking. Tools like a cutting board, knife, and forks are necessary for shredding. Foil is used for covering during cooking to retain moisture. Optional equipment includes an Instant Pot for faster cooking or a skillet for searing. These tools ensure the pork is cooked to perfection and easily shredded for serving.
Optional Additions for Enhanced Flavor
For added depth, consider incorporating Dr. Pepper or Mexican cola with sugar for a sweeter twist. Garlic cloves and onions can be sautéed with the pork for aromatic flavor. Wood chips, like hickory or apple, add a smoky note when using a smoker. A shot of Jack Daniel’s during cooking intensifies the whiskey flavor. For a tangy contrast, homemade mustard slaw or acidic sides pair perfectly. These optional additions elevate the dish, offering a customizable and rich flavor profile that complements the whiskey-infused BBQ sauce.
Preparation Steps
Season and sear pork shoulder, then slow cook with onions, garlic, cola, and Jack Daniel’s. Shred tender meat, mix with BBQ sauce, and serve on rolls or with sides.
Marinating the Pork Shoulder
Marinate the pork shoulder in a mixture of Jack Daniel’s, cola, garlic, and spices for at least 8 hours. Season with salt, pepper, and paprika before searing. This step enhances flavor and tenderness, ensuring the pork absorbs the rich, smoky notes of the whiskey. For a deeper flavor, marinate overnight. After marinating, sear the pork to create a crispy texture, then slow cook it in the marinade. This process ensures the meat is infused with the bold, tangy flavors of the Jack Daniel’s BBQ sauce and spices, resulting in a tender, flavorful dish.

Searing the Pork for Crispy Texture
Searing the pork shoulder over medium-high heat creates a crispy, caramelized crust that enhances texture and flavor. Season the pork with salt, pepper, and paprika before searing. Sear the meat for a few minutes on each side until golden brown. This step locks in juices and adds a smoky depth. After searing, the pork is ready to be slow-cooked in the marinade. For easier shredding, consider trimming excess fat before searing. This ensures a tender, flavorful result with a satisfying crunch from the seared exterior.
Slow Cooking Methods
Slow cooking is essential for tender, flavorful Jack Daniel’s Pulled Pork. Place the seared pork shoulder in a slow cooker or oven with cola, Jack Daniel’s, garlic, and spices. Cook on low for 8-10 hours or at 160°C (320°F) for 3-4 hours. The meat becomes fork-tender, easily shredding apart. For a smoker, cook at 225°F (110°C) for 8-10 hours. The low heat breaks down connective tissues, infusing the pork with rich, smoky whiskey flavors. This method ensures a juicy, fall-apart texture perfect for shredding and tossing in BBQ sauce.
Finishing Touches
Once the pork is tender, remove it from the slow cooker or oven. Shred the meat with two forks, ensuring it’s fully pulled apart. Strain the cooking liquid and reduce it by half to create a thicker, richer sauce. Toss the shredded pork in a mixture of Jack Daniel’s BBQ sauce and the reduced cooking liquid until evenly coated. For extra flavor, drizzle with a bit more Jack Daniel’s. Serve immediately on toasted buns, garnished with fresh herbs or coleslaw for a delicious, polished finish.

Cooking Techniques
Explore versatile cooking methods for Jack Daniel’s Pulled Pork, including slow cooker, oven, smoker, and Instant Pot techniques, each ensuring tender meat and rich flavor.

Slow Cooker Method
The slow cooker method is ideal for achieving tender, flavorful Jack Daniel’s Pulled Pork. Season the pork shoulder with spices, then sear it briefly. Place the pork in the slow cooker with onions, garlic, cola, Jack Daniel’s whiskey, and BBQ sauce. Cook on low for 8 hours or high for 5-7 hours until the meat shreds easily. After cooking, shred the pork with forks and mix it with the rich, whiskey-infused sauce. This hands-off approach ensures a delicious, fall-apart texture perfect for sandwiches, tacos, or served with sides.
Oven Cooking Instructions
Preheat your oven to 160°C (325°F). Season the pork shoulder with salt, pepper, and paprika, then sear it in a pan for a few minutes. Place the pork in a casserole dish, cover it with foil, and bake for 3 hours. During cooking, the pork absorbs the flavors of Jack Daniel’s, cola, and BBQ sauce, resulting in tender, fall-apart meat. After baking, shred the pork with forks and mix it with the sauce. Serve on toasted rolls with cheese for a delicious, hearty meal. This method ensures rich, smoky flavors and a satisfying texture.
Smoker Technique
For a authentic, smoky flavor, use a smoker set to 225-250°F (110-120°C). Place the seasoned pork shoulder in the smoker, fat side up. Add wood chips like hickory or apple for depth. Cook for 8-10 hours until the internal temperature reaches 190°F (88°C). During the last 2 hours, brush with Jack Daniel’s BBQ sauce. Wrap the pork in foil to retain moisture. After smoking, shred the meat with forks and toss it in the reduced sauce for a rich, tangy finish. Serve on buns for a classic pulled pork experience.
Instant Pot Variation
The Instant Pot offers a quick and convenient method for Jack Daniel’s Pulled Pork. Season the pork shoulder, then sear it using the sauté function. Add onions, garlic, cola, and Jack Daniel’s, ensuring the pork is mostly submerged. Cook on high pressure for 45-50 minutes, followed by a 15-minute natural release. Shred the pork with forks and toss it in the reduced sauce. Serve on buns for a tender, flavorful meal with minimal effort. This method cuts cooking time significantly while maintaining rich, smoky flavors.
Serving Suggestions
Jack Daniel’s Pulled Pork is perfect on soft buns, in tacos, or atop toast. Try it on pizza, with crispy onions, or alongside coleslaw for a balanced meal.
Classic Pulled Pork Sandwiches
A timeless favorite, Jack Daniel’s Pulled Pork shines in classic sandwiches. Pile tender, sauce-infused pork onto soft hamburger buns, top with melted cheese, and serve with a side of tangy coleslaw. The combination of smoky whiskey flavors, juicy meat, and crunchy slaw creates a satisfying, finger-licking meal. For extra indulgence, toast the buns slightly before assembling. This straightforward yet flavorful approach ensures every bite is a delightful experience, perfect for casual gatherings or family dinners.
Accompanying Sides
Classic sides like creamy coleslaw, crispy onion rings, and warm cornbread perfectly complement Jack Daniel’s Pulled Pork. Baked beans infused with a hint of BBQ sauce add a sweet and smoky contrast. For a lighter option, a fresh green salad or roasted vegetables provide a refreshing balance. Garlic bread or toasted buns are ideal for sopping up the flavorful sauce. These sides enhance the rich, whiskey-infused pork, creating a well-rounded and satisfying meal that appeals to a variety of tastes.
Incorporating into Other Dishes
Jack Daniel’s Pulled Pork adds a flavorful twist to various dishes. Try it in enchiladas, stuffed baked potatoes, or as a pizza topping for a hearty meal. Mix it into mac and cheese for a creamy, smoky surprise. Use it as a filling for tacos or quesadillas, paired with fresh slaw for crunch. Even as a topping for nachos or baked sweet potatoes, the rich, whiskey-infused pork elevates any dish. Its versatility makes it a great addition to breakfast items like eggs or biscuits, offering endless creative possibilities for meals.
Unique Presentation Ideas
Elevate your Jack Daniel’s Pulled Pork with creative presentations. Serve it on pretzel buns for a twist or atop pancakes with a drizzle of Jack Daniel’s syrup. For a breakfast-inspired dish, layer it in a skillet with eggs and hash browns. Use it as a topping for loaded nachos or baked potatoes, adding a smoky flair. Even incorporate it into stuffed bell peppers or as a filling for crispy empanadas. These ideas transform the classic pulled pork into a standout centerpiece for any meal, ensuring a memorable dining experience.
Variations and Substitutions
Variations and Substitutions
Explore substitutions like using Tennessee whiskey or bourbon for a unique twist. Try Dr. Pepper for a sweeter flavor or opt for low-sugar BBQ sauce alternatives.
Alternative Whiskey Options
For those looking to experiment, bourbon or Tennessee whiskey can substitute Jack Daniel’s, offering distinct flavor profiles. Bourbon adds a sweeter, richer taste, while Tennessee whiskey provides a smoother, slightly sweeter note. Both options complement the pork’s tenderness and pair well with BBQ sauce. These alternatives allow for customization, making the dish adaptable to various preferences while maintaining the core whiskey-infused flavor that defines Jack Daniel’s Pulled Pork.
Dietary Substitutions
For a gluten-free option, use gluten-free BBQ sauce. Vegetarians can substitute pork with jackfruit or mushrooms for a similar texture. To reduce sodium, opt for low-sodium BBQ sauce or homemade versions. For a sweeter twist without added sugars, try sugar-free BBQ sauce. These substitutions ensure the dish remains flavorful while catering to various dietary needs, making Jack Daniel’s Pulled Pork accessible to everyone.
Spice and Seasoning Adjustments
Customize the flavor by adjusting spices like paprika, garlic, and chili powder. For a spicier twist, add cayenne or red pepper flakes. To enhance smokiness, incorporate smoked paprika or chipotle peppers. For a sweeter profile, increase brown sugar or honey in the BBQ sauce. Experiment with herbs like thyme or rosemary for a savory twist. Adjust seasoning during marinating or slow cooking for deeper flavor penetration. These tweaks allow you to tailor the dish to your taste preferences while maintaining the iconic Jack Daniel’s Pulled Pork essence.

Tips for Different Occasions
Jack Daniel’s Pulled Pork is perfect for parties, family gatherings, or casual meals. Serve on buns, in tacos, or with unique twists like pancakes and JD syrup for a memorable touch.
Party and Event Planning
Jack Daniel’s Pulled Pork is a crowd-pleaser for parties, BBQs, and casual gatherings. Serve it on buns, in tacos, or with unique twists like pancakes and JD syrup. Its rich, smoky flavor pairs perfectly with sides like coleslaw or baked beans. For larger events, prepare it in advance using a slow cooker or smoker, ensuring tender, flavorful meat. Offer toppings like pickles, onions, or extra BBQ sauce for customization. This dish is easy to scale and serves as a hearty, satisfying option for any celebration.
Family Meal Ideas
Jack Daniel’s Pulled Pork is a versatile and delicious centerpiece for family meals. Serve it on soft buns with coleslaw for a classic comfort food dinner. For a fun twist, use it in tacos or as a topping for baked potatoes. Kids and adults alike will love the tender, flavorful meat. Pair it with simple sides like corn on the cob or roasted vegetables for a balanced meal. Leftovers can be easily reheated, making it a practical choice for busy families. Its rich, smoky flavor ensures everyone leaves the table satisfied.
Holiday Specials

Jack Daniel’s Pulled Pork adds a rich, smoky flavor to holiday gatherings. Serve it as sliders on festive buns for a crowd-pleasing appetizer or as a hearty main dish. Pair it with seasonal sides like cranberry coleslaw or roasted root vegetables for a holiday twist. The dish is also perfect for holiday parties, as it can be prepared in advance and reheated easily. Its bold, whiskey-infused flavor makes it a standout for special occasions, ensuring your holiday meals are memorable and delicious.
Expert Tips and Tricks
Shred pork gently with forks to maintain texture. Reduce sauce for thickness. Enhance flavor by adding wood chips during cooking for a smokier taste.
Shredding Techniques
The key to perfect pulled pork is gentle shredding. Use two forks to pull apart the meat in large, tender strands, avoiding over-shredding. For easier shredding, remove excess fat before pulling. This ensures a cleaner texture and prevents chewy bits. After slow cooking, the pork should be so tender it practically falls apart. Shred while the meat is still warm for the best results. This method retains moisture and flavor, making every bite juicy and delicious.
Sauce Reduction for Thickness
To achieve a thicker, richer sauce, reduce the Jack Daniel’s BBQ sauce by simmering it on low heat until it reaches about one-third of its original volume. This intensifies the flavors and creates a velvety texture that coats the pork perfectly. After shredding the meat, toss it in the reduced sauce, ensuring every strand is evenly coated. This step enhances the overall flavor profile and adds a satisfying tanginess to the dish, making it irresistibly delicious.
Enhancing Flavor with Wood Chips
Adding wood chips to your Jack Daniel’s Pulled Pork recipe infuses a deep, smoky flavor. Soak wood chips like hickory or apple in water or whiskey for 30 minutes. Place them in your smoker or grill to create a rich, aromatic smoke. This method complements the whiskey notes in the BBQ sauce, adding complexity to the dish. The slow-cooked pork absorbs the smoky undertones, resulting in a bold, savory flavor profile that elevates the overall taste experience, making it perfect for BBQ enthusiasts seeking authentic, smoky pulled pork.
Budget and Cost-Effectiveness
Jack Daniel’s Pulled Pork is budget-friendly, with affordable ingredients like pork shoulder and BBQ sauce. A 750g portion serves 4 generously, making it cost-effective for gatherings or meals.
Affordability of Ingredients
The ingredients for Jack Daniel’s Pulled Pork are budget-friendly, with pork shoulder being a cost-effective cut. A 750g portion, priced around £2.50/kg, generously serves four. Common items like onions, garlic, and cola keep costs low. Jack Daniel’s BBQ sauce adds flavor without breaking the bank, making this dish affordable for families or large gatherings. The recipe’s simplicity ensures minimal expense while delivering rich, smoky flavors, perfect for casual meals or events.
Portion Control and Leftovers
A 750g pork shoulder typically yields four generous servings, making it ideal for family meals or gatherings. Leftovers can be refrigerated or frozen for later use, maintaining their tender texture and rich flavor. Repurpose leftover pulled pork in enchiladas, sandwiches, or as a topping for nachos. This versatility ensures minimal waste and maximizes value, allowing you to enjoy the dish in multiple ways without compromising quality or taste.
Nutrition and Health Considerations
Jack Daniel’s Pulled Pork offers lean protein from pork shoulder, though BBQ sauce adds sugar and sodium. Balance with healthier sides for a nutritious meal option.
Nutritional Overview
Jack Daniel’s Pulled Pork is a hearty dish rich in protein from the pork shoulder, with approximately 25-30 grams per serving. It contains moderate carbohydrates, primarily from the BBQ sauce, and some fat, mostly from the pork. A typical serving (about 3 ounces) ranges from 250-350 calories, depending on sauce quantity. The dish provides essential vitamins like niacin and vitamin B12, but the BBQ sauce adds sugars and sodium. Balancing the meal with sides like vegetables or whole grains can enhance its nutritional profile while keeping it flavorful and satisfying.
Healthier Alternatives
For a healthier twist on Jack Daniel’s Pulled Pork, consider reducing the amount of BBQ sauce to lower sugar content. Opt for a low-sugar or homemade BBQ sauce with natural ingredients. Use leaner cuts of pork, such as tenderloin, to minimize fat. Incorporate vegetables like onions and garlic for added fiber and flavor without extra calories. Grilling or baking instead of frying can also make the dish lighter. Pairing the pork with whole-grain buns or a fresh salad provides a more balanced meal option while maintaining the rich, smoky flavor.

Storage and Reheating
Store pulled pork in an airtight container in the fridge for up to 3 days. Reheat gently in the microwave, oven, or stovetop on low heat to maintain moisture and flavor.
Proper Storage Methods
To maintain freshness, store Jack Daniel’s Pulled Pork in an airtight container or ziplock bag, pressing out excess air. Keep refrigerated at 40°F (4°C) or below for up to 3 days. For longer storage, freeze at 0°F (-18°C) for up to 3 months. Ensure the pork cools to room temperature before refrigerating or freezing to prevent bacterial growth. When reheating, use low heat to retain moisture and flavor. Proper storage preserves the tender texture and rich, smoky whiskey-infused flavor of the dish.
Reheating Techniques
Reheat Jack Daniel’s Pulled Pork using low heat to retain moisture and flavor. For oven reheating, place the pork in a covered dish with a splash of sauce or water at 275°F (135°C) for 20-30 minutes. In a slow cooker, reheat on low for 1-2 hours, adding a bit of sauce if needed. On the stovetop, warm over low heat with a little sauce, stirring occasionally. Each method ensures the pork stays tender and the whiskey BBQ flavor remains vibrant, perfect for serving fresh-tasting pulled pork anytime.
Conclusion
Jack Daniel’s Pulled Pork offers a delicious blend of tender meat and rich, whiskey-infused flavors, perfect for any occasion and sure to satisfy your taste buds.
Final Thoughts
Jack Daniel’s Pulled Pork is a crowd-pleasing dish that combines tender meat with rich, smoky flavors. Its versatility makes it perfect for sandwiches, tacos, or even unique twists like pancakes with Jack Daniel’s syrup. Whether for casual gatherings or special occasions, this recipe delivers a delicious, budget-friendly meal. The ease of preparation and the depth of flavor from the whiskey-infused BBQ sauce ensure it’s a standout choice for any cook. Experiment with serving styles and enjoy the hearty, satisfying taste of this Southern-inspired classic.
Encouragement to Experiment
Don’t be afraid to get creative with Jack Daniel’s Pulled Pork! Try different cooking methods like slow cookers, ovens, or smokers for varied textures. Experiment with unique serving ideas, such as stuffed baked potatoes, tacos, or even pancakes with Jack Daniel’s syrup. Add personal touches like extra spices, wood chip smoke, or alternative BBQ sauces. This recipe is a versatile canvas, so feel free to adapt it to your taste preferences and explore new flavors. The key is to have fun and make it your own!