calisthenics workout pdf

Discover a comprehensive guide to bodyweight training with our Calisthenics Workout PDF. Perfect for all fitness levels, it offers structured plans, exercises, and tips to build strength and flexibility. Download, print, and start your journey to a leaner, stronger you with minimal equipment needed!

What is Calisthenics?

Calisthenics is a form of exercise using body weight and gravity as resistance to build strength, flexibility, and coordination. Originating from the Greek words “kalos” (beauty) and “sthenos” (strength), it requires minimal equipment, making it accessible to all fitness levels. Through movements like push-ups, squats, and lunges, calisthenics enhances physical fitness without gym memberships, ideal for home or outdoor training. It promotes overall wellness, muscle growth, and improved mobility, suitable for beginners and advanced athletes alike.

Benefits of Calisthenics

Calisthenics offers numerous benefits, including improved strength, flexibility, and coordination. It enhances muscle growth, boosts endurance, and promotes overall wellness. This cost-effective workout requires minimal equipment, making it accessible anywhere. Suitable for all fitness levels, calisthenics helps build functional strength, enhancing daily activities and sports performance. It also improves mental discipline and reduces injury risk compared to heavy weightlifting. Regular practice leads to a lean, toned physique and better overall health.

Why Use a Calisthenics Workout PDF?

A Calisthenics Workout PDF provides a structured, portable, and customizable plan for bodyweight training. It offers clear exercise routines, sets, reps, and rest periods, making it easy to follow anywhere. The PDF allows for personalization based on fitness levels and goals, with options to adjust exercises. It also includes space for tracking progress, celebrating milestones, and staying motivated. Accessible on phones or in print, it’s a cost-effective tool for consistent and effective training, eliminating the need for special apps or equipment.

Structured Calisthenics Workout Programs

Explore organized workout plans designed for progress, from 12-week and 30-day routines to 6-week beginner programs. Tailored for all fitness levels, these plans promote strength, flexibility, and consistency.

12-Week Calisthenics Workout Plan

This comprehensive 12-week program is designed to help you build a strong, aesthetic physique through organized bodyweight exercises. Whether you’re a beginner or intermediate, the plan includes progressive workouts to enhance strength, muscle mass, and flexibility. Each phase focuses on different muscle groups, ensuring balanced development. With detailed exercise schedules and tips for modification, this plan is perfect for those committed to consistent training and visible results. Stay motivated and track your progress for a transformative fitness journey. Download the PDF to get started today!

30-Day Calisthenics Workout Routine

Kickstart your fitness journey with this 30-day calisthenics program, designed to gradually build endurance and muscle. Perfect for all fitness levels, it includes exercises like push-ups, squats, lunges, and planks. Each week focuses on different muscle groups, ensuring balanced growth. With a clear schedule and progression tips, this routine helps you stay consistent. Download the PDF to access daily workout plans, nutrition tips, and motivation to keep you on track for the full month. Achieve noticeable results in just four weeks!

6-Week Calisthenics Workout Plan for Beginners

Begin your fitness journey with this 6-week calisthenics plan, tailored for newcomers; Each week introduces foundational exercises like push-ups, squats, and lunges, gradually increasing in intensity. The program focuses on building strength, balance, and flexibility. With clear instructions and progression tips, it helps you stay motivated. Perfect for home or outdoor workouts, this PDF guide ensures a smooth transition into a consistent exercise routine. Start your transformation today!

Progression and Scaling in Calisthenics

Master the art of progression and scaling in calisthenics. Increase reps, sets, or modify exercises to suit your fitness level. Achieve strength and flexibility with minimal equipment, ensuring sustained growth and long-term results.

How to Progress in Calisthenics Exercises

Progressing in calisthenics involves gradually increasing difficulty. Start with basic exercises like push-ups, then move to more challenging variations such as decline or single-arm push-ups. Incorporate plyometric movements, like burpees or jump squats, to enhance explosiveness. As strength improves, add advanced techniques such as muscle-ups or handstand push-ups. Consistency and patience are key to mastering each progression step and achieving long-term fitness goals. Always focus on proper form to avoid injury and ensure effective muscle engagement.

Scaling Exercises for Different Fitness Levels

Calisthenics exercises can be scaled to suit various fitness levels. Beginners can modify push-ups to knee push-ups or wall push-ups, while intermediates can add plyometric movements like claps or depth. Advanced individuals can progress to single-arm push-ups or handstand variations. Each variation maintains the exercise’s core benefits but adjusts difficulty, ensuring safe and effective progression. Proper form is essential at every level to prevent injury and maximize results.

Downloading and Using the Workout PDF

Easily download the free Calisthenics Workout PDF, print it, or access it on your phone. Stay organized, track progress, and stay motivated with this handy guide.

How to Download the Calisthenics Workout Guide

Downloading the Calisthenics Workout Guide is straightforward. Visit the official website, click the download link, and save the PDF to your device. Open, print, or access it on your phone. Ensure you have a stable internet connection for a smooth download. The guide is free and instantly available, providing you with a structured plan to follow anytime, anywhere. Start your fitness journey with just a few clicks!

Customizing the Workout Plan for Personal Goals

Tailor your Calisthenics Workout Plan to suit your fitness objectives. Modify exercises, sets, or reps based on your current fitness level and goals. For strength, increase reps or intensity. For endurance, focus on higher sets with shorter rests. Replace or add exercises to target specific muscle groups. Adjust the schedule to fit your lifestyle, ensuring consistency and progress. Personalization enhances effectiveness, keeping workouts engaging and aligned with your aspirations.

Key Exercises and Routines

Tailor your calisthenics program by adjusting exercises, sets, reps, and intensity to match your fitness goals. Focus on strength, endurance, or flexibility by modifying routines. Swap exercises to target specific muscles or address weaknesses. Adjust rest periods and volume based on your schedule and progress. Personalization ensures the plan remains challenging and effective, keeping you motivated and on track to achieve your desired results.

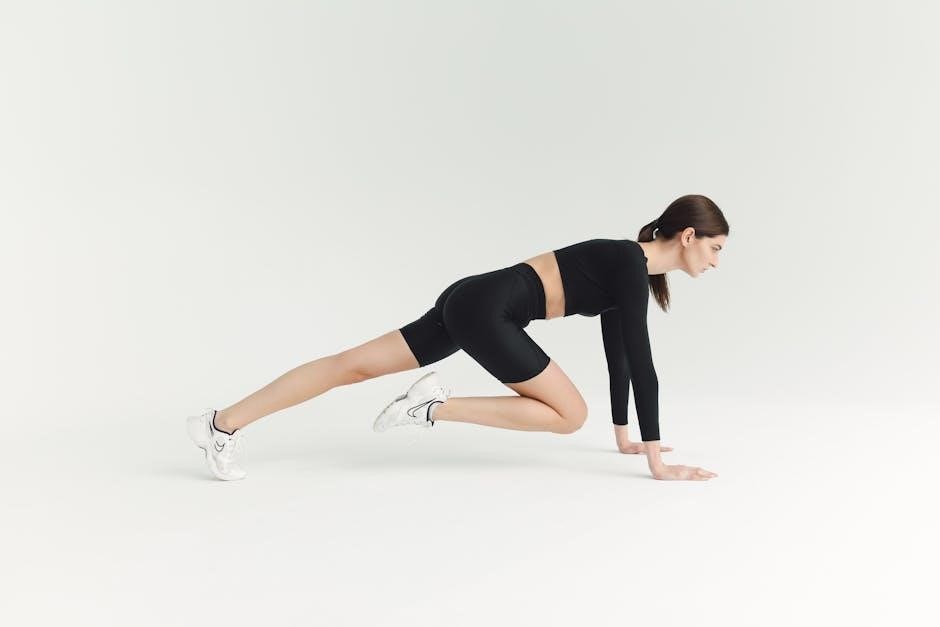
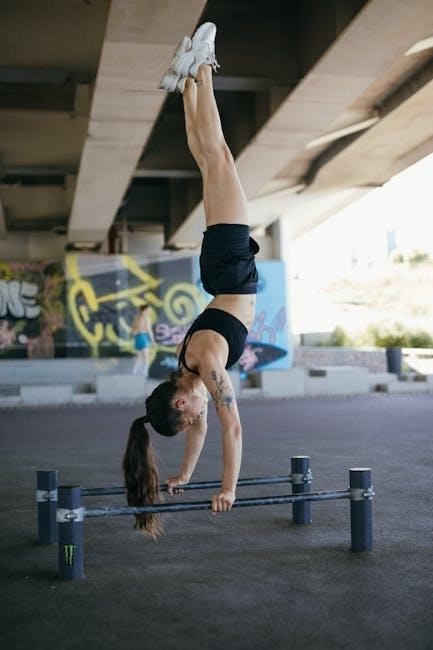
Core Calisthenics Exercises for Full-Body Workout

Master essential exercises like push-ups, pull-ups, squats, lunges, planks, and dips to target all muscle groups. These movements build strength, endurance, and flexibility. Push-ups enhance chest and arm strength, while pull-ups improve upper body power. Squats and lunges work the legs and core, ensuring a balanced workout. Planks and dips target the core and triceps, rounding out the full-body approach. These exercises form the foundation of any effective calisthenics routine, promoting overall fitness and athleticism.

Warm-Up and Cool-Down Routines

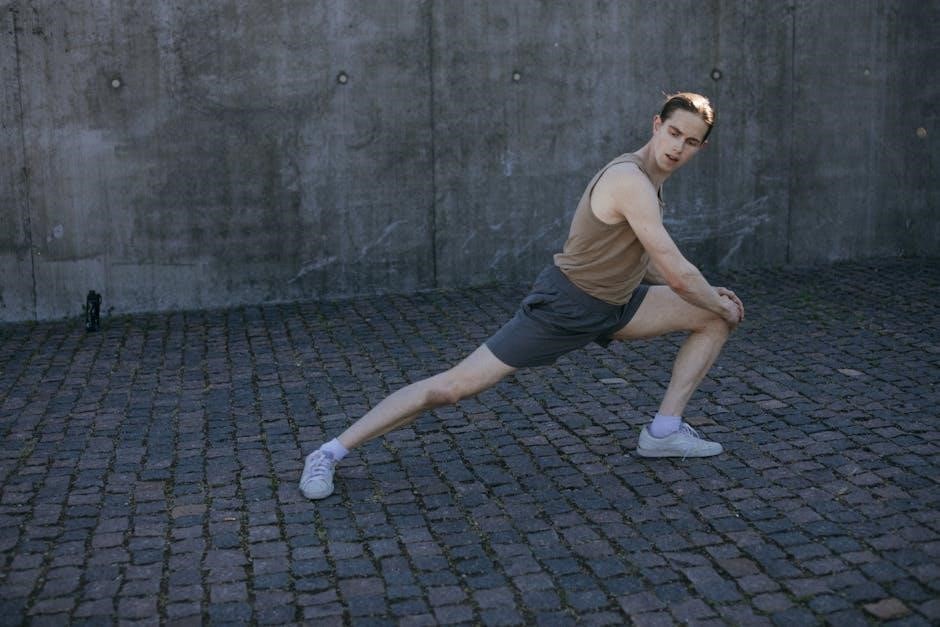
A proper warm-up prepares your body for exercise, reducing injury risk. Start with arm circles, standing twists, and wrist circles. Add dynamic stretches like leg swings and high knees. Finish with light cardio like jumping jacks. Post-workout, cool down with static stretches, such as hamstring and chest stretches, to improve flexibility and aid recovery. A well-structured warm-up and cool-down enhance performance and support overall fitness goals.

Nutrition and Recovery

Nutrition and recovery are vital for optimal results in calisthenics. Fuel your body with a balanced diet, stay hydrated, and prioritize rest and sleep to support muscle growth and repair.

Importance of Nutrition in Calisthenics

Nutrition plays a critical role in calisthenics, as it directly impacts energy levels, recovery, and overall performance. A balanced diet rich in proteins, carbohydrates, and healthy fats ensures muscle growth and repair. Proper hydration and timing of meals are essential to fuel workouts and support physical demands. Visit www.nutrition.org for tailored meal plans and expert advice to optimize your calisthenics journey.

Recovery Tips for Optimal Results

Proper recovery is essential for maximizing calisthenics progress. Ensure adequate sleep, incorporate rest days, and prioritize stretching to prevent muscle soreness. Active recovery, such as yoga or swimming, can enhance flexibility and reduce stress. Maintain a balanced diet rich in proteins and carbohydrates to aid muscle repair. Stay hydrated, and consider using foam rollers for muscle relief. Listen to your body to avoid overtraining, and schedule recovery days to allow your muscles to rebuild. Visit ACE Fitness for more recovery tips.

Motivation and Consistency

Stay motivated by tracking progress and celebrating milestones. Consistency is key to seeing results. Join a calisthenics community for support and accountability. Visit ACE Fitness for tips on maintaining motivation.

Staying Motivated During the Workout Plan

Staying motivated requires setting achievable goals and celebrating small victories. Track your progress, reward milestones, and visualize your success. Find a workout buddy or join a community for support. Celebrate progress, no matter how small, to stay driven. Remember, consistency and patience are key to long-term results. Stay committed, and you’ll see transformation over time.

Tracking Progress and Celebrating Milestones

Regularly track your workouts, noting exercise progress and strength gains. Celebrate milestones like increased reps or mastering new moves. Use a workout log or mobile app to monitor improvements. Acknowledge achievements with non-food rewards or sharing progress with friends. This positive reinforcement keeps motivation high and encourages consistency, helping you stay committed to your fitness journey with visible results.

Equipment and Setup

Calisthenics requires minimal equipment, often just a pull-up bar, parallel bars, or a mat. Set up a dedicated workout space at home with enough room to move freely and proper flooring for comfort and safety.

Minimal Equipment Needed for Calisthenics

Calisthenics requires minimal equipment, making it highly accessible. A pull-up bar, parallel bars, and a good-quality exercise mat are essentials. Resistance bands or a bench can be optional for variations. Most exercises rely on body weight, allowing you to train anywhere. This simplicity makes calisthenics cost-effective and perfect for home workouts or outdoor sessions, ensuring you can stay fit without heavy investments in equipment.

Creating a Home Workout Space

Transforming your home into a workout area is simple. Choose a spacious room with a non-slip floor, preferably wooden or rubber. Ensure good ventilation and lighting. Install a sturdy pull-up bar and consider a mirror for form checks. Clear the area of clutter and add a workout mat for comfort. This setup allows you to follow your calisthenics PDF guide effectively, making home training convenient and motivating.

Success Stories and Community

Inspiring journeys of transformation through calisthenics motivate many. The supportive community fosters accountability, shares tips, and celebrates milestones, making the fitness journey enjoyable and rewarding for everyone.

Real-Life Success Stories from Calisthenics

Real-life success stories from calisthenics inspire and motivate individuals to embrace bodyweight training. Many have achieved remarkable progress, from performing 5-10 push-ups with good form to building noticeable muscle mass and strength. These journeys highlight the effectiveness of calisthenics in transforming lives, proving that dedication and consistent effort yield impressive results. The supportive community and structured PDF guides further empower individuals to reach their fitness goals and celebrate their achievements.

Joining the Calisthenics Community for Support

Joining the calisthenics community provides invaluable support and motivation. Connect with like-minded individuals online or locally, sharing tips, advice, and encouragement. The community fosters accountability, helping you stay consistent and overcome challenges. Participate in group workouts, events, or forums to enhance your journey. Being part of this supportive network ensures you stay inspired, gain new insights, and celebrate milestones together, making your fitness journey more enjoyable and rewarding.

Embrace the transformative power of calisthenics with our workout PDF as your guide. It empowers you to build strength, flexibility, and confidence, helping you achieve your fitness vision effectively and sustainably.

Final Thoughts on the Calisthenics Workout PDF

The Calisthenics Workout PDF is an exceptional resource for anyone seeking a structured, effective fitness journey. With its comprehensive plans, progression guides, and minimal equipment requirements, it caters to all fitness levels. Whether you’re a beginner or advanced, this guide empowers you to achieve strength, flexibility, and confidence. Download it now and transform your workouts with a proven, sustainable approach to bodyweight training.

Encouragement to Start the Journey

Embrace the transformative power of calisthenics with our workout PDF. Designed for all fitness levels, it offers a clear roadmap to strength and flexibility. Start small, stay consistent, and celebrate every milestone. With minimal equipment and proven routines, this guide makes fitness accessible and rewarding. Download now, commit to your goals, and unlock a stronger, healthier you. Your fitness journey begins here—take the first step today!

zaxby’s gluten free menu pdf

Zaxby’s offers a variety of gluten-free options, including grilled chicken, salads, and wings, prepared with care for those with dietary restrictions. While they don’t provide a dedicated gluten-free menu PDF, their items are clearly marked on their website and in-store menus for easy navigation. This ensures customers with gluten sensitivities can enjoy their meals safely and confidently.

Overview of Gluten-Free Options at Zaxby’s

Zaxby’s offers a selection of gluten-free options, catering to those with dietary restrictions. While they don’t provide a dedicated gluten-free menu PDF, their menu includes items like grilled chicken, salads, and wings that are naturally gluten-free. Customers can enjoy these options by making informed choices, such as avoiding certain sauces or dressings. The restaurant prepares dishes on shared equipment, so cross-contamination is a consideration for those with severe gluten intolerance. Despite not having a certified gluten-free menu, Zaxby’s provides flexibility for diners seeking gluten-free meals, ensuring they can still enjoy flavorful and satisfying options.

Importance of Gluten-Free Dining

Gluten-free dining is essential for individuals with celiac disease or gluten sensitivity, as consuming gluten can lead to severe health issues. It ensures they can enjoy meals safely while maintaining their dietary needs. Restaurants like Zaxby’s offering gluten-free options support inclusivity and cater to diverse dietary preferences, enhancing customer satisfaction. This approach promotes awareness and accommodates health-conscious diners, providing them with more choices. By understanding the importance of gluten-free options, Zaxby’s helps create a welcoming environment for all customers.

Available Gluten-Free Items at Zaxby’s

Zaxby’s provides a range of gluten-free options, including grilled chicken, fresh salads, and select wings. Their menu accommodates dietary restrictions while maintaining flavor and variety for health-conscious diners. Customers can enjoy these items with confidence.

Gluten-Free Wings and Sauces

Zaxby’s gluten-free wings are a popular choice, offering a variety of flavors without gluten. Their sauces, such as the Sweet & Smoky and Nuclear options, are also gluten-free, enhancing the wing experience. Customers can enjoy these options confidently, knowing they cater to gluten-free dietary needs while maintaining great taste.

Gluten-Free Salads and Dressings

Zaxby’s offers a selection of gluten-free salads that cater to dietary preferences and restrictions. The Asian Zensation Zalad and other grilled chicken salads are popular choices, provided they are ordered without croutons. Customers can customize their salads to ensure they meet gluten-free requirements. Zaxby’s also provides gluten-free dressing options, such as their signature Zax Sauce, allowing for a flavorful and safe dining experience. While the restaurant does not have a certified gluten-free menu, their salads and dressings are prepared with gluten-free ingredients, making them a reliable option for those avoiding gluten. However, it’s important to note that Zaxby’s kitchen equipment is shared with gluten-containing items, so cross-contamination is possible. For guests with severe gluten intolerance, informing the staff of dietary needs is crucial to ensure proper preparation. This attention to detail helps create a safe and enjoyable meal for all customers seeking gluten-free options.

Grilled Chicken and Protein Options

Zaxby’s grilled chicken is a standout option for gluten-free diners, as it is naturally free from gluten and prepared without gluten-containing ingredients. The Grilled Chicken Sandwich can be modified to be gluten-free by omitting the bun, and it pairs well with a side salad or gluten-free dressing. Additionally, the Grilled Chicken Zalad is a popular choice, featuring grilled chicken atop a fresh mix of greens, vegetables, and toppings. Customers can further customize their meals by requesting no croutons or gluten-containing sauces. While Zaxby’s does not have a certified gluten-free menu, their grilled chicken and protein options are inherently gluten-free and offer a safe choice for those with dietary restrictions. However, due to shared kitchen equipment, there is a risk of cross-contamination with gluten. Informing the staff of gluten-free needs can help ensure proper preparation. This makes Zaxby’s grilled chicken and protein options a reliable and flavorful choice for gluten-free dining.

Gluten-Free Sides and Extras

Zaxby’s offers several gluten-free side options to complement your meal. Their coleslaw is a popular choice, made with shredded cabbage and a hint of vinegar, and is naturally gluten-free. Additionally, the fresh veggies side, featuring carrot sticks and cucumber slices, is another safe option. For those seeking something more substantial, the fries are gluten-free, though they are cooked in a shared fryer, which may pose a risk of cross-contamination for highly sensitive individuals. While Zaxby’s does not provide a dedicated gluten-free menu PDF, their sides are clearly marked on their website and in-store menus. It’s important to note that while these sides are gluten-free by ingredients, cross-contamination risks exist due to shared kitchen equipment. Always inform the staff of your dietary needs to ensure proper preparation. This makes Zaxby’s sides and extras a convenient and flavorful addition to a gluten-free meal.

Navigating the Menu Safely

Zaxby’s does not provide a dedicated gluten-free menu PDF, but their website and in-store menus clearly indicate gluten-free options. Always inform staff of dietary needs to ensure proper preparation and avoid cross-contamination risks.

How to Order Gluten-Free at Zaxby’s

When ordering gluten-free at Zaxby’s, it’s essential to communicate your dietary needs clearly to the staff. Start by asking for modifications to menu items, such as removing croutons from salads or opting for grilled chicken without ranch sauce. Choose items like wings, salads, and grilled chicken, which are naturally gluten-free. Be sure to request that your meal be prepared in a dedicated area to minimize cross-contamination. While Zaxby’s does not offer a gluten-free menu PDF, their website and in-store menus provide clear indications of gluten-free options. Always double-check with the staff about preparation methods and ingredients to ensure your meal meets your dietary requirements. By taking these steps, you can enjoy a safe and satisfying gluten-free dining experience at Zaxby’s.

Cross-Contamination Precautions

Zaxby’s takes steps to accommodate gluten-free dietary needs, but cross-contamination remains a concern due to shared equipment and facilities. To minimize risks, inform staff of your gluten-free requirements when ordering. Request that your meal be prepared in a dedicated area to avoid exposure to gluten-containing ingredients. Avoid items like croutons in salads or sauces that may contain gluten. While Zaxby’s does not provide a gluten-free menu PDF, their website and in-store menus highlight gluten-free options, helping you make informed choices. Always double-check with staff about preparation methods and ingredient sourcing to ensure your meal is safe; By taking these precautions, you can enjoy a gluten-free dining experience at Zaxby’s with confidence.

soleil heater manual

Welcome to the Soleil Heater Manual․ This guide provides essential information for safe and effective use, covering installation, operation, and maintenance․ Ensure safety and maximize efficiency․

Overview of the Soleil Heater

The Soleil Heater is a utility heater designed for safe and efficient heating․ It operates at 110 to 120 V, making it suitable for standard household use․ Priced between $25 to $50, it offers affordability without compromising performance․ Available models include the Eurom Mon Soleil 601 WiFi and the PTC-910B ceramic fan heater․ The Quartz Infrared Heater with Remote Control (Model PH-91E-WD) is another option․ The user manual, available for download in PDF, provides detailed instructions․ Ensure proper ventilation and keep combustible items away․ Adjust the temperature control panel as needed for optimal heating․ Always follow the manual for safe operation․

Key Features and Benefits

The Soleil Heater offers advanced features for efficient and safe heating․ It includes models like the PTC-910B ceramic fan heater and the Quartz Infrared Heater with remote control․ These units are designed for portability and ease of use, with features like adjustable temperature controls and timers․ The Eurom Mon Soleil 601 WiFi model adds smart functionality․ Energy efficiency and reliability are key benefits, ensuring consistent heating while minimizing energy consumption․ Safety certifications, such as Intertek listing, provide peace of mind․ Detailed manuals and guides are available for optimal performance and troubleshooting․

Safety Precautions and Guidelines

Always follow the manual’s guidelines to ensure safe operation․ Keep the heater away from flammable materials and maintain proper ventilation․ Supervise children and pets during use․

General Safety Instructions

Always read the manual before using the Soleil heater․ Ensure the unit is placed on a stable surface, away from flammable materials․ Keep children and pets supervised․ Avoid overheating by maintaining a safe distance from combustible items․ Never operate the heater near water or in humid environments․ Plug directly into a grounded outlet rated for 110-120V․ Avoid using damaged cords or malfunctioning units․ If unusual odors or smoke appear, turn off immediately and ventilate the area․ Follow all safety guidelines to prevent accidents and ensure reliable performance․

Important Warnings and Restrictions

Never modify the heater or use it for purposes other than intended․ Operate only at the specified voltage (110-120V)․ Do not use if the cord or plug is damaged․ Keep the heater away from water and moist environments․ Avoid placing combustible materials within 3 feet․ Ensure proper ventilation to prevent carbon monoxide buildup․ Do not leave the heater unattended or running overnight․ Supervise children and pets during operation․ Follow all local safety regulations and manufacturer guidelines․ Failure to comply may result in fire hazards, electric shock, or injury․

Installation and Setup

Plug the heater into a suitable outlet․ Position it on a flat, stable surface, ensuring at least 3 feet of clearance from combustible materials․

Step-by-Step Installation Guide

Welcome to the installation guide for your Soleil Heater․ Begin by carefully unpacking the unit and ensuring all components are included․ Place the heater on a flat, stable surface, away from combustible materials․ Plug the device into a suitable 120V power outlet, ensuring proper ventilation․ For models with additional features, such as timers or remote controls, refer to the specific instructions provided․ Always follow the manufacturer’s guidelines to ensure safe and optimal performance․ If unsure, consult the manual or contact customer support for assistance․

Positioning and Placement Recommendations

Position the Soleil Heater on a stable, flat surface, ensuring it is at least 3 feet away from combustible materials like curtains or furniture․ Avoid placing it in damp environments or near water sources․ Keep the heater away from direct sunlight and flammable liquids․ Maintain a clear area around the unit to ensure proper airflow and heat distribution․ Do not place it in confined spaces or near pets and children to prevent accidental contact․ Follow these guidelines to ensure safe and efficient operation of your Soleil Heater․

Operating Instructions

Plug the Soleil Heater into a suitable outlet, ensuring proper ventilation․ Adjust settings and use the timer as needed․ Keep combustible items away and follow safety guidelines to prevent hazards․

How to Turn On and Use the Heater

To operate the Soleil Heater, first ensure it is placed on a stable, flat surface․ Plug the heater into a suitable 120V outlet, keeping it away from water and flammable materials․ Turn on the power switch located on the unit or remote control․ Use the temperature control panel to adjust heat settings or activate the fan-only mode for circulating air․ For models with a timer, set the desired duration to automate operation․ Always monitor the heater during use, especially around children or pets․ Refer to the manual for specific model instructions, such as the PTC-901 or PH-91E-WD, to ensure optimal performance and safety․

Adjusting Settings and Using the Timer

To adjust settings on your Soleil Heater, use the temperature control panel to select your desired heat level․ For models with a timer, press the TIMER button and use the +/- buttons to set the operating duration․ The remote control, available on select models like the PH-91E-WD, allows convenient adjustments․ Ensure the room is well-ventilated and free from flammable materials․ Always turn off the heater when leaving the room or when the timer expires․ Refer to your specific model’s instructions for advanced features, such as the PTC-901’s fan-only mode, to optimize comfort and energy use․

Maintenance and Care

Regularly clean the heater with a soft cloth and ensure proper ventilation for efficiency and safety․ Check air vents for blockages to prevent issues daily․

Cleaning and Upkeeping the Heater

Regular maintenance ensures optimal performance and safety․ Turn off and unplug the heater before cleaning․ Use a soft, dry cloth to wipe the exterior, avoiding harsh chemicals․ For tough stains, dampen the cloth slightly but ensure no moisture enters internal components․ Clean air vents and grills to prevent dust buildup, which can reduce efficiency․ Check for blockages in the heating element and vents․ After cleaning, allow the heater to dry completely before reuse․ Store the heater in a dry, cool place when not in use to prevent damage․ Regular upkeep helps maintain efficiency and prolongs lifespan․

Troubleshooting Common Issues

If the heater does not turn on, check the power supply and ensure it is properly plugged in․ Verify the circuit breaker has not tripped․ For unusual odors or smoke during initial use, this is normal due to factory materials․ Allow it to burn off in a well-ventilated area․ If the heater overheats, turn it off immediately and ensure proper clearance from flammable materials․ For noisy operation, check for blockages in vents or grills and clean as needed․ Consult the manual for specific solutions or contact customer support if issues persist․

Energy Efficiency and Performance

The Soleil Heater is designed for optimal energy efficiency, using advanced technology to provide consistent warmth while minimizing power consumption․ Regular maintenance ensures peak performance․

Maximizing Energy Efficiency

To maximize energy efficiency with your Soleil Heater, adjust the thermostat to the lowest comfortable setting and use the timer function to limit operation hours․ Regularly clean the heater to ensure optimal airflow and performance․ Proper placement, away from drafts and combustible materials, also enhances efficiency․ By following these guidelines, you can enjoy consistent warmth while reducing energy consumption and lowering utility bills․ Always refer to the manual for specific energy-saving tips tailored to your model․

Understanding the Heater’s Performance

Your Soleil Heater is designed to provide efficient and reliable warmth․ It operates by converting electrical energy into heat, which is then distributed evenly․ Models like the PTC-910B ceramic heater and the Quartz Infrared Heater with remote control offer advanced features for consistent performance․ The heater’s performance is optimized when used in well-ventilated areas, away from flammable materials․ Always follow the manual’s guidelines to ensure proper operation․ During initial use, a slight odor or smoke may occur, which is normal․ Regular maintenance, as outlined in the manual, helps maintain its efficiency and longevity․

Final Tips for Safe and Effective Use

Always follow the guidelines outlined in this manual to ensure safe and efficient operation․ Keep the heater away from flammable materials and out of reach of children․ Avoid overheating by maintaining a safe distance from combustible items․ Use the heater only on a stable, flat surface and plug it directly into a wall outlet․ Never leave the heater unattended or running for extended periods․ Regularly inspect the unit for damage and clean it as recommended․ If you notice unusual odors or smoke, discontinue use and contact a professional․ By adhering to these tips, you can enjoy safe and effective heating․

Where to Find Additional Resources

For further assistance, download the official Soleil Heater Manual from the manufacturer’s website or authorized retailers․ Visit the Soleil support page for detailed guides, troubleshooting tips, and FAQs․ Contact customer service for specific inquiries or concerns․ Additional resources, including instructional videos and user forums, can be found online․ Ensure all materials are genuine and approved by Soleil to maintain safety and warranty compliance․ Refer to trusted sources for accurate information to optimize your heater’s performance and resolve any operational issues effectively․

paw patrol invitation templates free download pdf

Paw Patrol invitation templates offer a fun and easy way to create personalized party invites. Available as free downloads in PDF format, these templates feature beloved characters and customizable details, making party planning a breeze for parents.

Why Paw Patrol Invitations Are Popular

Paw Patrol invitations are incredibly popular due to the global appeal of the Paw Patrol franchise, which is loved by children and parents alike. These templates are perfect for themed birthday parties, allowing kids to feel like part of the Adventure Bay team. The vibrant designs, featuring characters like Chase, Marshall, and Skye, instantly capture the excitement of the show. Parents appreciate how easy it is to customize these templates with their child’s name, age, and party details. Additionally, the availability of free downloadable PDFs makes them accessible to everyone, saving time and money. The combination of convenience, personalization, and beloved characters ensures Paw Patrol invitations remain a top choice for kids’ parties. Their popularity also stems from their versatility, as they can be printed or shared digitally, catering to both traditional and modern party planning needs.

Where to Find Free Paw Patrol Invitation Templates

Free Paw Patrol invitation templates are widely available online, making it easy for parents to find and download them. Popular platforms like Canva, Etsy, and Pinterest offer a variety of customizable designs. Websites such as birthdayinvitations.online and Ellie Rose Party Designs provide editable PDF templates that can be downloaded instantly. Additionally, marketplaces like Etsy offer unique, handmade designs that can be personalized to match your party theme. Many of these templates are available for free, with options to customize details like names, dates, and party information. Some websites also offer bundles that include matching decorations, banners, and thank-you cards. These resources are perfect for parents looking to create professional-looking invitations without the hassle and expense of hiring a designer. With just a few clicks, you can download, edit, and print your Paw Patrol invitations, ensuring your child’s party stands out.

How to Download and Edit Paw Patrol Templates

Paw Patrol templates are easily downloadable as free PDFs and can be edited using software like Adobe Acrobat. Customize details like names, dates, and colors effortlessly to create personalized invitations for your event.

Step-by-Step Guide to Downloading Templates

Downloading Paw Patrol invitation templates is a straightforward process. First, visit a trusted website offering free PDF templates. Click the “Download” button, usually labeled clearly. Choose a location on your device to save the file. Once downloaded, open the PDF using Adobe Acrobat or a compatible editor to customize details. Enter your party information, such as date, time, and location, using editable fields. Save your changes and print the invitations on cardstock for a professional look. Some templates also allow digital sharing via email or messaging apps. Ensure you have the necessary software installed to avoid any issues during editing.

Customizing Your Paw Patrol Invitation

Customizing your Paw Patrol invitation is simple and fun. Most free PDF templates are editable, allowing you to add personal details like your child’s name, party date, time, and location. Use Adobe Acrobat or similar software to fill in the fields. Many templates also let you change colors or add photos to match your party theme. Choose your favorite Paw Patrol character to feature prominently on the design. For a personal touch, include a special message or a cute illustration of your child’s favorite pup. Once customized, save the file and print it on high-quality paper for a professional look. You can also share the digital version via email or messaging apps for convenience. With these templates, creating a personalized and engaging invitation is quick and effortless, ensuring your party stands out.

Features of Paw Patrol Invitation Templates

Paw Patrol invitation templates feature customizable text, vibrant character images, and playful design elements. They are free, editable PDFs, perfect for creating personalized invites with themes and colors that match your celebration.

Design Elements of Paw Patrol Invitations

Paw Patrol invitation templates are designed with vibrant character images, signature color schemes, and themed backgrounds that bring Adventure Bay to life. They often feature beloved characters like Chase, Marshall, and Skye, making them instantly recognizable to fans. The templates include customizable text boxes to input party details, along with playful fonts and paw print icons that align with the show’s aesthetic. Many designs incorporate action-packed scenes or rescue mission themes, adding an exciting touch for kids. The use of bright colors like blue, red, and yellow ensures the invitations are eye-catching and energetic. Additionally, some templates include fun phrases like “Adventure Bay Awaits!” to set the tone for the celebration. These design elements create a cohesive and engaging look that resonates with both children and parents, making the invitations a perfect start to a Paw Patrol-themed party.

Customization Options for Personalization

Paw Patrol invitation templates offer extensive customization options, allowing parents to tailor every detail to their child’s preferences. Users can edit text fields to include the birthday child’s name, party date, time, location, and a personalized message. Many templates provide multiple character options, enabling the selection of the child’s favorite pup to feature prominently. Color schemes can be adjusted to match party themes, while fonts and layouts can be tweaked for a unique look; Some templates also include spaces for photos, allowing families to add a personal touch. Additionally, interactive PDFs let users input custom details directly before printing or sharing digitally. These customization options ensure that each invitation reflects the child’s personality and the party’s unique style, making the process both fun and efficient for parents.

Using Paw Patrol Templates for Party Planning

Paw Patrol templates simplify party planning with customizable designs and decoration ideas. They help create themed parties, ensuring a cohesive and engaging celebration that excites both kids and parents alike every time.

Tips for Matching Invitations to Party Themes

To ensure your Paw Patrol invitations align perfectly with your party theme, start by selecting a template that reflects the party’s central idea, such as Adventure Bay or a specific character’s mission. Use the signature colors of Paw Patrol, like blue, red, and yellow, to maintain consistency. Incorporate themed elements like badges, paw prints, or character illustrations to enhance the design. Consider the age and preferences of the birthday child when customizing the invitation. For a digital theme, opt for editable PDFs that can be shared online, while printable versions are ideal for physical distribution. Match the invitation’s tone to the party’s mood, whether it’s adventurous, playful, or festive. Finally, coordinate the design with other party materials, such as banners and decorations, to create a cohesive and immersive celebration. This attention to detail will make the invitation a perfect preview of the fun to come.

How to Share Digital Invitations

Sharing digital Paw Patrol invitations is convenient and eco-friendly. Once you’ve customized your template, save it as a high-quality PDF or JPG file. You can send it via email or messaging apps like WhatsApp or Facebook Messenger. For a more modern approach, upload the invitation to social media platforms such as Instagram or Facebook, creating an event page to share it with guests. If you’re using digital invitation platforms like Evite or Canva, they offer direct sharing options with tracking features to monitor RSVPs. Additionally, some templates allow you to share invitations directly from the editing software. Ensure the file format is compatible with the platform you choose and that the design looks sharp on both mobile and desktop screens. This method saves time and allows guests to respond quickly, making it an efficient way to manage your party planning.

Inspiration and Ideas

Paw Patrol invitation templates inspire creativity with customizable designs featuring your child’s favorite pups. Explore themed ideas, from Adventure Bay to jungle adventures, and pair them with matching decorations for a cohesive party look.

Creative Ways to Use Paw Patrol Invitations

Paw Patrol invitations can be creatively used beyond traditional party invites. Use them as customizable thank-you cards or decorate them with photos of your child’s favorite pups. Print them on sturdy cardstock to create keepsakes or incorporate them into DIY party decorations, such as garlands or banners. For digital invites, share them via WhatsApp or email with animated elements to make them more engaging. Additionally, pair the invitations with themed party favors, like Paw Patrol stickers or activity books, to create an immersive experience; You can also use the templates to design matching cupcake toppers or party signs, ensuring a cohesive look for the celebration. These versatile templates allow parents to express their creativity while making the party planning process fun and stress-free. They’re perfect for crafting memorable moments for both kids and adults alike!

Themed Party Ideas to Pair with Invitations

Paw Patrol invitations can be perfectly paired with themed party ideas to create an immersive experience for kids. Consider an Adventure Bay Rescue Mission theme, where decorations mimic the Paw Patrol headquarters. Use blue, red, and yellow balloons and streamers to match the pups’ signature colors. Another idea is a Pup-Tastic Obstacle Course party, where kids can participate in activities inspired by their favorite characters. For a more personalized touch, host a Pup-Themed Cake and Cupcake Decorating station with edible Paw Patrol toppers. You can also organize a Paw Patrol Scavenger Hunt, hiding pup figurines or stickers around the party area. These themes align seamlessly with the customizable invitations, ensuring a cohesive and exciting celebration. The invitations can even be designed to include a call-to-action, like “Join the Adventure!” to set the tone for the party. This approach creates a fun and engaging experience for both kids and parents.

Using free downloadable Paw Patrol invitation templates in PDF format is an excellent way to add a personal and creative touch to your child’s birthday celebration. These templates are not only cost-effective but also easy to customize, allowing parents to include essential details like date, time, and location. With a variety of designs featuring popular characters like Chase, Marshall, and Skye, these invitations can be tailored to match any party theme. Additionally, the option to edit and print them at home makes the process convenient and stress-free. Many websites offer these templates for free, ensuring accessibility for everyone. By pairing these invitations with themed party ideas and decorations, parents can create a cohesive and memorable experience for their children. Overall, Paw Patrol invitation templates are a practical and fun solution for planning a successful and enjoyable celebration.

wonders your turn practice book grade 3 answer key pdf

The Wonders Your Turn Practice Book Grade 3 Answer Key PDF is a vital resource for the McGraw-Hill Wonders reading program, offering comprehensive solutions for weekly reading selections, phonics, spelling, and grammar exercises. Designed to support teachers, parents, and students, it provides clear answers to activities, unit assessments, and progress-tracking tools, ensuring effective learning and curriculum alignment.

Overview of the McGraw-Hill Wonders Program

The McGraw-Hill Wonders program is a comprehensive reading and language arts curriculum designed to foster literacy skills in students. It integrates reading, writing, speaking, and listening through engaging stories, activities, and assessments. The program emphasizes critical thinking and comprehension, with a focus on differentiated instruction to meet diverse learning needs. Aligned with educational standards, Wonders provides teachers with structured lesson plans, resources, and tools to support effective instruction. Its research-based approach ensures that students build a strong foundation in language arts, preparing them for academic success. The program also incorporates digital components for interactive learning experiences, making it a versatile and dynamic educational resource.

Importance of the Your Turn Practice Book in Grade 3 Curriculum

The Your Turn Practice Book plays a pivotal role in the Grade 3 curriculum by reinforcing reading, writing, and language skills through interactive activities. It complements the McGraw-Hill Wonders program by providing students with hands-on practice, aligning with weekly reading selections and skills introduced in class. The book’s structured format allows students to apply their knowledge independently, building confidence and fluency. Regular use of the Practice Book helps students develop a deeper understanding of concepts, track their progress, and prepare for unit assessments. It also serves as a valuable tool for differentiated instruction, catering to various learning styles and abilities, ensuring all students have the support they need to succeed.

Structure and Content of the Your Turn Practice Book

The Your Turn Practice Book is organized into weekly reading selections, phonics, spelling, and grammar exercises, along with unit assessments to monitor student progress and understanding.

Weekly Reading Selections and Activities

The Your Turn Practice Book features engaging weekly reading selections that align with the McGraw-Hill Wonders curriculum. Each selection is accompanied by activities designed to enhance comprehension, vocabulary, and critical thinking. Students engage in exercises such as identifying main ideas, making inferences, and practicing fluency. The activities are structured to reinforce learning objectives and promote deeper understanding of the text. The Answer Key provides correct answers, enabling students, teachers, and parents to assess progress and identify areas for improvement. These weekly exercises are integral to building foundational reading skills and fostering a love for learning in Grade 3 students.

Phonics, Spelling, and Grammar Exercises

The Your Turn Practice Book includes targeted phonics, spelling, and grammar exercises tailored for Grade 3 students. These activities reinforce foundational language skills, such as decoding words, identifying word patterns, and applying grammar rules. The exercises are designed to complement the McGraw-Hill Wonders curriculum, ensuring students master essential concepts. The Answer Key provides correct responses, allowing for accurate self-assessment and immediate feedback. Regular practice with these exercises helps students build confidence and proficiency in their language abilities, preparing them for more complex literacy tasks. The structured approach ensures steady progress and a strong command of phonics, spelling, and grammar fundamentals.

Unit Assessments and Progress Tracking

The Your Turn Practice Book features unit assessments to evaluate student understanding at the end of each unit. These assessments include multiple-choice questions and short-answer tasks, aligning with the weekly reading selections. The Answer Key provides correct answers, enabling accurate grading and feedback. Regular progress tracking through these assessments helps teachers and parents identify areas where students excel or need additional support. This structured evaluation ensures continuous improvement and reinforces learning objectives. By monitoring progress, educators can tailor instruction to meet individual needs, fostering academic growth and ensuring students stay on track with the curriculum.

The Role of the Answer Key in Effective Learning

The Answer Key provides accurate solutions, enabling students, teachers, and parents to verify answers and track progress effectively. It fosters understanding and supports guided instruction.

How the Answer Key Supports Teachers and Parents

The Answer Key serves as an essential tool for teachers and parents, offering clear solutions to exercises and assessments in the Your Turn Practice Book. It provides immediate access to correct answers, enabling efficient grading and feedback. Teachers can use it to prepare lessons, identify knowledge gaps, and differentiate instruction. Parents benefit by guiding homework and reinforcing learning at home. The Answer Key aligns with the curriculum, ensuring consistency and accuracy in teaching and learning. Its structured format allows educators to track student progress effectively, making it a valuable resource for supporting academic success in the third-grade Wonders program.

Benefits of Using the Answer Key for Students

The Answer Key empowers students by providing immediate verification of their work, helping them identify strengths and areas for improvement. It fosters independent learning, allowing students to self-check assignments and understand their mistakes. This resource builds confidence by confirming correct answers and clarifying doubts. Regular use of the Answer Key helps students track their progress, stay motivated, and develop a deeper understanding of the curriculum. It also serves as a valuable study aid, preparing students for unit assessments and fostering a growth mindset. By using the Answer Key, students become more self-reliant and better equipped to succeed in the Wonders reading program.

Supplementary Resources and Materials

The Your Turn Practice Book is supported by Phonics/Spelling Reproducibles, Grammar Reproducibles, and Word Study Rotation Cards, providing additional practice and interactive learning opportunities for students.

Phonics/Spelling Reproducibles for Student Practice

The Phonics/Spelling Reproducibles are essential resources designed to reinforce weekly phonics and spelling lessons. These materials include engaging worksheets and activities tailored to Grade 3 students, focusing on word patterns, vowel sounds, and spelling rules. They align with the Wonders curriculum, ensuring consistency and targeted practice. Teachers can use these reproducibles to create interactive lessons, while students benefit from hands-on exercises that build foundational literacy skills. The reproducibles are versatile, suitable for both classroom instruction and at-home practice, making them a valuable tool for supporting student progress in phonics and spelling development throughout the year.

Grammar Reproducibles and Word Study Rotation Cards

Grammar Reproducibles and Word Study Rotation Cards complement the Wonders curriculum, offering structured activities for Grade 3 students. These resources focus on grammar fundamentals, such as sentence structure, parts of speech, and punctuation. The reproducibles provide clear, engaging exercises that enhance understanding and application. Word Study Rotation Cards introduce hands-on tasks, allowing students to explore word patterns, prefixes, suffixes, and word families. Together, these tools encourage active learning, reinforcing grammar and vocabulary skills in a dynamic and interactive manner. They are ideal for differentiated instruction, catering to varied learning styles and helping students master essential language concepts throughout the academic year.

Accessing the Wonders Your Turn Practice Book Grade 3 Answer Key PDF

The Wonders Your Turn Practice Book Grade 3 Answer Key PDF can be easily downloaded from reliable educational websites or official McGraw-Hill platforms, ensuring convenient access to verified solutions and progress tracking for students and educators.

Downloading the PDF from Reliable Sources

To ensure authenticity and quality, download the Wonders Your Turn Practice Book Grade 3 Answer Key PDF from trusted educational platforms or the official McGraw-Hill website. Avoid unverified sources to prevent incorrect or incomplete content. Many reputable sites offer free or subscription-based access to this resource. Additionally, schools or libraries may provide access through their digital portals. Always verify the publisher’s logo and copyright information to confirm authenticity. Downloading from reliable sources guarantees accurate answers and alignment with the curriculum, supporting effective teaching and learning. This ensures that both teachers and students can rely on the material for consistent progress tracking and instruction.

Navigating the Digital Version of the Answer Key

The digital version of the Wonders Your Turn Practice Book Grade 3 Answer Key PDF is designed for ease of use, with features that enhance navigation and accessibility. Users can quickly locate specific answers using the search function or by navigating through the table of contents. The PDF is fully searchable, allowing teachers and students to find keywords or unit assessments instantly. Additionally, zoom tools enable clear viewing of detailed answers. Many digital versions are also printable, making it easy to distribute answers to students or use them in classroom settings. This digital format ensures efficient access to resources, supporting both teaching and learning effectively.

Key Features of the Your Turn Practice Book

The Your Turn Practice Book offers weekly reading selections, interactive activities, and exercises in phonics, spelling, and grammar. It aligns with the McGraw-Hill Wonders curriculum, providing unit assessments and progress-tracking tools to support student learning and teacher instruction effectively.

Interactive and Engaging Reading Activities

The Your Turn Practice Book is designed with interactive and engaging reading activities that captivate young learners and promote deeper comprehension. Each weekly reading selection is accompanied by hands-on exercises, such as comprehension questions, vocabulary building tasks, and critical thinking prompts. These activities encourage students to directly interact with the text, fostering a more immersive learning experience. The book also incorporates visually appealing layouts and relatable content, making reading practice enjoyable and meaningful. By integrating varied activity types, the practice book supports diverse learning styles and helps students develop a strong foundation in reading skills. This approach ensures that learning is both effective and enjoyable for third-grade students.

Alignment with the McGraw-Hill Wonders Scope and Sequence

The Your Turn Practice Book is carefully aligned with the McGraw-Hill Wonders Scope and Sequence, ensuring a cohesive and structured learning experience. Each weekly reading selection and activity corresponds to specific skills and objectives outlined in the curriculum. The practice book mirrors the program’s scope, covering essential reading, phonics, and grammar skills in a logical progression. This alignment allows teachers to seamlessly integrate the practice book into their lesson plans, reinforcing classroom instruction and supporting students’ mastery of key concepts. The answer key further enhances this alignment by providing accurate and consistent answers, helping to track progress and ensure adherence to the curriculum’s goals.

Managing Small Groups and Differentiated Instruction

The Your Turn Practice Book supports differentiated instruction and small group management by providing targeted activities and clear answers, enabling teachers to facilitate group learning effectively.

Using the Answer Key to Facilitate Group Learning

The Answer Key is an invaluable tool for facilitating group learning, enabling teachers to verify student work and provide immediate feedback. By aligning with the curriculum, it ensures activities are understood and completed correctly. Teachers can use it to track progress, identify areas needing review, and differentiate instruction. The clear answers also empower parents to support learning at home. This resource fosters collaboration and personalized instruction, helping students grasp concepts effectively. Its structured format makes it easy to integrate into small group settings, ensuring every learner receives tailored guidance and support.

The Wonders Your Turn Practice Book Grade 3 Answer Key PDF is an essential tool for effective learning, providing clear answers and supporting progress tracking for students and educators alike.

Maximizing the Potential of the Your Turn Practice Book and Answer Key

To maximize the potential of the Your Turn Practice Book and its Answer Key, educators and parents should integrate these resources seamlessly into daily instruction. The practice book’s alignment with the McGraw-Hill Wonders curriculum ensures that students engage with materials tailored to their learning needs. By leveraging the Answer Key, teachers can efficiently assess progress, identify areas for improvement, and provide targeted support. Additionally, the PDF format allows for easy access and sharing, making it a versatile tool for both classroom and at-home learning. Regular use of these resources fosters academic growth, reinforces skills, and helps students achieve their full potential in reading and language arts.

tour du mont blanc self-guided

Embark on an unforgettable adventure along the iconic Tour du Mont Blanc, a 110-mile trek circumnavigating Western Europe’s highest peak. This self-guided journey offers flexibility and independence, allowing hikers to explore stunning alpine landscapes, charming villages, and breathtaking vistas at their own pace. Ideal for experienced hikers with strong navigation skills, the self-guided option provides the freedom to fully immerse in the natural beauty of the Mont Blanc massif.

Overview of the Tour du Mont Blanc

The Tour du Mont Blanc (TMB) is one of the most renowned long-distance hiking trails in the Alps, spanning approximately 170 kilometers through France, Switzerland, and Italy. This iconic route circumnavigates the Mont Blanc massif, the highest peak in Western Europe, offering breathtaking views of glaciers, valleys, and picturesque villages. The trail is well-marked and varied, featuring challenging ascents, scenic ridges, and lush meadows. Hikers can choose from several route variations, including the classic TMB and shorter highlights, making it accessible to both experienced adventurers and those seeking a taste of alpine beauty.

Why Choose a Self-Guided Tour?

A self-guided Tour du Mont Blanc offers unparalleled flexibility and independence, allowing hikers to fully immerse in the trail’s natural beauty. Without the constraints of a group or guide, hikers can set their own pace, linger at scenic viewpoints, and explore hidden gems. Self-guided packages typically include detailed itineraries, pre-booked accommodations, and luggage transfers, providing support while maintaining freedom. This option is ideal for experienced hikers with strong navigation skills, offering a perfect balance of adventure and convenience.

Planning Your Self-Guided Tour du Mont Blanc

Planning your self-guided Tour du Mont Blanc involves selecting dates, choosing accommodations, and arranging luggage transfers, providing flexibility while ensuring a well-organized adventure.

Best Time to Hike

The best time to hike the Tour du Mont Blanc is from mid-June to late September, with optimal conditions in July and August. The weather is generally warm and sunny, with wildflowers blooming in early summer; However, trails can be crowded during peak season. June offers cooler temperatures and fewer hikers, while September provides a serene atmosphere with golden foliage. Be prepared for potential afternoon storms in August. Plan ahead and book accommodations in advance, especially during peak months, to ensure a smooth and enjoyable trek.

Choosing the Right Direction

The Tour du Mont Blanc can be hiked in either a clockwise or anti-clockwise direction. The anti-clockwise route, starting from Chamonix, is the most popular, offering stunning views of Mont Blanc and gradual ascents. It typically takes 7-8 days to complete. The clockwise route is less crowded but equally scenic, with dramatic descents and breathtaking panoramas. Both directions provide unforgettable experiences, so choose based on your preference for crowd levels and terrain. Proper planning and physical preparation are essential regardless of the direction you select for this iconic trek.

Booking Accommodations and Luggage Transfers

Securing accommodations and arranging luggage transfers are crucial for a smooth self-guided Tour du Mont Blanc experience. Many tour companies offer packages that include pre-booked lodgings, from cozy mountain refuges to deluxe hotels, ensuring availability and convenience. Luggage transfer services allow you to hike unencumbered, with your bags transported to your next destination. Booking in advance is highly recommended, especially during peak season, to avoid shortages of rooms or transfer slots. This logistical support enhances your journey, letting you focus on the trail and scenic beauty without added stress.

Navigating the Trail

Navigating the Tour du Mont Blanc requires confidence in map-reading and GPS use. Prepare thoroughly to ensure a smooth journey through diverse alpine terrains and scenic landscapes.

Essential Navigation Skills for Self-Guided Hikers

Self-guided hikers must master map-reading, GPS navigation, and compass skills to stay on track. Understanding trail markers and signs is crucial, as is the ability to interpret terrain features. Familiarity with digital tools like GPS apps can enhance route-finding, while traditional navigation skills remain vital for emergencies. Always carry a detailed topographic map and know how to use it alongside electronic devices. Practice route-finding in advance to build confidence. Staying observant and calm under pressure ensures safe and enjoyable navigation along the Tour du Mont Blanc trail.

Using Maps and GPS for the Tour du Mont Blanc

Accurate navigation is critical for the Tour du Mont Blanc. Carry detailed topographic maps (1:50,000 or 1:100,000 scale) and a compass. GPS devices or apps like Guthook or Maps.me are invaluable for real-time tracking. Download digital maps in advance, as signal coverage can be unreliable. Websites like tmb-guide.com offer downloadable GPS tracks. Always cross-reference digital tools with physical maps to avoid errors. Mark key waypoints, such as refuges and water sources, for easy reference. Combining GPS technology with traditional map skills ensures reliable navigation throughout the trek.

Highlights of the Tour du Mont Blanc

The Tour du Mont Blanc offers breathtaking views of the Mont Blanc massif, alpine meadows, and charming mountain villages. Hikers experience dramatic landscapes, including iconic sections like the approach to Col du Bonhomme and stunning vistas from the Italian side of Monte Bianco. The trail’s diversity, with its mix of challenging passes and serene valleys, makes it one of the most spectacular long-distance treks in the Alps.

Most Scenic Sections of the Trail

The Tour du Mont Blanc boasts some of the most breathtaking alpine vistas in Europe. The ascent to Col du Bonhomme offers dramatic views of surrounding peaks, while the descent to Lac Blanc reveals its pristine waters reflecting Mont Blanc. The Italian side provides stunning panoramas of Monte Bianco, with easy trails following the valley. Challenging passes like Col de Balme reward hikers with sweeping views of glaciers and valleys. The trail’s diversity ensures every section is a visual masterpiece, blending rugged mountain landscapes with charming alpine villages and lush meadows.

Charming Mountain Villages Along the Route

The Tour du Mont Blanc route meanders through picturesque mountain villages, each offering unique charm and cultural richness. Courmayeur, with its cobblestone streets and Italian flair, provides a warm welcome, while Chamonix, a bustling alpine hub, offers vibrant energy and amenities. Les Contamines, a quieter village, features traditional chalets and serene surroundings. These villages serve as refuges, offering cozy accommodations, hearty local cuisine, and opportunities to immerse in alpine culture. They are perfect spots to recharge and reflect on the day’s adventure, blending seamlessly into the breathtaking natural backdrop of the Mont Blanc massif.

Physical and Mental Preparation

Physical and mental preparation are crucial for the Tour du Mont Blanc self-guided. Hikers need strong endurance, agility, and stamina to tackle challenging terrain and elevation changes daily. Regular cardio and strength training beforehand are essential. Mentally, strategies like setting realistic goals, staying positive, and managing stress are vital for motivation. Proper rest, nutrition, and hydration also play key roles in building resilience for the demanding hike.

Assessing Your Fitness Level

Evaluating your fitness level is essential for a successful self-guided Tour du Mont Blanc. This challenging trek requires strong endurance, stamina, and agility. Hikers should be comfortable with daily distances of 10-15 miles and significant elevation gains. Prior experience with long-distance hiking is beneficial. Assess your cardiovascular health, muscle strength, and overall physical condition. If needed, engage in pre-trek training like hiking, running, or cycling to build stamina. Ensure you can carry a loaded backpack comfortably and navigate uneven terrain confidently. Accurately gauging your fitness helps prevent fatigue and ensures a safer, more enjoyable journey.

Mental Strategies for Long-Distance Hiking

Maintaining mental resilience is crucial for the Tour du Mont Blanc. Break the trek into manageable sections, focusing on one day at a time to avoid feeling overwhelmed. Cultivate a positive mindset by embracing challenges and celebrating small victories. Practice mindfulness to stay present and fully immerse in the experience. Visualize success and use positive self-talk to boost confidence. Staying flexible and adapting to unforeseen circumstances will enhance your overall enjoyment. Mental preparation is as vital as physical training, ensuring you remain motivated and resilient throughout the journey.

Logistics and Safety

Plan meticulously, ensuring accommodations and transfers align with your itinerary. Understand the route thoroughly, and carry essential safety gear like a first aid kit and navigation tools.

What to Pack: A Comprehensive Gear List

Packing light is crucial for a self-guided Tour du Mont Blanc. Essentials include sturdy hiking boots, moisture-wicking layers, a waterproof jacket, and a comfortable backpack. Bring a map, compass, and GPS device for navigation. A first aid kit, headlamp, and emergency shelter are vital for safety. Don’t forget trekking poles for challenging terrain and a water filter or hydration bladder. Pack lightweight, high-calorie snacks and personal hygiene items. Ensure extra clothing and footwear for varying weather conditions. Avoid overloading—carry only what’s necessary for a smooth, enjoyable hike.

Emergency Procedures and Safety Tips

Always carry a first aid kit, emergency shelter, and a whistle. Ensure your phone is fully charged and consider a portable charger. Inform someone of your itinerary daily and know the nearest refuge locations. Stay visible with reflective clothing and avoid hiking alone in risky conditions. Check weather forecasts regularly and be prepared for sudden changes. Carry a map and GPS, and know how to use them. Keep emergency contacts handy, including local rescue services. Stay hydrated, eat regularly, and rest when needed. Know your limits and seek help if conditions become unsafe or you feel unwell.

The Tour du Mont Blanc self-guided adventure is a transformative journey, offering breathtaking views, cultural immersion, and personal growth; Embrace the challenge and create unforgettable memories.

Final Tips for a Successful Self-Guided Adventure

  • Plan meticulously, using up-to-date guides and maps to ensure a smooth journey.
  • Pack lightly but wisely, avoiding unnecessary weight while carrying essentials like navigation tools and layers.
  • Develop strong navigation skills, combining map-reading with GPS apps for accuracy.
  • Book accommodations in advance, especially during peak season, to secure desired stays.
  • Assess your fitness level honestly and train beforehand to handle the trek’s demands.
  • Respect the environment and local cultures, leaving a positive impact on the Mont Blanc region.

health with bec 3 week body reset pdf

Discover a transformative 3-week program designed by nutritionist Bec Miller, focusing on low-carb, high-protein meals to help women achieve weight loss, reduce bloating, and optimize gut health effortlessly.

Overview of Bec Miller and Health With Bec

Bec Miller, an Australian nutritionist and weight loss specialist, founded Health With Bec to empower women to achieve their health goals. Her 3 Week Body Reset program focuses on low-carb, high-protein meals and gut health, helping women reduce bloating and lose weight without hunger or restriction. Bec’s approach emphasizes sustainable results, making it ideal for busy women seeking lasting change. Her program has gained popularity for its practical and effective strategies, supported by bonus resources and a supportive community.

Key Objectives of the 3 Week Body Reset

The program aims to help women slim down, reduce bloating, and optimize gut health through a structured, low-carb, high-protein diet. It focuses on eliminating cravings, boosting energy, and promoting sustainable weight loss without hunger. The 3-week plan is designed to reset metabolism, improve digestion, and establish healthy eating habits. By targeting gut health and providing balanced nutrition, the program supports overall well-being and long-term results for a healthier lifestyle.

Structure of the 3 Week Body Reset Program

Divided into three phases: Detox and Reset, Balance and Optimization, and Sustain and Thrive, the program guides users through a low-carb, high-protein plan designed by Bec Miller to reset metabolism and optimize gut health.

Week 1: Detox and Reset

Week 1 focuses on eliminating harmful foods, resetting digestion, and kickstarting metabolism. Users adopt a low-carb, high-protein diet with detoxifying recipes to reduce bloating and improve gut health. This phase introduces meal plans that prioritize whole foods, lean proteins, and healthy fats to cleanse the body and prepare it for optimal weight loss. Bec Miller’s expertise ensures a scientifically-backed approach to rebooting health and energy levels, setting the foundation for the next two weeks.

Week 2: Balance and Optimization

Week 2 focuses on balancing macronutrients and optimizing digestion. The program introduces a variety of low-carb, high-protein meals to stabilize energy levels and support gut health. Participants learn to identify and reintroduce foods that nourish their bodies without causing bloating. This phase emphasizes personalized nutrition, ensuring a sustainable approach to weight loss and overall well-being. Bec Miller’s expert guidance helps participants refine their eating habits, making healthy choices second nature and setting them up for long-term success.

Week 3: Sustain and Thrive

Week 3 focuses on maintaining the progress made and transitioning into a sustainable lifestyle. Participants learn how to incorporate balanced eating habits into their daily routine, with an emphasis on mindful choices and long-term results. The program provides tools to help individuals thrive beyond the three weeks, ensuring they feel empowered to continue their health journey. This phase is about creating a lasting impact, with strategies to avoid setbacks and embrace a healthier, more vibrant way of living.

Meal Planning and Recipes

The program offers structured meal plans and recipes designed by Bec Miller, focusing on nutritionally balanced, low-carb, high-protein options to support weight loss and gut health.

Low-Carb, High-Protein Meal Ideas

Bec Miller’s program offers delicious, easy-to-prepare low-carb, high-protein meal ideas to support weight loss and gut health. Breakfast options include protein-packed omelets and keto smoothies, while lunches feature grilled meats with fresh vegetables. Dinners emphasize whole foods like fish, lean beef, and cauliflower-based sides. Snacks such as hard-boiled eggs, avocado, and nuts keep energy levels steady. These meals are designed to be flavorful, nutritious, and adaptable for busy lifestyles, ensuring sustainable results without sacrificing taste or variety.

Sample Meal Plan for One Day

A sample day from Bec Miller’s program includes a protein-packed breakfast like scrambled eggs with spinach, avocado, and tomatoes. Mid-morning, a snack of raw veggies with hummus keeps energy steady. Lunch features a hearty chicken salad with mixed greens, cucumber, and olive oil dressing. A mid-afternoon snack of almonds and berries provides a natural boost. Dinner showcases grilled salmon with roasted broccoli and cauliflower rice. Each meal is designed to be nutrient-dense, flavorful, and easy to prepare, aligning with the program’s low-carb, high-protein principles to support weight loss and gut health.

Benefits of the Program

The program promotes sustainable weight loss, reduces bloating, and enhances gut health. It boosts energy levels and supports overall well-being through balanced nutrition and targeted meal plans.

Weight Loss and Bloating Reduction

The 3 Week Body Reset helps women shed unwanted pounds and reduce bloating through targeted nutrition. By focusing on low-carb, high-protein meals, the program supports a slimmer physique and improved digestion. Participants often experience visible results within days, with many reporting a flatter stomach and enhanced energy levels. The program’s emphasis on gut health ensures sustainable weight loss and a reduction in water retention, leaving users feeling lighter and more confident.

Improved Gut Health

The 3 Week Body Reset prioritizes gut health as a cornerstone of overall wellness. By eliminating processed foods and incorporating nutrient-dense, low-carb meals, participants often experience improved digestion and reduced bloating. The program’s focus on probiotic-rich foods and balanced nutrition helps restore gut balance, enhancing absorption of essential nutrients. This approach not only supports weight loss but also promotes long-term digestive health, leaving users feeling lighter, more energized, and less sluggish. A healthier gut fosters a stronger immune system and overall well-being.

Support and Resources

The program offers bonus PDF guides, tools, and a supportive community to help participants stay on track and achieve their health goals effectively.

Bonus PDF Guides and Tools

The 3 Week Body Reset Program includes exclusive bonus PDF guides, offering practical tools like meal prep tips, grocery lists, and strategies for maintaining an 80/20 lifestyle. These resources empower participants to adapt the program to their needs, ensuring long-term success. Additional materials, such as a family-friendly meal guide, help integrate healthy habits into daily life, making the program versatile and sustainable for busy individuals.

Community Support and Online Groups

Join an active online community where participants share experiences, recipes, and tips. Private Facebook groups provide a supportive space to connect with others, ask questions, and stay motivated. Bec Miller and her team engage regularly, offering guidance and encouragement. This collective support system helps participants stay accountable and inspired throughout their journey, fostering a sense of belonging and shared success.

Success Stories and Reviews

Participants rave about their transformative results, sharing stories of significant weight loss, reduced bloating, and improved energy; Thousands have embraced this program, feeling empowered and supported.

Testimonials from Program Participants

Sarah: “I lost 8 pounds in 3 weeks without feeling deprived! The meals were delicious and easy to prepare.”

Emma: “This program transformed my body and energy levels. I finally feel like myself again!”

Clare: “After struggling with bloating for years, this reset gave me a flat stomach and confidence.”

Lisa: “As a busy mom, I loved the practical meal plans that fit into my hectic schedule.”

Jessica: “I was skeptical, but the results were incredible—down 5 kilos and no more cravings!”

Before and After Results

Participants often share dramatic before-and-after photos, showcasing significant weight loss and reduced bloating. Many report losing 5-10 kilos, with visible improvements in body shape and energy levels. The program’s focus on gut health and nutrition leads to lasting changes, with users achieving a flatter stomach and improved overall well-being. These results are attributed to the structured meal plans and holistic approach, making the transformation both visible and sustainable.

Scientific Backing and Nutrition Principles

The 3 Week Body Reset is rooted in nutrition science, emphasizing the role of gut health and a low-carb, high-protein diet to promote weight loss and overall wellness.

Role of Gut Health in Weight Loss

Gut health plays a crucial role in weight loss by influencing digestion, nutrient absorption, and metabolism. An imbalance in gut bacteria can lead to bloating, slowed metabolism, and weight gain. The 3 Week Body Reset prioritizes gut optimization through targeted nutrition, reducing inflammation and promoting a balanced microbiome. By focusing on whole, nutrient-dense foods and eliminating triggers, the program helps restore gut function, enhancing overall weight loss efforts and improving long-term health outcomes for participants.

Importance of Low-Carb Diets

Low-carb diets are central to the 3 Week Body Reset, promoting fat burning and reducing insulin levels. By eliminating high-carb foods, the body shifts to ketosis, utilizing stored fat for energy. This approach curbs cravings, stabilizes blood sugar, and supports sustained weight loss. Bec Miller’s program leverages low-carb, high-protein meals to optimize metabolism, helping women achieve a slimmer, healthier physique without excessive hunger or restriction, making it easier to maintain long-term dietary changes.

Accessibility and Practicality

The 3 Week Body Reset is designed for busy women, offering practical, easy-to-follow meal plans that fit seamlessly into a hectic lifestyle.

How the Program Suits Busy Women

The 3 Week Body Reset is specifically tailored for busy women, offering flexible meal plans and quick, easy-to-prepare recipes that fit into even the most hectic schedules. Designed to be practical, the program provides done-for-you guides, eliminating meal planning stress and saving valuable time. With a focus on sustainable habits, it empowers women to maintain a healthy lifestyle beyond the initial three weeks, making it an ideal choice for those balancing work, family, and personal goals.

Quick and Easy Recipes for Meal Prep

The program includes a variety of quick and easy recipes, perfect for meal prep. These recipes are designed to be simple, requiring minimal ingredients and preparation time. They focus on low-carb, high-protein meals that are both nutritious and delicious. Busy women can enjoy prepping meals in advance, ensuring they stay on track with their health goals without sacrificing flavor or convenience. The recipes are adaptable, making them suitable for the whole family to enjoy together.

Common Questions and Concerns

Participants often ask about hunger, cravings, and suitability for everyone. The program addresses these concerns with balanced meal plans and support, ensuring sustainable results for all.

Addressing Hunger and Cravings

The program tackles hunger and cravings through balanced, nutrient-dense meals. High-protein, low-carb recipes keep you full longer, reducing cravings naturally. With flexible meal plans and support, you’ll feel satisfied while achieving your goals, ensuring a sustainable and enjoyable journey toward a healthier lifestyle.

Is the Program Suitable for Everyone?

The 3 Week Body Reset program is primarily designed for women aiming to reduce bloating and lose weight, particularly those who have tried various diets without success. It focuses on low-carb, high-protein meals and gut health optimization. While it suits busy women well, it may not be ideal for vegans or vegetarians due to the emphasis on high-protein animal products. Additionally, individuals with certain health conditions should consult their healthcare provider before starting the program to ensure it aligns with their specific needs.

Complete your transformation with the 3 Week Body Reset program. Join now to access meal plans, guides, and support. Start your journey to a healthier, slimmer you today!

How to Get Started with the Program

Sign up for the 3 Week Body Reset program through Health With Bec’s official website. Upon purchase, you’ll receive instant access to the comprehensive PDF guide, complete with meal plans, recipes, and tips. Begin by reviewing the materials and planning your first week of meals. Join the private online community for support and accountability. Start your journey toward a slimmer, healthier you with Bec Miller’s expert guidance. Stay committed and enjoy the transformative results!

Maintaining Results Beyond the 3 Weeks

Transition into an 80/20 lifestyle by incorporating healthy habits learned from the program. Use the bonus PDF guides for ongoing meal inspiration and tips. Focus on sustaining gut health and balanced nutrition. Stay hydrated, listen to your body, and continue tracking progress. Join Health With Bec’s community for motivation and support. By maintaining these practices, you can enjoy lasting weight loss and overall well-being long after completing the 3-week reset.

siser htv heat guide

This guide helps crafters and DIYers master heat transfer vinyl application․ It covers temperature, time, and pressure settings for optimal results․ Use essential tools and resources․

1․1 Understanding the Importance of Heat Transfer Vinyl (HTV)

Heat Transfer Vinyl (HTV) is a versatile material for creating custom designs on fabrics․ Its durability and wide range of finishes make it ideal for crafters and professionals․ HTV’s ability to adhere to various fabrics ensures long-lasting results․ Understanding HTV’s properties and application processes is essential for achieving professional-grade designs․ This guide helps you master HTV application for stunning, durable projects․

1․2 Purpose of the Siser HTV Heat Guide

The Siser HTV Heat Guide is designed to help users achieve professional-quality heat transfer vinyl applications․ It provides clear instructions on temperature settings, application times, and pressure requirements․ The guide ensures optimal results for various projects, from custom apparel to home décor; It also offers a printable chart and resources, making it an essential tool for crafters of all skill levels․

Types of Siser HTV and Their Application Requirements

Explore popular Siser HTV types, including EasyWeed, EasyWeed EcoStretch, and specialty vinyls like Stretch and Sparkle․ Each requires specific temperature, time, and pressure settings for best results․

2․1 EasyWeed HTV

EasyWeed HTV is a popular choice for crafters due to its durability and ease of use․ It requires a temperature setting of 305°F (150°C) with medium pressure and an application time of 10-15 seconds․ Preheating the garment for 2-3 seconds is recommended for optimal results․ It is compatible with all major vinyl cutters and works well on various fabrics, offering a vibrant finish․ This makes it ideal for creating custom designs efficiently for both beginners and experienced crafters․

2․2 EasyWeed EcoStretch HTV

EasyWeed EcoStretch HTV is designed for stretchy fabrics, offering flexibility and durability․ It requires a temperature of 250°F (121°C) and 10-15 seconds of heat application with medium pressure․ Ideal for performance wear, it ensures vibrant designs that withstand stretching without cracking․ Preheating garments for 2-3 seconds is recommended for optimal adhesion․ This vinyl is perfect for creating custom sportswear and activewear․

2․3 Specialty Vinyls (Stretch, Sparkle, etc․)

Specialty vinyls like Stretch and Sparkle offer unique finishes for custom designs․ Stretch vinyl is ideal for athletic wear, requiring 160°C for 20 seconds with medium pressure․ Sparkle vinyl adds a festive touch, needing 155°C for 15 seconds․ Both demand precise settings for durability and vibrant results, ensuring long-lasting adhesion on various fabrics․

Recommended Temperature Settings for Siser HTV

EasyWeed HTV: 305°F (150°C) for 10-15 seconds․ EasyWeed EcoStretch: 250°F (121°C) for 10-15 seconds․ Specialty vinyls vary, with Stretch at 160°C and Sparkle at 155°C․

3․1 EasyWeed HTV Temperature Range

The recommended temperature for Siser EasyWeed HTV is 305°F (150°C) with medium pressure․ This setting ensures a strong bond and durability․ Apply for 10-15 seconds, suitable for hot or cold peeling․ Ideal for cotton, polyester, and blends, this range prevents damage while promoting long-lasting adhesion․ Always preheat garments briefly for optimal results․ This range is compatible with heat presses and Cricut EasyPress for precise application․

3․2 EasyWeed EcoStretch HTV Temperature Range

EasyWeed EcoStretch HTV requires a temperature of 250°F (121°C) for optimal application․ Use a medium pressure setting and apply heat for 10-15 seconds․ For Cricut EasyPress users, add approximately 30 seconds to the recommended time․ Preheat garments for 2-3 seconds before applying the design․ Ensure proper adhesion without overheating for long-lasting results․

3․3 Specialty Vinyls Temperature Requirements

Specialty vinyls like Stretch, Sparkle, and Subli LT require precise temperatures․ Stretch vinyl applies at 160°C for 20 seconds with hot peel․ Sparkle vinyl needs 155°C for 15 seconds, hot or cold peel․ Subli LT works at 135°C for 15 seconds, suitable for both hot and cold peels․ These settings ensure optimal adhesion and durability for unique finishes․

Pressure Settings for Heat Transfer

Pressure is crucial for proper vinyl adhesion․ Standard settings apply for most HTVs, while specialty vinyls may require slight adjustments for optimal results and durability․

4․1 Standard Pressure for Siser HTV

Standard pressure for Siser HTV is typically medium to ensure proper adhesion without damaging the vinyl or garment․ A heat press with even force is ideal․ Too much pressure can cause vinyl stretching or fabric damage, while too little may result in incomplete adhesion․ Adjustments may be needed based on material thickness and type․

4․2 Adjusting Pressure for Specialty Vinyls

For specialty vinyls like Stretch and Sparkle, adjust pressure based on material thickness․ Use medium pressure for most HTVs, but increase slightly for thicker styles․ Ensure proper adhesion without over-applying, which can damage the vinyl or garment․ Light pressure works best for delicate materials․ Always preheat garments and test pressure on scrap fabric first for optimal results․

Time Settings for Siser HTV Application

EasyWeed HTV requires 10-15 seconds, while EasyWeed EcoStretch and Specialty Vinyls need 15-20 seconds for optimal adhesion and durability․ Adjust based on material thickness and type․

5․1 EasyWeed HTV Time Recommendations

For optimal results, Siser EasyWeed HTV requires 10-15 seconds of heat application․ This ensures proper adhesion without damaging the vinyl․ Use hot or cold peeling based on preference․ Preheating the garment for 2-3 seconds beforehand enhances results․ Follow these guidelines for a durable, long-lasting finish․ Adjust time slightly if using a heat press or Cricut EasyPress Mini for smaller designs․

5․2 EasyWeed EcoStretch HTV Time Recommendations

For EasyWeed EcoStretch HTV, apply designs at 250°F (121°C) with medium pressure for 10-15 seconds․ This ensures proper adhesion and stretchability․ Allow the material to cool before peeling․ Ideal for fabrics like polyester and cotton blends․ Adjust time slightly for larger designs to ensure even heat distribution․ Always refer to the printable chart for precise settings․

5․3 Specialty Vinyls Time Requirements

Specialty vinyls like Stretch, SubliM, and Sparkle require specific application times․ Stretch vinyls typically need 15-20 seconds at medium pressure, while SubliM and Sparkle vinyls require 15-20 seconds․ Always refer to the Siser HTV reference chart for precise time settings based on your heat press type and material․ Adjustments may be needed for optimal adhesion and durability․

Preheating Steps for Optimal Results

Preheating your garment ensures proper HTV adhesion and prevents wrinkles․ Always heat press at 250°F for 2-3 seconds before applying the design for optimal results․

6․1 Preheating Garments for HTV Application

Preheating garments ensures proper adhesion of HTV․ Set heat press to 250-305°F (120-150°C) depending on vinyl type․ Place garment on press, close, and preheat for 2-3 seconds․ This step removes moisture and flattens fibers, ensuring a smooth surface for application․ Always check fabric suitability and avoid overheating to prevent damage or discoloration․

Tools Needed for Heat Transfer

A heat press machine and Cricut EasyPress Mini are essential tools for applying Siser HTV․ These tools ensure proper temperature and pressure for durable designs․

7․1 Heat Press Machine

A heat press machine is essential for applying Siser HTV․ It ensures even heat and pressure distribution, crucial for a durable bond․ Preheat garments for 2-3 seconds before applying designs․ Adjust temperature based on HTV type, such as 305°F for EasyWeed․ Use medium pressure and recommended time settings for optimal results․ Compatible with all Siser HTV types․

7․2 Cricut EasyPress Mini

The Cricut EasyPress Mini is a compact, portable tool ideal for applying Siser HTV to small or intricate designs․ It offers precise temperature control, compatible with Siser’s vinyl requirements․ Use it for heat-transfer projects on fabrics, accessories, or curved surfaces․ Refer to the printable Siser HTV chart for specific settings, ensuring perfect results with minimal effort and professional finishes․

Common Mistakes to Avoid

Incorrect temperature or time settings can ruin designs․ Insufficient pressure may lead to uneven adhesion․ Always ensure proper peel temperature for lasting results․

8․1 Incorrect Temperature or Time Settings

Using the wrong temperature or time can ruin your design․ Too high a temperature may damage the vinyl or fabric․ Too low, and the vinyl won’t adhere properly․ Always refer to the Siser HTV chart for precise settings․ Ensure your heat press is preheated correctly․ Incorrect settings can lead to peeling or discoloration․ Double-check your machine’s settings before applying to avoid costly mistakes․

8․2 Insufficient Pressure

Insufficient pressure is a common mistake that can lead to poor adhesion of the HTV․ It prevents the vinyl from properly bonding to the fabric, resulting in peeling or incomplete transfers․ Always ensure the heat press is calibrated correctly and apply the recommended pressure for your specific vinyl type․ Even slight under-pressure can compromise the final result, so double-check settings before pressing․

Printable Siser HTV Time and Temperature Chart

A handy printable chart for Cricut projects, listing optimal settings for various Siser HTV types, ensuring perfect application every time with precise temperature and time guidance․

9․1 How to Use the Chart for Cricut Projects

The chart simplifies heat transfer vinyl application for Cricut users․ Download and print the PDF to reference temperature and time settings․ Match your vinyl type with recommended settings, ensuring optimal results․ Laminate the chart for easy access during projects․ Use it to adjust heat press settings and achieve professional-looking designs every time․

Resources and References

Access Siser’s official HTV application guide, printable time and temperature charts, and reference materials for precise heat transfer vinyl application․ Visit their website for detailed resources․

10․1 Siser HTV Reference Chart

The Siser HTV Reference Chart provides detailed specifications for various heat transfer vinyls, including material composition, width, and application requirements․ It covers popular options like EasyWeed, EasyWeed EcoStretch, and specialty vinyls․ The chart is downloadable as a PDF, offering a quick guide for crafters to ensure optimal results․ It is compatible with tools like Cricut and Silhouette Cameo, making it a must-have resource for any HTV project․

10․2 Siser Official Application Instructions

Refer to Siser’s official guidelines for detailed application steps․ Preheat garments for 2-3 seconds․ Apply designs at specified temperatures, such as 305°F for EasyWeed․ Use medium pressure and recommended times․ Ensure proper weeding and mirroring․ Consult Siser’s HTV reference chart for precise settings․ Available on their website or as a downloadable PDF, these instructions ensure professional results for all Siser HTV products․

ashta lakshmi stotram in telugu pdf

The Ashta Lakshmi Stotram is a revered Hindu hymn dedicated to the eight divine forms of Goddess Lakshmi, symbolizing prosperity, wealth, and spiritual growth. Composed in elegant Telugu script, this stotram is structured into eight meaningful verses, each praising a distinct aspect of Lakshmi, from her primeval form to her role as a bestower of liberation. Its availability in PDF format makes it easily accessible for devotees to chant and reflect upon during daily worship or special occasions, fostering a deep connection to divine grace and blessings.

Overview of the Stotram

The Ashta Lakshmi Stotram is a sacred Hindu devotional hymn dedicated to the eight forms of Goddess Lakshmi, each embodying distinct virtues like wealth, knowledge, and spiritual enlightenment. Comprising eight verses, the stotram is a poetic ode to Lakshmi’s divine grace, offering devotion and seeking her blessings for prosperity and well-being. Available in Telugu script, it is widely cherished for its lyrical elegance and profound spiritual significance. The stotram’s structure and rhythm make it ideal for chanting during worship, allowing devotees to connect deeply with the divine energy of Lakshmi, fostering both material and spiritual fulfillment in their lives.

Significance of the Eight Forms of Lakshmi

The eight forms of Lakshmi—Adhi Lakshmi, Dhana Lakshmi, Dhanya Lakshmi, Gaja Lakshmi, Santana Lakshmi, Vidya Lakshmi, and Vijaya Lakshmi—represent diverse aspects of divine prosperity and well-being. Each form embodies unique virtues, from material wealth to spiritual enlightenment, offering devotees a comprehensive path to seek blessings. These forms symbolize the multifaceted nature of Goddess Lakshmi, emphasizing her role in granting both worldly success and inner peace. By honoring all eight forms, devotees attain a balanced and fulfilling life, reflecting the holistic vision of divine grace and prosperity that the stotram embodies.

Lyrics and Script in Telugu

The Telugu lyrics of Ashta Lakshmi Stotram are presented in an elegant script, divided into eight verses, each honoring a distinct form of Goddess Lakshmi. The stotram is available in a clear PDF format, making it easy for devotees to read and chant with devotion, ensuring accessibility and preserving the spiritual essence of the text.

Structure of the Stotram

The Ashta Lakshmi Stotram is structured into eight verses, each dedicated to a unique form of Goddess Lakshmi, symbolizing her diverse blessings. The stotram begins with an invocation, followed by verses that glorify her aspects such as wealth, health, and knowledge. Each verse is crafted with poetic elegance, using metaphors and praises to highlight her divine qualities. The structure is designed to flow seamlessly, allowing devotees to connect deeply with each form of Lakshmi. The Telugu script in the PDF format preserves the traditional layout, making it easy to recite and reflect upon her divine grace and abundance.

Adhi Lakshmi and Her Significance

Adhi Lakshmi, the primeval form of Goddess Lakshmi, holds paramount significance as the embodiment of eternal prosperity and divine grace. She is revered as the original source of wealth, peace, and liberation, often depicted with a golden complexion, symbolizing purity and abundance. In the Ashta Lakshmi Stotram, Adhi Lakshmi is celebrated as the first and most revered form, representing the cosmic energy of creation and sustenance. Her worship is believed to bestow devotees with both material and spiritual blessings, making her a central focus of devotion in the stotram. Her divine presence is seeking harmony and eternal bliss, fulfilling desires and granting moksha, the ultimate liberation. Chanting her verses is considered auspicious, especially during rituals and daily worship, as it invokes her benevolent grace and fosters a deeper connection to her eternal essence.

Benefits of Chanting Ashta Lakshmi Stotram

Chanting Ashta Lakshmi Stotram brings prosperity, peace, and good fortune. It helps remove obstacles, enhances wealth, and grants both material and spiritual benefits to devotees daily;

Spiritual and Material Benefits

Chanting Ashta Lakshmi Stotram fosters spiritual growth, bringing peace, prosperity, and good fortune. It enhances wealth, removes obstacles, and grants material success while nurturing a deeper connection to Goddess Lakshmi. The stotram’s verses, available in Telugu PDF, are believed to attract positive energy, ensuring harmony and divine grace in one’s life. Regular recitation is said to bestow both spiritual enlightenment and worldly comforts, making it a powerful practice for those seeking balance in their lives. Its accessibility in PDF format allows devotees to easily incorporate it into daily worship, amplifying its benefits.

Impact on Prosperity and Well-being

The Ashta Lakshmi Stotram profoundly influences prosperity and well-being, attracting wealth, success, and happiness. By chanting this stotram, devotees invoke Goddess Lakshmi’s blessings, fostering financial stability and emotional peace. Its verses, readily available in Telugu PDF, are believed to ward off adversity, promoting a harmonious and affluent life. Regular recitation enhances positive energy, ensuring prosperity in all aspects of life while nurturing inner calm and contentment. This sacred hymn is a powerful tool for those seeking to align their lives with divine grace and achieve a balanced, fulfilling existence.

Download Options for Ashta Lakshmi Stotram in Telugu PDF

The Ashta Lakshmi Stotram in Telugu PDF is freely available for download on platforms like stotram.co.in and telugudevotionalswaranjali.blogspot, offering easy access to its sacred lyrics and meaning.

Free PDF Download Links

Devotees can easily access the Ashta Lakshmi Stotram in Telugu PDF for free from platforms like stotram.co.in and telugudevotionalswaranjali.blogspot. These websites offer the stotram in downloadable PDF format, ensuring convenience for daily worship or reference. The PDF includes the Telugu lyrics, their meanings, and a structured layout for easy recitation. Additionally, it is available as a text file or for online reading, catering to diverse preferences. This free resource is a blessing for those seeking spiritual growth and prosperity through the divine verses of Ashta Lakshmi Stotram.

Importance of the PDF Format for Devotional Purposes

The PDF format of the Ashta Lakshmi Stotram in Telugu holds significant value for devotees. It preserves the sacred text’s integrity, ensuring clear readability of Telugu script and proper layout. PDFs are easily sharable and accessible across devices, making them ideal for daily worship, whether at home or in temples. The portability and consistency of PDFs allow devotees to carry the stotram wherever they go, facilitating uninterrupted spiritual practice. This format also maintains the stotram’s cultural and religious authenticity, making it a reliable resource for those seeking to connect with Goddess Lakshmi’s blessings through traditional chants.

Cultural and Historical Context

The Ashta Lakshmi Stotram is a revered Hindu hymn rooted in ancient tradition, celebrating Goddess Lakshmi’s eight forms. Its Telugu version reflects deep cultural and spiritual significance in worship practices across regions.

Origins of the Stotram

The origins of the Ashta Lakshmi Stotram trace back to ancient Hindu scriptures, where Goddess Lakshmi is revered as the embodiment of prosperity and divine energy. The stotram, composed in Telugu, is believed to have been written by scholars who sought to honor her eight distinct forms, each symbolizing a unique aspect of her blessings. Its roots are deeply embedded in Vedic traditions and are often recited during pujas and rituals to invoke her grace. Over time, the stotram has been preserved and shared through generations, maintaining its spiritual significance and cultural relevance.

Role in Hindu Devotional Practices

The Ashta Lakshmi Stotram holds a significant role in Hindu devotional practices, particularly in rituals and pujas dedicated to Goddess Lakshmi. Devotees chant the stotram to invoke her blessings for prosperity, wealth, and spiritual growth. Its verses are often recited during Diwali and Navaratri, fostering a divine connection. The stotram is also integrated into daily worship, offering a means to seek grace and balance in life. By chanting it, believers aim to cultivate positivity and harmony, aligning with the teachings of Hindu scriptures that emphasize devotion and surrender to the divine feminine energy embodied by Lakshmi.

Verse-by-Verse Explanation

The Ashta Lakshmi Stotram is structured into eight verses, each highlighting a distinct form of Lakshmi. Each verse provides insights into her divine attributes and spiritual significance.

Key Verses and Their Meanings

The stotram comprises eight verses, each glorifying a distinct form of Lakshmi. The first verse, Adhi Lakshmi, praises her as the originator of the universe, embodying eternal prosperity. Subsequent verses highlight her roles as Dhana Lakshmi (wealth), Dhanya Lakshmi (agricultural abundance), Gaja Lakshmi (royal splendor), Jaya Lakshmi (victory), Santana Lakshmi (progeny), Vijaya Lakshmi (triumph), and * Vidya Lakshmi* (knowledge). Each verse reflects her divine attributes, offering devotees a path to attain both material and spiritual fulfillment, making the stotram a comprehensive prayer for all aspects of life.

Relevance of Each Verse in Daily Life

Each verse of the Ashta Lakshmi Stotram holds profound relevance in daily life, offering guidance and blessings for various aspects of human existence. The hymn addresses prosperity, wealth, knowledge, and spiritual growth, making it versatile for modern lifestyles. For instance, invoking Adhi Lakshmi fosters a sense of calm and stability, while Dhana Lakshmi is sought for financial stability. Dhanya Lakshmi blesses devotees with abundance in food and health, and Gaja Lakshmi embodies royal grace and success. Chanting these verses helps individuals align with divine energy, fostering balance, harmony, and fulfillment in their daily lives and aspirations.

Ashta Lakshmi Stotram in Daily Worship

The Ashta Lakshmi Stotram is integral to daily worship, offering devotees a powerful means to invoke divine blessings for prosperity and harmony. Its verses, readily available in Telugu PDF formats, guide followers in seeking Lakshmi’s grace, ensuring spiritual and material well-being through regular recitation.

How to Incorporate the Stotram into Daily Puja

To integrate the Ashta Lakshmi Stotram into daily worship, begin by obtaining the Telugu PDF version for accurate recitation. Set aside a quiet, clean space for puja, ideally in the morning or evening, facing east or north. Gather essential items like a Lakshmi idol, flowers, incense, and a lamp to create a sacred ambiance. Sit comfortably, perhaps cross-legged, and start with a brief meditation to center your mind. Recite the stotram with attention to correct Telugu pronunciation, possibly using audio guides for accuracy. Understand the meaning of each verse through translations to deepen your connection. Offer prayers sincerely, focusing on the eight forms of Lakshmi and their specific blessings. Maintain consistency by incorporating this practice into your daily routine, ensuring it becomes a meaningful part of your spiritual life. By following these steps, you can effectively invoke Goddess Lakshmi’s grace and experience the stotram’s prosperity and well-being benefits.

Best Times for Chanting the Stotram

The ideal times for chanting the Ashta Lakshmi Stotram are during the early morning hours (Brahma Muhurta) or in the evening during sunset. These periods are considered sacred and conducive for spiritual practices. Devotees can also chant during Friday puja, as it is traditionally dedicated to Goddess Lakshmi. Additionally, chanting during full moon days, Navaratri, or Diwali amplifies the stotram’s blessings. Consistency is key, so incorporating the stotram into a daily routine, even if briefly, ensures steady spiritual growth and material prosperity. By aligning chants with these auspicious times, one can enhance focus and invoke divine grace effectively.

The Ashta Lakshmi Stotram is a powerful prayer honoring Goddess Lakshmi’s eight forms, offering spiritual growth and prosperity. Its Telugu PDF availability makes it accessible for daily worship, aiding devotees in seeking divine blessings and balance in life.

Final Thoughts on the Significance of Ashta Lakshmi Stotram

The Ashta Lakshmi Stotram holds profound spiritual and cultural significance, offering devotees a pathway to connect with Goddess Lakshmi’s divine grace. Its Telugu PDF format ensures accessibility, making it easier for followers to recite and reflect on its verses, seeking prosperity, peace, and enlightenment.

By honoring Lakshmi’s eight forms, the stotram embodies the essence of devotion, guiding believers toward a balanced life filled with material and spiritual abundance. Its timeless relevance continues to inspire, fostering a deeper understanding of faith and its transformative power in daily life.

a raisin in the sun play pdf

Lorraine Hansberry’s A Raisin in the Sun is a groundbreaking play exploring the struggles of the Younger family in 1950s Chicago, delving into themes of racial inequality, family resilience, and the pursuit of dreams.

Historical Context of “A Raisin in the Sun”

A Raisin in the Sun is set in Chicago’s South Side during the 1950s, reflecting the era’s racial segregation and economic struggles faced by African Americans. The play highlights the challenges of living in cramped conditions and the limited opportunities available to Black families. Lorraine Hansberry drew inspiration from her own experiences growing up in a segregated neighborhood and the Great Migration of African Americans to northern cities. The Younger family’s story mirrors the broader struggle for equality and dignity during this period. The play’s debut in 1959 marked a landmark moment in American theater, as it was the first Broadway play written by a Black woman, offering a powerful voice to marginalized communities.

Why “A Raisin in the Sun” is a Significant Work in American Theater

A Raisin in the Sun holds a pivotal place in American theater history as the first Broadway play written by a Black woman, Lorraine Hansberry. Its raw portrayal of the Younger family’s struggles resonated deeply, breaking racial barriers and challenging stereotypes. The play’s exploration of universal themes like identity, family, and equality made it relatable across cultures. Its success paved the way for future Black playwrights and actors, marking a turning point in diversifying American theater. The play’s enduring relevance lies in its ability to address systemic racism and social inequality, continuing to inspire new adaptations and discussions about race and justice in modern society.

Plot Summary

Set in 1950s Chicago, the play follows the Younger family as they await a life-changing insurance check, navigating racial discrimination and internal conflicts over their aspirations.

Set in the 1950s in Chicago’s South Side, Act I introduces the Younger family in their small, worn apartment. The family awaits a $10,000 insurance check from the death of Lena’s husband. Lena, the matriarch, hopes to buy a better home for her family. Walter, her son, dreams of investing in a liquor store to escape poverty. Ruth, Walter’s wife, struggles with the family’s financial constraints. Beneatha, Walter’s sister, aspires to attend medical school, reflecting her desire for independence and intellectual growth. Travis, the youngest, represents the family’s hope for a better future. Act I establishes the family’s shared and individual aspirations, setting the stage for their collective and personal struggles.

Act II: The Family’s Struggles and Dreams

Act II delves deeper into the Younger family’s struggles as they await the insurance check. Walter’s frustration with poverty intensifies, while Lena remains cautious about their future. Walter’s desire to invest in a liquor store clashes with Lena’s dream of a better home. Beneatha’s identity crisis deepens as she navigates her aspirations and societal expectations. The family’s financial strain and differing opinions create tension, highlighting their shared goal of a better life. Act II explores the emotional and financial challenges, revealing the strength of their bonds and the complexity of their individual ambitions.

Act III: Resolution and the Family’s Decision

Act III brings the play to a poignant resolution as the Younger family faces a pivotal decision. Walter, inspired by Lena’s wisdom, rejects the offer to sell their home, asserting their pride and identity. The family unites, choosing to move to a less desirable neighborhood despite racial tensions. Lena’s strength and guidance are central, as she rallies the family to embrace their future together. The act concludes with the Youngers leaving their cramped apartment, symbolizing their resilience and hope for a better life. This resolution underscores themes of identity, family unity, and the pursuit of dignity in the face of adversity.

Characters

The play centers around the Younger family, including Lena, Walter, Beneatha, Ruth, Travis, and George. Each character represents distinct struggles and aspirations within their shared journey.

Main Characters and Their Roles

The Younger family is at the heart of A Raisin in the Sun, with each member representing unique struggles and aspirations. Lena (Mama) is the matriarch, embodying strength and traditional values, striving to preserve her family’s unity. Walter, her son, is a man trapped by his circumstances, yearning for financial success and identity. Ruth, Walter’s wife, is practical and nurturing, often mediating family conflicts. Beneatha, the younger sister, is ambitious and independent, seeking self-discovery and challenging societal norms. Travis, the youngest, symbolizes the family’s collective hope for a better future. Together, they navigate racism, poverty, and internal tensions, each playing a vital role in the family’s journey toward empowerment and understanding.

The Role of Women in the Play

The women in A Raisin in the Sun embody strength, resilience, and the pursuit of identity amidst societal constraints. Lena (Mama) is the family’s emotional anchor, fighting to maintain dignity and unity. Ruth, Walter’s wife, balances practicality with her own suppressed desires, often mediating conflicts. Beneatha, the youngest, challenges traditional norms, seeking independence and intellectual growth. These characters reflect the struggles of Black women in the 1950s, navigating racism, gender roles, and personal aspirations. Through their diverse perspectives, Hansberry highlights the importance of female agency and the interconnectedness of their experiences, showcasing their vital roles in the family’s journey toward empowerment and self-discovery.

Themes and Symbols

Central themes include dreams, identity, and racism, while symbols like the insurance check and the plant represent hope, resilience, and the family’s deferred aspirations.

Themes: Dreams, Identity, and Racism

A Raisin in the Sun explores the Younger family’s collective and individual dreams, reflecting their aspirations for a better life despite systemic barriers. The theme of identity is central, as characters like Beneatha navigate cultural and personal self-discovery. Racism emerges as a pervasive obstacle, limiting opportunities and reinforcing segregation. Hansberry vividly portrays how these elements intertwine, illustrating the family’s resilience and determination to overcome adversity. Through these themes, the play offers a powerful commentary on the African American experience, making it a timeless exploration of human struggle and hope.

Symbols: The Insurance Check and the Plant

The insurance check symbolizes the Younger family’s hope for a better life and their struggles with financial inequality. It represents the opportunity to escape poverty and segregation, yet it also sparks conflict over its use. The plant, cared for by Lena, embodies resilience and the nurturing of fragile hopes. It signifies the family’s ability to sustain life and dignity despite harsh conditions. Both symbols reflect the play’s central themes of struggle, hope, and the pursuit of a brighter future. Through these elements, Hansberry underscores the importance of preserving identity and aspiration in the face of adversity.

Study Guide and Analysis

Study guides for A Raisin in the Sun provide summaries, analysis, and questions, while resources like SparkNotes offer deep insights into themes, symbols, and character development.

Key Questions and Discussions from Study Guides

Study guides for A Raisin in the Sun often pose questions about the play’s setting, such as, “What is the significance of the Younger family’s apartment?” and “Why does Walter ask Ruth what’s wrong with her?” These questions encourage readers to analyze character motivations and themes like racial inequality. Discussions also explore symbolic elements, such as the insurance check and the plant, highlighting their roles in representing the family’s struggles and aspirations. Additionally, guides frequently examine the roles of women, like Lena and Beneatha, and their contributions to the family’s dynamics. These resources help students interpret the play’s cultural and historical context, making it easier to engage with Hansberry’s powerful storytelling.

SparkNotes and Other Resources for Deep Understanding

SparkNotes and other study guides provide in-depth analysis of A Raisin in the Sun, offering summaries, character insights, and thematic explanations. These resources help students engage with the play’s complexities, such as its exploration of racial inequality and family dynamics. SparkNotes, in particular, is praised for its detailed breakdown of scenes, themes, and symbols, making it easier for readers to grasp Hansberry’s nuanced storytelling. Additionally, other guides include multiple-choice questions, character lists, and historical context, enhancing comprehension of the play’s significance in American theater. These tools are invaluable for students and educators seeking a deeper understanding of the play’s cultural and literary impact.

Cultural Impact

A Raisin in the Sun was the first play by a Black woman on Broadway, running for 19 months. It portrayed the Black experience and became a landmark in American theater, inspiring future generations and paving the way for diverse voices.

The Play’s Relevance in Modern Theater

A Raisin in the Sun remains a powerful force in modern theater, addressing universal themes like racial identity, economic inequality, and family dynamics. Its exploration of the Black experience continues to resonate, making it a landmark production that inspires contemporary adaptations and revivals. The play’s ability to balance poignant storytelling with social commentary ensures its relevance today, as audiences grapple with similar challenges. Its influence is evident in diverse storytelling across media, cementing its legacy as a foundational work in American theater. The play’s timeless appeal lies in its ability to evoke empathy and spark dialogue about humanity’s shared struggles.

Legacy of Lorraine Hansberry’s Work

Lorraine Hansberry’s legacy as a trailblazer in American theater is immeasurable. Her play, A Raisin in the Sun, broke barriers as the first Broadway production by a Black woman, addressing race, gender, and class with unflinching honesty. Hansberry’s work paved the way for future generations of diverse voices in theater and literature. Her exploration of the Black experience, particularly the struggles and aspirations of women, remains deeply resonant. Beyond the play, Hansberry’s writings and activism continue to inspire, solidifying her place as a pivotal figure in American cultural history. Her work challenges audiences to confront societal inequalities, ensuring her legacy endures as a champion of justice and artistic expression.

A Raisin in the Sun remains a powerful exploration of racial and economic struggle, offering timeless insights into the human condition and the pursuit of equality and justice.

Final Thoughts on the Play’s Significance

A Raisin in the Sun is a landmark in American theater, offering profound insights into racial and economic struggles. Its exploration of family resilience, identity, and societal barriers remains timeless. Lorraine Hansberry’s work challenges audiences to reflect on inequality and the universal aspiration for a better life. The play’s enduring relevance lies in its ability to spark conversations about justice, equality, and the human condition. As a groundbreaking work by a Black female playwright, it continues to inspire new generations, solidifying its place as a vital piece of American cultural heritage. Its impact underscores the power of theater to illuminate social issues and foster empathy, ensuring its lasting significance in modern society.