ryobi table saw instruction manual

Safety Precautions and Warnings

Always read the operator’s manual thoroughly before using your Ryobi table saw. Wear safety glasses and a dust mask to protect yourself. Keep loose clothing tied back and avoid jewelry that could get caught. Never operate the saw near children or when fatigued. Ensure the workpiece is properly supported and never remove the blade guard. Keep the work area clear of debris and avoid using the saw in damp environments. Always use proper cutting techniques to prevent kickback. Disconnect the power when changing blades or performing maintenance. Follow all safety instructions carefully to avoid accidents.

1.1. General Safety Guidelines

Before operating your Ryobi table saw, read and understand the entire operator’s manual. Familiarize yourself with the tool’s components, safety features, and proper usage techniques. Always wear approved safety glasses and a dust mask to protect against debris. Tie back loose clothing and remove jewelry that could interfere with operation. Ensure the work area is well-lit, clean, and free from obstructions. Never operate the saw near children or when fatigued. Keep the workpiece firmly supported and avoid using the saw in damp or wet conditions. Always maintain control of the material being cut and never reach over the blade while it is moving. Properly align the blade before each use and avoid making adjustments while the saw is running. Follow all safety guidelines to minimize risks and ensure safe operation.

1.2. Personal Protective Equipment (PPE)

Always wear proper Personal Protective Equipment (PPE) when operating your Ryobi table saw. This includes safety glasses or goggles to protect your eyes from flying debris. A dust mask is recommended to prevent inhaling sawdust. Hearing protection, such as earplugs or earmuffs, should be used to safeguard against loud noises. Wear steel-toe boots or sturdy footwear to protect your feet from heavy objects. Keep loose clothing and jewelry secure to avoid entanglement with moving parts. Gloves can provide better grip and protection for your hands. Ensure all PPE fits properly and is in good condition. Using PPE is crucial for preventing injuries and maintaining a safe working environment while operating power tools like your Ryobi table saw.

1.3. Work Area Preparation

Before operating your Ryobi table saw, ensure the work area is clean and clear of debris, tools, and loose materials. Set up the saw on a flat, stable surface to prevent vibration and ensure accurate cuts. Keep children and pets away from the work area. Remove any flammable materials or liquids nearby. Properly secure the saw to the work surface if needed. Ensure good lighting to maintain visibility and avoid tripping hazards. Keep the area well-ventilated to minimize dust exposure. Organize tools and materials within easy reach to reduce distractions. A well-prepared workspace enhances safety and efficiency when using your Ryobi table saw for various woodworking projects.

Understanding Your Ryobi Table Saw

Your Ryobi table saw features a powerful motor, durable construction, and versatile cutting capabilities. Familiarize yourself with its key components, such as the blade, fence, miter gauge, and rip capacity. Understanding these elements ensures proper operation and maintenance. Explore the included accessories and optional attachments to maximize functionality. Refer to the manual for detailed diagrams and assembly instructions to ensure everything is set up correctly for safe and efficient use.

2.1. Key Components and Features

Your Ryobi table saw includes essential components designed for precise and efficient cutting. The blade is the core cutting tool, available in various types for different materials. The fence provides stability for straight cuts, while the miter gauge enables accurate angle cuts. The rip capacity determines the maximum width of material you can cut. Additional features like the tilt adjustment allow for bevel cuts, and the dust collection port helps keep your workspace clean. Familiarize yourself with these components to optimize your cutting experience and achieve professional-grade results. Understanding each part’s function ensures safe and effective operation of your Ryobi table saw.

2.2. Accessories and Attachments

Your Ryobi table saw can be enhanced with various accessories to improve functionality; A table saw cart offers portability and storage, while an outfeed support helps manage large workpieces. A dust collection system minimizes debris, keeping your workspace clean. Additional accessories like dado sets and scoring blades expand cutting capabilities for specialized tasks. Attachments such as miter gauges and rip fences enhance precision, and featherboards help maintain material control. These accessories and attachments are designed to maximize the versatility of your Ryobi table saw, ensuring accurate and efficient cuts. Always consult the manual to ensure compatibility and proper installation of any accessory or attachment.

2.3. Proper Setup and Assembly

Begin by carefully unpacking your Ryobi table saw and verifying all components are included. Follow the manual’s instructions for assembling the stand or attaching the saw to a sturdy workbench. Ensure the table is level and secure to prevent vibration. Align the blade and fence accurately for proper cutting performance. Install the blade guard and anti-kickback pawls to maintain safety. Tighten all bolts and screws as specified to avoid any loose parts during operation. Connect the power cord to a suitable electrical outlet, ensuring it is grounded. Before first use, test the saw with a scrap piece of wood to confirm everything functions correctly. Proper setup ensures accuracy, safety, and optimal performance of your Ryobi table saw.

Operating the Table Saw

Turn the Ryobi table saw on safely, ensuring the blade guard is in place. Align the blade properly and perform precise crosscuts, miter cuts, and bevel cuts with confidence. Always maintain control of the workpiece for smooth, accurate results.

3.1. Powering On and Off

Before powering on your Ryobi table saw, ensure all safety precautions are met and the blade is properly aligned. Locate the on/off switch, typically found on the front or side of the saw. Flip the switch to the “on” position to start the motor. Always check that the blade is clear of debris before starting. When finished, turn the switch to the “off” position and allow the blade to come to a complete stop. Never leave the saw unattended while it is running. For added safety, remove the switch key when the saw is not in use to prevent accidental startups. Regularly inspect the power cord and plug for damage to ensure safe operation.

3.2. Blade Alignment and Maintenance

Proper blade alignment is crucial for accurate cuts and safety. Before use, ensure the blade is parallel to the rip fence and aligned with the miter slot. Adjust the alignment screws located at the trunnion to achieve proper positioning. Use a wrench to tighten the locking screws once alignment is correct. Regularly inspect the blade for damage or wear and replace it if necessary. Clean the blade teeth to prevent dust buildup, which can affect performance. Lubricate the blade arbor periodically to maintain smooth operation. Always unplug the saw when performing blade maintenance to avoid accidents. Refer to the operator’s manual for specific instructions on blade alignment and replacement procedures to ensure optimal performance and longevity of your Ryobi table saw.

3.3. Basic Cutting Operations

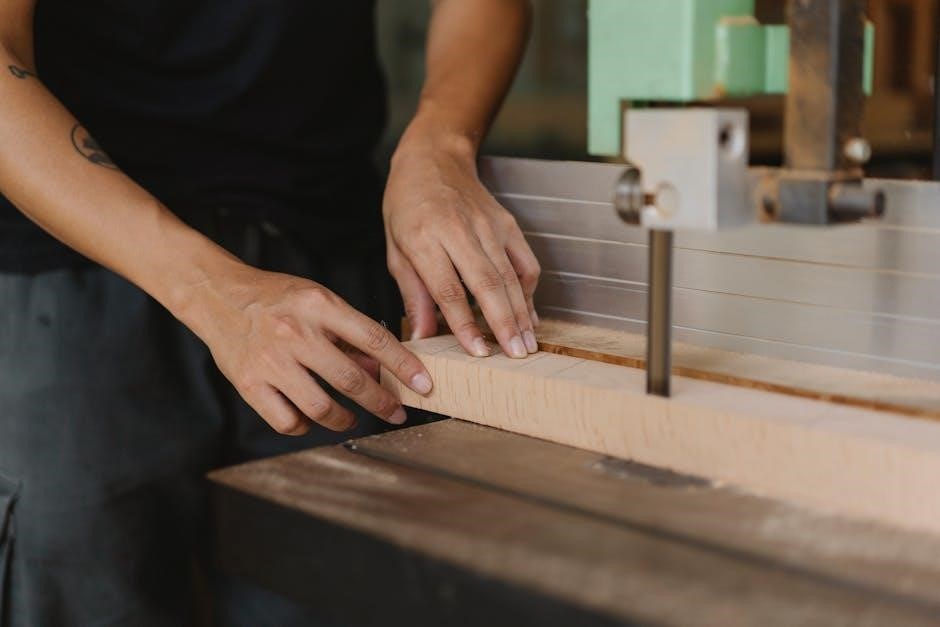
Start by ensuring the workpiece is properly aligned with the blade and the fence. For crosscuts, position the material at a right angle to the blade and gently push it through using a rip stick or push stick. When making rip cuts, align the material with the rip fence and maintain steady, consistent pressure. Always maintain control and keep your hands away from the blade path. Use a miter gauge for precise angled cuts, adjusting it to the desired angle before making the cut. For bevel cuts, tilt the blade to the specified angle and ensure the material is securely positioned. Never force the material through the blade; let it move naturally. Always turn off the saw and allow the blade to stop before leaving the machine unattended. Consult the operator’s manual for detailed guidance on performing these cuts safely and effectively.

3.4. Advanced Cutting Techniques

For compound cuts, tilt the blade to the desired angle and use the miter gauge to achieve precise angles. When performing dado joints, use a dado blade set and adjust the fence for accurate width. Always test cuts on scrap material first. For bevel rabbets, tilt the blade and use a auxiliary fence for consistent results. Maintain steady control and use push sticks or featherboards to guide the material smoothly. Avoid overloading the saw, as this can lead to kickback or uneven cuts. For intricate designs, consider using jigs or custom fixtures to ensure accuracy. Always refer to the operator’s manual for specific blade recommendations and setup instructions for advanced techniques. Proper alignment and blade maintenance are critical for achieving professional-grade results safely and efficiently.

Maintenance and Troubleshooting

Regularly clean the table and blade to prevent dust buildup. Inspect and tighten all bolts and belts. Lubricate moving parts as specified in the manual. Check blade alignment and sharpness. For common issues like uneven cuts or motor noise, refer to the troubleshooting guide. Always unplug the saw before performing maintenance. Replace worn or damaged parts promptly to ensure optimal performance and safety.

4.1. Routine Maintenance Tasks

Regular maintenance is crucial for optimal performance and longevity of your Ryobi table saw. Start by cleaning the table surface and miter slots with a soft brush or cloth to remove sawdust and debris. Inspect the blade for dullness or damage and replace it if necessary. Lubricate the saw’s moving parts, such as the trunnion and arbor bearings, with a high-quality machine oil. Check the belts and pulleys for signs of wear and ensure they are properly aligned. Tighten all bolts and screws, especially around the motor and arbor assembly. Refer to the operator’s manual for specific lubrication points and maintenance intervals. Additionally, ensure the blade guard and riving knife are in good condition and functioning correctly. By following these routine tasks, you can prevent premature wear and maintain precise cutting accuracy.

4.2. Common Issues and Solutions

If the blade is misaligned, check the arbor alignment and adjust according to the manual. For uneven cuts, ensure the blade is sharp and properly secured. If the motor overheats, reduce the workload and allow it to cool. Kickback can occur due to improper cutting techniques; always use a push stick and maintain control. Dust buildup on the table can cause inaccurate cuts; clean the surface regularly. If the saw vibrates excessively, check for loose parts and balance the blade. For faulty power switches, disconnect the power and contact Ryobi support. Refer to the troubleshooting section in the manual for detailed solutions and always follow safety guidelines when addressing any issue.

Additional Resources

Refer to the parts list and diagrams in the manual for detailed specifications. Contact Ryobi customer service for support or replacement parts. Visit the official website for downloadable manuals and guides.

5.1. Parts List and Diagrams

The parts list and diagrams section provides a comprehensive inventory of all components for your Ryobi table saw. Detailed illustrations highlight key features like the blade, motor, and fence. Each part is numbered and labeled for easy identification. Use these resources to understand assembly, maintenance, and troubleshooting. The diagrams are precise, ensuring accurate identification of components. Refer to this section for part numbers and descriptions when ordering replacements. This visual guide aids in proper setup and operation, helping you locate and understand every part of your table saw efficiently. Ensure you familiarize yourself with this section to maintain and repair your tool effectively. The clear labeling and detailed visuals make it easier to manage your saw’s upkeep and performance. Always consult the diagrams for accurate part identification and assembly instructions.

5.2. Contact Information for Support

For any questions or assistance with your Ryobi table saw, contact our dedicated customer support team. You can reach us by phone at 1-800-525-5929 or via email at support@ryobitools.com. Visit our official website at https://www.ryobitools.com/support for comprehensive resources, including manuals, FAQs, and troubleshooting guides. Our website also offers a live chat feature for immediate assistance. If you need replacement parts or accessories, use the parts lookup tool on our site. For warranty inquiries or repair services, contact our customer service team directly. Always have your tool’s model number and serial number ready for faster assistance. Our support team is available Monday through Friday, 8:00 AM to 5:00 PM EST. Save this manual for future reference and easy access to support information.

Thank you for taking the time to read this Ryobi table saw instruction manual. By following the safety guidelines, understanding your tool, and practicing proper techniques, you’ll achieve professional-quality results. Always prioritize safety and maintain your saw to ensure optimal performance. With proper care and use, your Ryobi table saw will be a trusted companion for countless projects. If you have any questions, refer to the contact information for support provided earlier. Happy building, and enjoy the satisfaction of creating something with your own hands!

mister coffee iced tea maker manual

Welcome to the Mr. Coffee Iced Tea Maker Manual, your guide to understanding, brewing, and maintaining your maker for perfect iced tea, ensuring safety and mastering features.

Overview of the Mr. Coffee Iced Tea Maker

The Mr. Coffee Iced Tea Maker is a convenient and easy-to-use appliance designed to brew refreshing iced tea at home. With its compact design, it allows users to prepare up to three quarts of iced tea in minutes. The maker features adjustable brew strength, ensuring customizable flavor to suit personal preferences. Its pitcher is designed for easy serving and cleaning, while the machine’s intuitive controls make the brewing process straightforward. Perfect for both tea enthusiasts and casual drinkers, this maker simplifies the process of creating delicious iced tea without the hassle of traditional methods.

Importance of Reading the Manual

Reading the Mr. Coffee Iced Tea Maker manual is essential for safe and effective use. It provides detailed instructions for assembly, operation, and maintenance, ensuring optimal performance. The manual highlights safety precautions to prevent accidents and device damage. Understanding the features and settings helps users customize their brewing experience. Additionally, troubleshooting guides and maintenance tips are included to address common issues and extend the product’s lifespan. By following the manual, users can enjoy perfectly brewed iced tea while maintaining their appliance in top condition. Proper usage ensures longevity and satisfaction with every brew.

Safety Precautions and Guidelines

Always handle the Mr. Coffee Iced Tea Maker with care. Keep it out of children’s reach and avoid electrical hazards. Follow all safety guidelines to ensure safe operation.

General Safety Tips for Appliance Usage

To ensure safe operation of your Mr. Coffee Iced Tea Maker, always keep it out of children’s reach and avoid placing it near water sources or flammable materials. Never submerge the appliance in water or expose it to extreme temperatures. Use only approved accessories and avoid overloading the machine. Regularly inspect electrical cords for damage and avoid using the maker if any components are malfunctioning. Place the appliance on a stable, heat-resistant surface to prevent accidents. Follow all guidelines in the manual to maintain safety and longevity of your iced tea maker.

Electrical Safety Considerations

Always plug your Mr. Coffee Iced Tea Maker into a grounded electrical outlet to prevent shocks. Avoid using frayed or damaged cords, as they can pose fire hazards. Never submerge the appliance in water or expose it to moisture, as this can cause electrical malfunctions. Keep the maker away from pools, sinks, or bathtubs. Avoid overloading circuits with multiple high-power appliances. Unplug the device when not in use or during cleaning. Ensure all electrical connections are secure and follow the manual’s guidelines to maintain electrical safety and prevent potential hazards.

Understanding the Components of the Mr. Coffee Iced Tea Maker

Familiarize yourself with the Mr. Coffee Iced Tea Maker’s components, including the pitcher, brew basket, and controls, to ensure proper use and maintenance of your appliance.

Diagram of Parts and Accessories

The Mr. Coffee Iced Tea Maker consists of key components: a pitcher with a lid, a brew basket, and a control panel. Accessories include a tea scoop and reusable filter. The pitcher holds up to 3 quarts, while the brew basket allows for loose or bagged tea. The control panel features buttons for power and brew strength. Additional parts may include a water reservoir and ice trays. Refer to the included diagram for accurate identification of each part and accessory, ensuring proper assembly and operation. Understanding these components is essential for brewing, cleaning, and maintaining your iced tea maker effectively.

Key Features and Functions Explained

The Mr; Coffee Iced Tea Maker offers a 3-quart capacity, perfect for serving multiple people. It features adjustable brew strength, allowing you to customize your tea’s flavor. The automatic shut-off ensures safety and prevents over-brewing. A reusable filter is included for convenience and eco-friendliness. The user-friendly interface makes it easy to operate, with clear buttons for power and brew settings. Additional features include a dishwasher-safe pitcher and a compact design for easy storage. These features work together to simplify the brewing process, ensuring delicious and refreshing iced tea every time. Understanding these functions will help you maximize your maker’s potential and enjoy perfect results.

Basic Brewing Instructions

Add tea bags, water, and ice to the pitcher. Choose brew strength and press start. The machine automatically brews and shuts off when done. Serve and enjoy!

Step-by-Step Guide to Making Iced Tea

Add tea bags to the infuser basket. 2. Pour fresh, cold water into the reservoir. 3. Fill the pitcher with ice cubes. 4. Select your preferred brew strength. 5. Press the Start button. The machine will brew, then automatically shut off. 6. Remove the tea bags and serve immediately. For best flavor, use fresh ingredients and adjust settings as needed. This simple process ensures perfectly brewed iced tea every time with your Mr. Coffee maker. Enjoy your refreshing drink!

Adjusting Brew Strength and Flavor

Customize your iced tea by adjusting the brew strength using the selector dial on the machine; Choose from light, medium, or strong brew options. For a bolder flavor, use more tea bags or steep longer. Adjust the water level to match the number of servings. Experiment with different tea varieties, like black, green, or herbal, for unique flavors. Add sweeteners or fruits to enhance taste. Regularly clean the infuser basket to prevent residue buildup. These simple adjustments ensure your iced tea is tailored to your preferences every time. Explore different combinations for the perfect refreshing drink.

Cleaning and Maintenance

Regular cleaning ensures optimal performance and hygiene. Wash the pitcher and infuser basket with mild soap and water after each use. Descaling is recommended every 3 months to prevent mineral buildup.

Regular Cleaning Procedures

Regular cleaning is essential to maintain your Mr. Coffee Iced Tea Maker’s performance and hygiene. After each use, wash the pitcher, lid, and infuser basket with mild soap and warm water. Rinse thoroughly to remove any residue. Dry all parts with a clean towel to prevent water spots. For tougher stains or buildup, mix equal parts water and white vinegar in the pitcher and soak for 30 minutes before scrubbing. Avoid using abrasive cleaners or scrubbers, as they may damage the surfaces. By following these steps, you’ll ensure your maker stays in great condition and continues to brew perfectly.

Deep Cleaning and Descaling Tips

For a deeper clean, descale your Mr; Coffee Iced Tea Maker every 1-3 months to remove mineral buildup. Fill the water reservoir with a descaling solution or equal parts water and white vinegar. Run a brewing cycle without tea leaves. Repeat the process until the solution is gone. If using vinegar, rinse thoroughly by running two cycles with fresh water to eliminate any taste. This prevents scaling and keeps your maker functioning smoothly. Regular descaling ensures optimal performance and prevents damage from lime deposits, keeping your iced tea tasting its best.

Troubleshooting Common Issues

Identify malfunctions such as power issues or leaks. Check electrical connections, ensure proper assembly, and descale regularly. Consult the manual for detailed solutions.

Identifying and Resolving Machine Malfunctions

Common issues with the Mr. Coffee Iced Tea Maker include the machine not turning on, improper brewing, or leaks. First, check the power cord and ensure it’s properly plugged in. For brewing issues, verify tea bag placement and water levels. Leaks may result from loose connections or damaged seals. Regularly descale the maker to prevent mineral buildup. Refer to the troubleshooting section in the manual for step-by-step solutions. If problems persist, contact customer support at 1-800-MR-COFFEE for assistance or replacement parts.

Common Errors and Solutions

Common issues with the Mr. Coffee Iced Tea Maker include the machine not turning on, uneven tea strength, or water overflow. If the maker doesn’t power on, check the outlet and ensure the plug is secure. For uneven brew strength, adjust the tea bag placement or steeping time. Water overflow may occur if the pitcher isn’t aligned properly. To resolve, ensure all parts are securely locked and the pitcher is correctly positioned. For persistent issues, consult the manual or contact customer support at 1-800-MR-COFFEE for assistance or replacement parts.

Additional Tips for Perfect Iced Tea

For perfect iced tea, use high-quality tea bags, filtered water, and adjust steeping time. Experiment with flavors like lemon, mint, or fruits for a refreshing twist. Serve over ice for best taste.

Choosing the Right Tea and Ingredients

Selecting the right tea is essential for a delicious iced tea experience. Opt for high-quality tea bags or loose-leaf varieties, such as black, green, or herbal options, depending on your preference. Pair with fresh or dried fruits, herbs, or spices to enhance flavor. For sweetness, consider natural additives like honey or agave syrup. Experiment with combinations like lemon and mint or raspberry and basil for unique twists. Use filtered water to ensure the best taste and adjust the tea-to-water ratio for strength. Proper ingredient selection will elevate your iced tea to new levels of refreshment and enjoyment.

Enhancing Flavor with Additives and Recipes

Elevate your iced tea with creative additives and recipes. Try infusing fresh fruits like lemons, limes, or berries for a refreshing twist. Herbs such as mint, basil, or lemongrass can add unique flavors. For sweetness, consider honey, agave syrup, or simple syrup. Experiment with spices like cinnamon or ginger for a warm, aromatic taste. Combining flavors, such as peach and mint or raspberry and lemon, creates delicious variations.

Explore recipes like tropical iced tea with pineapple and mango or southern-style sweet tea with honey. These additions and recipes will transform your brew into a flavorful, one-of-a-kind beverage tailored to your taste preferences;

ryobi 3000 psi pressure washer manual

The Ryobi 3000 PSI pressure washer, model RY80030, is a gas-powered cleaning solution with a 7 HP engine, delivering 3000 PSI and 2.7 GPM for heavy-duty tasks.

1.1 Overview of the Product

The Ryobi 3000 PSI pressure washer, model RY80030, is a powerful gas-powered cleaning tool designed for various outdoor tasks. With a 7 HP engine, it delivers 3000 PSI and 2.7 gallons per minute (GPM) of water flow, making it suitable for cleaning driveways, patios, decks, and vehicles. Engineered for dependability and ease of operation, this pressure washer features a robust design that ensures years of trouble-free performance when properly maintained. Its portability and high-pressure capability make it ideal for homeowners and professionals alike, offering a reliable solution for heavy-duty cleaning jobs. The unit is also designed with safety in mind, including features like a thermal relief valve to prevent overheating and a GFCI-protected power cord for enhanced user protection.

1.2 Key Features and Benefits

The Ryobi 3000 PSI pressure washer features a powerful 7 HP gasoline engine, delivering 3000 PSI and 2.7 gallons per minute (GPM) for efficient cleaning. Its robust design ensures durability and reliability, while the thermal relief valve prevents overheating, enhancing safety. The GFCI-protected power cord provides electrical safety, and the unit is portable, making it easy to maneuver for various outdoor tasks. Designed for heavy-duty cleaning, it excels at tackling driveways, patios, and vehicles. With proper maintenance, it offers years of trouble-free performance, making it a versatile and reliable tool for both homeowners and professionals. Its high-pressure capability and ease of use make it ideal for demanding cleaning jobs.

Safety Precautions and Warnings

Always read the manual before use. Ensure proper grounding and avoid operation in wet conditions. Never use E15 or E85 fuel. Follow all safety guidelines.

2.1 General Safety Guidelines

Always read the operator’s manual thoroughly before using the pressure washer. Ensure you understand all controls and safety features. Wear protective gear, including gloves and eyewear, to prevent injury from debris. Never operate the unit in wet conditions or expose it to rain. Properly ground the pressure washer using the GFCI plug provided to prevent electric shock. Keep children and pets away during operation. Regularly inspect hoses and connections for damage or leaks. Avoid using the pressure washer near open flames or sparks. Do not modify the unit or use unauthorized parts, as this can void the warranty and pose safety risks. Always follow the manufacturer’s instructions for maintenance and repair. Ensure the engine is cool before performing any checks or maintenance tasks.

2.2 Specific Warnings for Operation

Never use E15 or E85 fuel, as it can damage the engine. Ensure the pressure washer is on a stable, level surface before operation to prevent tipping. Do not point the nozzle at people, animals, or windows to avoid injury or damage. Keep the nozzle at least 12 inches away from surfaces to prevent etching or stripping. Always turn off the engine and release pressure by pulling the trigger before performing maintenance or leaving the unit unattended. Store the unit in a well-ventilated area to prevent carbon monoxide buildup. Never operate the pressure washer while fatigued or under the influence of alcohol or drugs. Ensure proper ventilation and avoid inhaling fumes from the engine or cleaning agents. Regularly check for worn or damaged parts and replace them immediately to maintain safety and performance.

Assembly and Initial Setup

Begin by unpacking and inventorying all parts. Connect the high-pressure hose to the pump and gun. Attach the spray nozzle and detergent tank. Ensure all connections are secure.

3.1 Unpacking and Inventory of Parts

Carefully unpack the Ryobi 3000 PSI pressure washer and verify all components are included. Check for damage during shipping. Inventory the parts: trigger gun, high-pressure hose, detergent tank, spray nozzles, and power cord. Ensure the engine and pump are pre-assembled. Familiarize yourself with the manual for specific part identification. Organize the accessories to prevent misplacement. Before assembly, inspect each component for any signs of damage or wear. If any parts are missing or damaged, contact customer support immediately. Proper inventory ensures a smooth setup process. Refer to the manual for a detailed list of included items and their descriptions. This step is crucial for ensuring all necessary components are available before proceeding with assembly.

3.2 Connecting Hoses and Accessories

To connect the hoses and accessories, start by attaching the high-pressure hose to the pump and the trigger gun. Ensure all connections are secure and free of leaks. Next, connect the spray nozzles to the gun, selecting the appropriate size for your cleaning task. If using detergent, attach the detergent tank and ensure it is properly aligned with the inlet. Double-check all connections for tightness and inspect for any signs of damage or wear. Finally, prime the pump by squeezing the trigger to ensure water flows freely through the system. Refer to the manual for specific instructions on connecting optional accessories. Proper connections are essential for safe and efficient operation. Always follow the manufacturer’s guidelines to avoid damage or malfunction.

Operating the Pressure Washer

Start by fueling the engine and ensuring all connections are secure. Prime the pump, then pull the starter cord to power up the unit.

4.1 Starting the Engine and Priming the Pump

To start the engine, ensure the pressure washer is on a level surface with the engine turned off. Engage the choke and prime the pump by squeezing the trigger gun to purge air from the system. Pull the starter cord firmly until the engine roars to life. Once running, disengage the choke and allow the pump to run for a few seconds to ensure proper priming. Always release pressure by pulling the trigger before starting to prevent system damage. Ensure all connections are secure and check for leaks before proceeding. Listen for unusual noises, as they may indicate issues requiring immediate attention. Proper starting ensures optimal performance and longevity of the unit.

4.2 Using the Trigger Gun and Nozzles

To operate the trigger gun, ensure the engine is running and the pump is primed. Squeeze the trigger to release water flow and use the nozzle to adjust the spray pattern. The Ryobi 3000 PSI pressure washer comes with interchangeable nozzles for various cleaning tasks. Always aim the nozzle away from people and pets to avoid injury. For detergent use, squeeze the trigger and wait 5 seconds for the detergent to flow. Regularly inspect nozzles for blockages and clean them to maintain performance. Store nozzles securely when not in use. The trigger gun is designed for comfortable grip and control during extended use. Always release pressure by pulling the trigger before shutting off the engine. This helps prevent system damage and ensures safe operation.

Maintenance and Care

Regular maintenance ensures optimal performance. Check and replace worn parts, clean filters, and lubricate moving components. Winterize by draining fluids and storing properly.

5.1 Regular Maintenance Tasks

Regular maintenance is essential to ensure the longevity and efficiency of your Ryobi 3000 PSI pressure washer. Start by inspecting the high-pressure hose and connections for any signs of wear or damage. Clean or replace the filters as needed to maintain proper water flow. Lubricate all moving parts, such as the pump and engine components, every 50 hours of use to prevent friction and wear. Check the belt for cracks or fraying and replace it if necessary. Additionally, ensure the engine oil level is adequate, and change the oil every 100 hours of operation. Finally, store the unit in a dry, protected area when not in use to prevent rust and corrosion. Regular upkeep will keep your pressure washer performing at its best.

5.2 Winterizing the Unit

Winterizing your Ryobi 3000 PSI pressure washer is crucial to protect it from freezing temperatures and ensure it operates efficiently in the next season. Start by draining all fuel from the tank and adding a fuel stabilizer to prevent degradation. Next, drain the water from the hoses, pump, and spray gun to eliminate any residual water that could freeze and cause damage. Use a pressure washer antifreeze solution to clear the system of moisture; Store the unit in a dry, protected area away from direct sunlight and extreme cold. Before storage, check the manual for specific winterization steps, such as lubricating moving parts or preparing the engine for dormancy. Proper winter care will extend the life of your pressure washer.

Troubleshooting Common Issues

Common issues with the Ryobi 3000 PSI pressure washer include low pressure, engine problems, and leaks. Always check hoses, belts, and connections for damage or blockages.

6.1 Identifying and Solving Operational Problems

Common operational issues with the Ryobi 3000 PSI pressure washer include low water pressure, engine difficulties, and leaks. To address low pressure, check for clogged nozzles or kinked hoses. Ensure the water supply is adequate and the pump is primed correctly. For engine problems, verify fuel levels, oil condition, and air filter cleanliness. Leaks often occur at connections; tighten any loose fittings and replace worn seals. Regularly inspect hoses and belts for wear. If issues persist, consult the manual or contact Ryobi support. Always follow safety guidelines when troubleshooting to avoid accidents. Proper maintenance can prevent many operational problems, ensuring efficient performance.

tv guide paducah ky

Your ultimate guide to Paducah, KY TV listings, covering broadcast, cable, and satellite channels. Discover schedules, local programming, and over-the-air options for a seamless viewing experience.

1.1 Overview of Local TV Listings

Local TV listings in Paducah, KY, offer a diverse range of channels, including broadcast, cable, and satellite options. Viewers can access schedules for popular networks like WPSD Local 6, Comcast, and Time Warner Cable. Over-the-air channels provide free access to shows like Jeopardy! and NBC News Daily. With daily updates, residents can easily track their favorite programs, ensuring they never miss a show. This comprehensive guide helps viewers navigate the wide array of entertainment and news available in the Paducah area.

1.2 Importance of a TV Guide for Viewers

A TV guide is essential for viewers in Paducah, KY, as it provides a centralized source for tracking broadcast, cable, and satellite listings. It helps viewers discover new shows, plan their viewing schedule, and never miss favorite programs. With daily updates, the guide ensures access to current and accurate information. This resource is vital for maximizing entertainment options and staying informed about local and national programming. It caters to diverse preferences, making it an indispensable tool for both casual and dedicated TV enthusiasts in the Paducah area.

Broadcast TV Listings in Paducah, KY

Explore free over-the-air TV channels in Paducah, featuring major networks like ABC, CBS, NBC, FOX, and PBS; Includes local channels such as WPSD Local 6 and more.

2.1 Local Channels and Their Schedules

Paducah, KY offers a variety of local channels with diverse programming. WPSD Local 6 provides news, weather, and NBC shows. Classic TV on WPSD 6.3 features retro series. Other channels include GSN, Insp, and the Outdoor Channel. Schedules vary, with shows like Jeopardy! and Gomer Pyle, U.S.M.C. airing at specific times. Viewers can access these channels over-the-air or through cable providers like Comcast. Check daily listings for exact broadcast times and plan your viewing experience accordingly. Local channels ensure a mix of entertainment, education, and community-focused content for residents.

2.2 How to Access Over-the-Air Channels

To access over-the-air channels in Paducah, KY, viewers can use a digital antenna to receive free broadcasts. Channels like WPSD Local 6 are available on digital channel 6.1; Simply connect an antenna to your TV and scan for channels to ensure proper reception. This method provides access to local news, weather, and entertainment without subscription fees. Over-the-air TV is a cost-effective and reliable way to enjoy local programming, ensuring you never miss your favorite shows or important updates. Tune in effortlessly with the right equipment and setup.

Cable TV Listings in Paducah, KY

Explore cable TV listings in Paducah, KY, with providers like Comcast and Time Warner Cable offering diverse channel lineups. Discover popular networks and local programming options.

3.1 Popular Cable Providers in the Area

In Paducah, KY, leading cable providers include Comcast, Time Warner Cable, and Spectrum. These providers offer a wide range of channels, from local programming to premium networks. Comcast serves the Greater Paducah Area, while Time Warner Cable covers western Kentucky and northwest Tennessee. Spectrum provides robust channel lineups and high-definition streaming options. Each provider offers unique features, such as on-demand content and DVR capabilities, making them popular choices for viewers seeking diverse entertainment options.

3.2 Channel Lineups for Cable Services

Cable providers in Paducah, KY, offer diverse channel lineups to suit various viewer preferences. Comcast features channels like GSN, Inspiration Network, and Juice TV, while Spectrum includes Outdoor Channel and UP. Time Warner Cable offers a mix of entertainment, sports, and movie channels. Each provider tailors its lineup to include local programming, ensuring viewers stay connected to Paducah’s community events and news. With options for HD streaming and premium networks, these cable services provide a comprehensive viewing experience for residents.

Satellite TV Listings in Paducah, KY

Satellite TV in Paducah, KY, offers extensive channel options, including HD programming and premium networks. Providers like fubo ensure access to local and national content, enhancing viewer flexibility.

4.1 Satellite TV Providers Serving Paducah

Satellite TV providers in Paducah, KY, include Dish Network and DIRECTV, offering a wide range of channels, HD programming, and DVR capabilities. These services provide access to local and national networks, ensuring diverse entertainment options. With flexible packages, viewers can customize their plans to suit preferences. Satellite TV is ideal for areas with limited cable access, delivering reliable service and premium content. Both providers offer competitive pricing and advanced features, making them popular choices for Paducah residents seeking high-quality TV experiences.

4.2 Benefits of Satellite TV for Local Viewers

Satellite TV offers Paducah viewers wide channel selection, HD quality, and reliable reception, even in rural areas with limited cable access. DVR capabilities allow recording favorite shows, while flexible packages cater to diverse budgets. With providers like Dish Network and DIRECTV, viewers enjoy access to premium content, sports, and movies. Satellite TV ensures consistent service during weather disruptions, making it a dependable choice for entertainment. Its versatility and extensive coverage make it a preferred option for Paducah residents seeking high-quality TV experiences.

Popular TV Shows and Movies in Paducah, KY

Paducah viewers enjoy a diverse range of popular TV shows, movies, and special events. From trending dramas to comedy series, the guide keeps you updated on what’s airing locally.

5.1 Trending Programs on Local Channels

Paducah viewers enjoy a variety of trending programs across local channels. From WPSD Local 6’s New NBC News Daily to popular game shows like Jeopardy!, there’s something for everyone. Local channels also feature dramas, comedies, and movies, ensuring diverse entertainment options. Stay updated with daily schedules to catch your favorite shows. Check the TV guide for listings and never miss an episode of trending programs airing in Paducah, KY.

5.2 Movies and Special Events on TV

Paducah TV viewers can enjoy a wide range of movies and special events. From classic films to premieres, local channels like WPSD Local 6 and others offer diverse cinematic experiences. Special events, such as live sports and concerts, are also highlighted in the TV guide. Check listings for movie blocks and unique programming to plan your viewing. Stay entertained with Paducah’s mix of Hollywood hits, indie films, and exclusive TV events, all accessible through your local TV guide.

How to Choose the Right TV Service Provider

Selecting the right TV provider in Paducah, KY, involves comparing broadcast, cable, and satellite options. Evaluate costs, channel lineups, and special features to find the best fit for your needs.

6.1 Comparing Broadcast, Cable, and Satellite Options

When selecting a TV service provider in Paducah, KY, it’s essential to compare broadcast, cable, and satellite options. Broadcast TV is free but limited to local channels. Cable TV offers a wide range of channels and reliability, though it can be expensive. Satellite TV provides access to numerous channels and is ideal for rural areas, though weather can disrupt service. Evaluate your budget, viewing preferences, and coverage needs to choose the best option for your lifestyle and entertainment requirements.

6.2 Tips for Selecting the Best TV Plan

To choose the right TV plan in Paducah, KY, assess your viewing habits and prioritize channels. Check provider coverage and compare costs. Set a budget and opt for packages offering your favorite shows. Consider add-ons like DVR or streaming. Evaluate customer reviews for reliability. Lastly, inquire about promotions or discounts to maximize value. Tailoring your plan ensures you enjoy the content you love without unnecessary expenses.

WPSD Local 6: A Comprehensive Guide

WPSD Local 6 offers Paducah, KY, essential news, entertainment, and NBC programming. Available via antenna on 6.1 and select cable providers, it’s a trusted local resource.

7;1 Channel Features and Programming

WPSD Local 6 offers a diverse lineup of news, weather, sports, and entertainment programming. Popular shows include Local 6 Midday and NBC News Daily. The channel features a mix of local content and NBC network programming, ensuring a blend of regional and national coverage. Viewers can enjoy Jeopardy!, Gomer Pyle, U.S.M.C., and other classic shows; Additionally, WPSD provides community-focused segments, making it a trusted source for Paducah residents. With a focus on both entertainment and local news, WPSD Local 6 caters to a wide audience.

7.2 How to Tune into WPSD Local 6

Tune into WPSD Local 6 by using an antenna for over-the-air access on digital channel 6.1. Cable subscribers can find WPSD on Comcast (channel 233) in the Greater Paducah Area and Time Warner Cable (channel 100) in west KY and northwest TN. Viewers can also access WPSD via satellite or streaming services. For antenna users, ensure your device is compatible with digital signals. Check your provider’s channel lineup or use a TV guide for precise tuning. Enjoy local news, weather, and NBC programming with ease.

kryptek pdf

Kryptek PDFs provide high-resolution camouflage patterns designed for tactical, hunting, and outdoor enthusiasts. These files enable users to create professional-grade stencils for various projects, from firearm customization to DIY crafts, offering versatility and style.

1.1 What Are Kryptek PDFs?

Kryptek PDFs are digital files containing high-resolution camouflage patterns designed for various applications. These files provide detailed, professional-grade stencils that can be used for firearm customization, tactical gear, DIY projects, and artistic designs. They are compatible with plotters, printers, and laser cutters, making them versatile for enthusiasts and professionals alike. The patterns feature unique layering and 3D effects, ensuring concealment and style. Each PDF is curated for specific uses, offering everything needed to craft or customize stencils; They are intended for personal use, allowing users to achieve professional results in their projects.

1.2 Key Features and Benefits of Kryptek PDFs

Kryptek PDFs offer high-resolution, detailed patterns that ensure crisp and professional results. They are compatible with various tools like plotters, printers, and laser cutters, making them versatile for different projects. The files provide bi-level layering and sharp geometrical designs, creating a 3D camouflage effect for optimal concealment. These PDFs cater to both enthusiasts and professionals, offering ease of use and customization. They are ideal for tactical gear, firearm customization, and artistic projects, providing a cost-effective solution for achieving unique and stylish camouflage patterns. Their digital format allows instant access and hassle-free printing, enhancing productivity and creativity.

Applications and Uses of Kryptek PDFs

Kryptek PDFs are widely used for tactical gear customization, hunting equipment, and DIY projects. They are popular among outdoor enthusiasts and military communities for their versatility and effectiveness.

2.1 Tactical and Hunting Gear Customization

Kryptek PDFs are widely used for customizing tactical and hunting gear, offering high-resolution camouflage patterns. These files enable users to create professional-grade stencils for firearm customization, Cerakote applications, and tactical camo projects. Compatible with CNC machines, laser engravers, and vinyl cutters, they provide precise and detailed designs. The patterns feature micro and macro layering, creating a 3D appearance for enhanced concealment. Popular among outdoor enthusiasts and military communities, Kryptek PDFs are ideal for personalizing equipment, ensuring durability and style. Their versatility makes them a favorite for both amateur DIY projects and professional-grade modifications, catering to a broad range of tactical and hunting needs.

2.2 Artistic and DIY Projects

Kryptek PDFs are a popular choice for artistic and DIY projects, offering versatile and stylish camouflage patterns. Artists and crafters use these high-resolution files to create unique designs for hydrographics, wrap vinyl, fabric, and gift wrap. The patterns, featuring hexagonal and layered designs, add a professional touch to various mediums. DIY enthusiasts can print and cut stencils for projects like painting guns, Cerakote applications, and tactical gear customization. The seamless designs are also ideal for fashion, graphic design, and 3D modeling. Whether for personal creativity or commercial use, Kryptek PDFs provide endless possibilities for artistic expression and customization, making them a favorite among crafters and designers.

Downloading and Accessibility of Kryptek PDFs

Kryptek PDFs are easily accessible through official sources and marketplaces, offering both free and paid options. Instant downloads enable users to quickly obtain high-resolution files for various projects.

3.1 Official Sources and Marketplaces

Kryptek PDFs are available through official sources like the Kryptek website and authorized retailers. Popular marketplaces such as Etsy and eBay also offer a wide range of Kryptek designs. These platforms provide easy access to high-resolution patterns, stencils, and instructions for various projects. Official sources ensure authenticity and quality, while marketplaces often include user-friendly options for instant downloads. Many listings cater to specific needs, such as firearm customization or tactical gear, making it easy to find the right file for your project. Always verify the seller’s credentials to ensure you’re purchasing genuine Kryptek products.

3.2 Free vs. Paid Options

Kryptek PDFs are available in both free and paid options, catering to different user needs. Free versions often include basic patterns or limited-resolution files, suitable for personal projects. Paid options provide high-resolution, detailed designs and exclusive content, ideal for professional use or intricate customization. Websites like Printablee and specialized forums offer free downloads, while official Kryptek sources and marketplaces like Etsy feature premium files. Paid options typically include additional features like editable layers or comprehensive guides, making them worth the investment for serious enthusiasts. Choose the option that best fits your project’s requirements and budget.

Popularity and Reception of Kryptek PDFs

Kryptek PDFs have gained significant popularity among tactical and outdoor enthusiasts due to their unique, high-resolution camouflage patterns and versatility in customization for various projects and gear.

4.1 Among Outdoor and Hunting Enthusiasts

Kryptek PDFs have become highly popular among outdoor and hunting enthusiasts due to their ability to provide professional-grade camouflage patterns for gear customization. The high-resolution designs allow users to create stencils for firearms, apparel, and equipment, enhancing both functionality and aesthetics. Enthusiasts appreciate the versatility of these files, which cater to various printing and cutting tools, making it easy to apply Kryptek’s unique patterns to their projects. This has made Kryptek PDFs a go-to resource for those seeking to personalize their gear with a tactical, stylish edge, ensuring they stand out in the field or wilderness.

4.2 In Tactical and Military Communities

Kryptek PDFs are widely recognized within tactical and military communities for their advanced, three-dimensional camouflage patterns. These designs, inspired by artillery camouflage netting, offer exceptional concealment at various distances. Professionals value the ability to download high-resolution files for use with CNC machines, laser engravers, and vinyl cutters, enabling precise application to firearms, gear, and apparel. The patterns’ effectiveness in diverse terrains has made Kryptek a trusted name, with U.S. Special Operations having rigorously tested and utilized their designs. This adoption underscores the PDFs’ reliability and versatility in high-stakes environments, solidifying their reputation as a tactical essential.

Customization and Utilization of Kryptek PDFs

Kryptek PDFs offer versatile tools for customization, enabling users to create stencils for firearm customization, Cerakote applications, and tactical projects. Compatible with CNC, lasers, and vinyl cutters, they ensure precise, professional results.

5.1 Tools and Techniques for Printing and Cutting

Kryptek PDFs are designed for precision printing and cutting, compatible with tools like CNC machines, laser engravers, and vinyl cutters. High-resolution patterns ensure crisp details, while software like CorelDRAW or Adobe Illustrator aids in customizing designs. For optimal results, use high-quality materials such as vinyl or hydrographic film. Calibration of equipment is crucial to maintain pattern accuracy. Techniques include layering for 3D effects and aligning patterns seamlessly. Proper cutting tools, like sharp blades or lasers, prevent errors. Test runs on scrap material are recommended to refine settings. These tools and techniques ensure professional-grade customization for tactical gear, firearms, and outdoor projects.

5.2 Projects and Examples of Use

Kryptek PDFs are widely used for firearm customization, tactical gear, and DIY projects. Enthusiasts apply these patterns to create camouflage stencils for rifles, hydrographic wrapping, and fabric printing. For instance, users can customize Cerakote applications or design unique tactical apparel. The high-resolution files are ideal for crafting hunting gear, such as tree stands or blinds, blending seamlessly into outdoor environments. Additionally, artists utilize Kryptek patterns for creative projects, like wall art or vehicle wraps, showcasing the versatility of these designs. These examples highlight how Kryptek PDFs empower individuals to achieve professional-grade customization across various applications.

Legal Considerations and Trademark Information

Kryptek and its patterns are registered trademarks of Kryptek Outdoor Group, LLC. Usage rights are restricted, and files are intended for personal use only, with licensing required for commercial purposes.

6.1 Trademark and Usage Rights

Kryptek and its distinctive camouflage patterns are registered trademarks of Kryptek Outdoor Group, LLC. The trademarks and designs are legally protected, restricting unauthorized commercial use. Users must adhere to licensing agreements, ensuring proper usage rights. Personal, non-commercial use is generally permitted, but commercial applications require explicit authorization. Violations may result in legal action. Always verify licensing terms before using Kryptek PDFs for any project to respect intellectual property rights and avoid infringement.

6.2 Licensing and Restrictions

Licensing for Kryptek PDFs typically requires authorization for commercial use, while personal use is generally permitted. Restrictions prohibit resale, redistribution, or modification of the files without explicit consent. Users must comply with terms outlined in licensing agreements to avoid legal consequences. Unauthorized commercial exploitation of Kryptek patterns is strictly prohibited, as they are protected under trademark law. Always review the licensing terms before using Kryptek PDFs to ensure compliance and avoid infringement issues;

Kryptek PDFs have revolutionized camouflage customization, offering versatility for tactical and outdoor enthusiasts. Future trends include advanced digital patterns and expanded applications, ensuring continued relevance and innovation.

7.1 Impact on Outdoor and Tactical Culture

Kryptek PDFs have significantly influenced outdoor and tactical culture by providing high-resolution, customizable camouflage patterns. Widely adopted by enthusiasts and professionals, they offer versatility for gear customization and artistic projects. Their popularity stems from their realistic, 3D-effect designs, making them a favorite among hunters, military personnel, and DIY enthusiasts. The ease of access to these PDFs has democratized camouflage customization, allowing individuals to personalize their equipment and creations. This has fostered a community-driven approach to tactical and outdoor aesthetics, solidifying Kryptek’s role as a leader in the industry. Their impact is evident in the growing demand for digital camouflage solutions.

7.2 Future Trends and Developments

Kryptek PDFs are expected to evolve with advancements in digital printing and cutting-edge technologies. The integration of AI and machine learning could enhance pattern customization, offering more terrain-specific designs. Collaborations with outdoor and tactical brands may expand their applications, while eco-friendly printing options could cater to environmentally conscious users. Additionally, the rise of 3D printing and laser cutting technologies may further simplify the customization process. As demand grows, Kryptek PDFs are likely to remain at the forefront of innovation in camouflage design, offering users even greater versatility and precision in their projects.

black and decker air fryer toaster oven manual

Welcome to the Black and Decker Air Fryer Toaster Oven manual! This guide provides essential information to help you understand and use your appliance effectively. Discover its key features, including 5 versatile cooking functions: toast, bake, air fry, broil, and keep warm. Learn how to utilize the innovative Air Fry technology for crispy results with minimal oil. This manual covers safety precautions, operating instructions, and troubleshooting tips to ensure safe and optimal performance. Read carefully to make the most of your cooking experience!

Overview of the Manual

This manual provides comprehensive guidance for the Black and Decker Air Fryer Toaster Oven, covering essential topics to ensure safe and effective use. It includes detailed instructions for operating the appliance, highlighting its versatile functions such as toasting, baking, air frying, broiling, and keeping food warm. The manual emphasizes safety precautions, pre-use checks, and proper maintenance to extend the product’s longevity. Users will find troubleshooting tips and solutions for common issues, as well as practical advice for achieving optimal cooking results. With clear, step-by-step instructions, the manual helps users unlock the full potential of their air fryer toaster oven while ensuring a seamless cooking experience.

Importance of Reading the Manual

Reading the Black and Decker Air Fryer Toaster Oven manual is crucial for ensuring safe and effective appliance operation. It provides vital safety precautions, such as avoiding hot surfaces and proper electrical usage, to prevent accidents. The manual explains how to utilize each function optimally, from air frying to baking, and offers troubleshooting solutions for common issues. By following the guidelines, users can extend the product’s lifespan and maintain performance. Understanding the manual’s instructions helps users achieve desired cooking results while minimizing risks. It serves as a comprehensive guide to unlocking the oven’s full potential, making it an essential resource for both new and experienced users.

Safety Precautions

Always read and follow the safety guidelines in the manual. Avoid touching hot surfaces; use handles or knobs. Keep children away and ensure proper ventilation. Never immerse the appliance in water or expose it to excessive moisture to prevent electrical hazards. Regularly inspect for damage and avoid overloading. Follow all instructions carefully to ensure safe and efficient operation.

Pre-Use Safety Checks

Before using your Black and Decker Air Fryer Toaster Oven, ensure all parts are undamaged and free from wear. Keep children away from the appliance while in use. Place the oven on a stable, heat-resistant surface, away from flammable materials. Never expose the appliance to water or excessive moisture, as this can cause electrical hazards. Regularly inspect the power cord and plug for damage. Ensure proper ventilation in the kitchen to prevent steam buildup. Always read the manual thoroughly before first use to understand safety guidelines and operating instructions. Following these pre-use checks will help prevent accidents and ensure safe, efficient operation of your appliance.

Safety During Operation

Always monitor the appliance while in use and never leave it unattended. Use oven mitts or tongs to handle hot food and racks to avoid burns. Keep children away from the oven during operation. Ensure the appliance is placed on a stable, heat-resistant surface. Avoid overcrowding the air fryer basket or oven rack, as this can hinder air circulation and affect cooking performance. Never insert metal utensils or objects into the oven, as they may cause sparks or damage. Keep the oven door closed during operation to maintain temperature and safety. Regularly clean food residue to prevent smoke and potential fires. Always follow the recommended cooking times and temperatures to ensure safe and efficient cooking.

Product Overview

The Black and Decker Air Fryer Toaster Oven combines 5 versatile cooking functions: toast, bake, air fry, broil, and keep warm. Its compact design saves countertop space while offering innovative Air Fry technology for crispy results with minimal oil. Built for efficiency and convenience, it features a user-friendly interface and sleek appearance, making it a practical addition to any kitchen.

Key Features of the Air Fryer Toaster Oven

The Black and Decker Air Fryer Toaster Oven is equipped with 5 versatile cooking functions: toasting, baking, air frying, broiling, and keeping food warm. Its innovative Air Fry technology uses high-intensity hot air to achieve crispy results with minimal oil, operating at 425°F for optimal performance. The oven features a 60-minute timer with a stay-on function for extended cooking tasks and four heating elements for even heat distribution. A sleek and compact design saves countertop space while offering a modern look. The appliance also includes a air fry mesh rack for healthier frying options and a user-friendly control panel for easy operation.

Design and Build

The Black and Decker Air Fryer Toaster Oven features a sleek and compact design that seamlessly integrates into any kitchen countertop. Its stainless steel exterior offers durability and a modern aesthetic, while the interior is thoughtfully constructed for efficient cooking. Equipped with four heating elements, the oven ensures even heat distribution for consistent results. The appliance includes a air fry mesh rack, wire rack, and baking pan, providing versatility for various cooking tasks. The user-friendly control panel with temperature selector and timer knobs allows for precise adjustments. Built with safety in mind, it includes features like cool-touch handles and automatic shut-off, ensuring safe and convenient operation. This design makes it a practical and stylish addition to your kitchen.

Operating Instructions

The Black and Decker Air Fryer Toaster Oven operates with ease, offering versatile cooking functions. Use the temperature selector and timer knobs for precise control. Choose between toast, bake, air fry, broil, and keep warm settings. For air frying, place food on the mesh rack and set the temperature to 425°F. Always preheat before cooking and ensure food is evenly spaced for optimal results. Refer to the manual for specific cooking times and settings to achieve perfect dishes. Follow safety guidelines, such as avoiding hot surfaces and using oven mitts, for a safe and enjoyable cooking experience.

Basic Functions and Controls

The Black and Decker Air Fryer Toaster Oven features intuitive controls designed for easy operation. The temperature selector knob allows you to choose from various cooking functions, including toast, bake, air fry, broil, and keep warm. The timer selector knob offers precise time control, up to 60 minutes, with a stay-on function for extended cooking tasks. Additional settings include adjusting the toast shade to achieve your preferred crispiness. The oven also includes a mesh rack for air frying and a wire rack for toasting and baking. These user-friendly controls ensure seamless navigation, making it easy to achieve perfect results whether frying, baking, or toasting. Always refer to the manual for specific guidance on using each function effectively.

Setting Up the Air Fryer

Setting up your Black and Decker Air Fryer Toaster Oven is straightforward. Begin by placing the oven on a stable, heat-resistant surface, ensuring adequate ventilation. Plug the appliance into a nearby electrical outlet, avoiding the use of an extension cord. Before first use, wash the racks and pans with warm, soapy water to remove any manufacturing residue. Ensure the oven is preheated according to the manual’s instructions for optimal performance. Familiarize yourself with the controls, such as the temperature selector knob and timer, to understand their functions. Finally, review the manual to ensure proper setup and operation, as improper installation may affect safety and efficiency. This preparation ensures a smooth and safe cooking experience.

Troubleshooting Common Issues

Identify and resolve common problems with your Black and Decker Air Fryer Toaster Oven. Issues may include uneven cooking or the oven not turning on. Check power connections, ensure proper preheating, and verify timer settings. For air frying, ensure food is evenly spaced and cooked at the correct temperature. Refer to the manual for specific solutions and maintenance tips to address these issues effectively.

Identifying Common Problems

Common issues with the Black and Decker Air Fryer Toaster Oven include uneven cooking, the oven not turning on, or the air fry function not working as expected. Check if the appliance is properly plugged in and the outlet is functioning. Ensure the timer and temperature settings are correctly adjusted. For uneven cooking, verify food placement and rack positioning. If the air fry mode isn’t performing, ensure the mesh rack is used and food is evenly spaced. Consult the manual for troubleshooting steps specific to your model. Addressing these issues promptly ensures optimal performance and extends the appliance’s longevity. Always refer to the manual for detailed solutions.

Solutions and Quick Fixes

For common issues with your Black and Decker Air Fryer Toaster Oven, start by ensuring the appliance is properly plugged in and the outlet is functioning. If the oven doesn’t turn on, check the power cord and circuit breaker. For uneven cooking, adjust food placement and ensure the rack is correctly positioned. Clean the oven regularly to prevent food residue buildup. If the air fry function isn’t working, verify that the mesh rack is in place and food is evenly spaced. Reset the timer or temperature if necessary. Refer to the manual for specific troubleshooting steps tailored to your model. Regular maintenance and proper usage can resolve most issues quickly, ensuring optimal performance.

Maintenance and Care

Regular cleaning and proper storage are essential for maintaining your Black and Decker Air Fryer Toaster Oven. Wipe the exterior with a damp cloth and avoid abrasive cleaners. Clean the interior, racks, and pan after each use to prevent food buildup. Store the appliance on a stable, dry surface when not in use, ensuring it is cool. Proper maintenance ensures longevity and optimal performance.

Cleaning the Appliance

Regular cleaning is essential to maintain the performance and longevity of your Black and Decker Air Fryer Toaster Oven. Always unplug the appliance before cleaning. Wipe the exterior with a soft, damp cloth to remove splatters and fingerprints. For the interior, use a damp sponge or soft cloth to clean racks, pans, and surfaces. Avoid using abrasive cleaners, as they may damage the finish. For tough food residue, soak racks and pans in soapy water before scrubbing. Dry all parts thoroughly after cleaning to prevent moisture spots. Cleaning after each use prevents food buildup and ensures optimal cooking results. Regular maintenance keeps your oven in great condition for years of reliable service.

Storage and Longevity Tips

To ensure the longevity of your Black and Decker Air Fryer Toaster Oven, proper storage is crucial. Always unplug the appliance and allow it to cool completely before storing. Use a soft, dry cloth to wipe the exterior and interior to prevent dust buildup. Store the oven in a dry, cool place, away from direct sunlight and moisture. Avoid stacking heavy objects on top of the appliance to prevent damage. For extended storage, place the oven in its original packaging or a protective cover to safeguard it from dust and scratches. Regular cleaning and proper storage will help maintain its performance and extend its lifespan. Follow these tips to keep your oven in excellent condition for years of reliable use.

calisthenics workout pdf

Discover a comprehensive guide to bodyweight training with our Calisthenics Workout PDF. Perfect for all fitness levels, it offers structured plans, exercises, and tips to build strength and flexibility. Download, print, and start your journey to a leaner, stronger you with minimal equipment needed!

What is Calisthenics?

Calisthenics is a form of exercise using body weight and gravity as resistance to build strength, flexibility, and coordination. Originating from the Greek words “kalos” (beauty) and “sthenos” (strength), it requires minimal equipment, making it accessible to all fitness levels. Through movements like push-ups, squats, and lunges, calisthenics enhances physical fitness without gym memberships, ideal for home or outdoor training. It promotes overall wellness, muscle growth, and improved mobility, suitable for beginners and advanced athletes alike.

Benefits of Calisthenics

Calisthenics offers numerous benefits, including improved strength, flexibility, and coordination. It enhances muscle growth, boosts endurance, and promotes overall wellness. This cost-effective workout requires minimal equipment, making it accessible anywhere. Suitable for all fitness levels, calisthenics helps build functional strength, enhancing daily activities and sports performance. It also improves mental discipline and reduces injury risk compared to heavy weightlifting. Regular practice leads to a lean, toned physique and better overall health.

Why Use a Calisthenics Workout PDF?

A Calisthenics Workout PDF provides a structured, portable, and customizable plan for bodyweight training. It offers clear exercise routines, sets, reps, and rest periods, making it easy to follow anywhere. The PDF allows for personalization based on fitness levels and goals, with options to adjust exercises. It also includes space for tracking progress, celebrating milestones, and staying motivated. Accessible on phones or in print, it’s a cost-effective tool for consistent and effective training, eliminating the need for special apps or equipment.

Structured Calisthenics Workout Programs

Explore organized workout plans designed for progress, from 12-week and 30-day routines to 6-week beginner programs. Tailored for all fitness levels, these plans promote strength, flexibility, and consistency.

12-Week Calisthenics Workout Plan

This comprehensive 12-week program is designed to help you build a strong, aesthetic physique through organized bodyweight exercises. Whether you’re a beginner or intermediate, the plan includes progressive workouts to enhance strength, muscle mass, and flexibility. Each phase focuses on different muscle groups, ensuring balanced development. With detailed exercise schedules and tips for modification, this plan is perfect for those committed to consistent training and visible results. Stay motivated and track your progress for a transformative fitness journey. Download the PDF to get started today!

30-Day Calisthenics Workout Routine

Kickstart your fitness journey with this 30-day calisthenics program, designed to gradually build endurance and muscle. Perfect for all fitness levels, it includes exercises like push-ups, squats, lunges, and planks. Each week focuses on different muscle groups, ensuring balanced growth. With a clear schedule and progression tips, this routine helps you stay consistent. Download the PDF to access daily workout plans, nutrition tips, and motivation to keep you on track for the full month. Achieve noticeable results in just four weeks!

6-Week Calisthenics Workout Plan for Beginners

Begin your fitness journey with this 6-week calisthenics plan, tailored for newcomers; Each week introduces foundational exercises like push-ups, squats, and lunges, gradually increasing in intensity. The program focuses on building strength, balance, and flexibility. With clear instructions and progression tips, it helps you stay motivated. Perfect for home or outdoor workouts, this PDF guide ensures a smooth transition into a consistent exercise routine. Start your transformation today!

Progression and Scaling in Calisthenics

Master the art of progression and scaling in calisthenics. Increase reps, sets, or modify exercises to suit your fitness level. Achieve strength and flexibility with minimal equipment, ensuring sustained growth and long-term results.

How to Progress in Calisthenics Exercises

Progressing in calisthenics involves gradually increasing difficulty. Start with basic exercises like push-ups, then move to more challenging variations such as decline or single-arm push-ups. Incorporate plyometric movements, like burpees or jump squats, to enhance explosiveness. As strength improves, add advanced techniques such as muscle-ups or handstand push-ups. Consistency and patience are key to mastering each progression step and achieving long-term fitness goals. Always focus on proper form to avoid injury and ensure effective muscle engagement.

Scaling Exercises for Different Fitness Levels

Calisthenics exercises can be scaled to suit various fitness levels. Beginners can modify push-ups to knee push-ups or wall push-ups, while intermediates can add plyometric movements like claps or depth. Advanced individuals can progress to single-arm push-ups or handstand variations. Each variation maintains the exercise’s core benefits but adjusts difficulty, ensuring safe and effective progression. Proper form is essential at every level to prevent injury and maximize results.

Downloading and Using the Workout PDF

Easily download the free Calisthenics Workout PDF, print it, or access it on your phone. Stay organized, track progress, and stay motivated with this handy guide.

How to Download the Calisthenics Workout Guide

Downloading the Calisthenics Workout Guide is straightforward. Visit the official website, click the download link, and save the PDF to your device. Open, print, or access it on your phone. Ensure you have a stable internet connection for a smooth download. The guide is free and instantly available, providing you with a structured plan to follow anytime, anywhere. Start your fitness journey with just a few clicks!

Customizing the Workout Plan for Personal Goals

Tailor your Calisthenics Workout Plan to suit your fitness objectives. Modify exercises, sets, or reps based on your current fitness level and goals. For strength, increase reps or intensity. For endurance, focus on higher sets with shorter rests. Replace or add exercises to target specific muscle groups. Adjust the schedule to fit your lifestyle, ensuring consistency and progress. Personalization enhances effectiveness, keeping workouts engaging and aligned with your aspirations.

Key Exercises and Routines

Tailor your calisthenics program by adjusting exercises, sets, reps, and intensity to match your fitness goals. Focus on strength, endurance, or flexibility by modifying routines. Swap exercises to target specific muscles or address weaknesses. Adjust rest periods and volume based on your schedule and progress. Personalization ensures the plan remains challenging and effective, keeping you motivated and on track to achieve your desired results.

Core Calisthenics Exercises for Full-Body Workout

Master essential exercises like push-ups, pull-ups, squats, lunges, planks, and dips to target all muscle groups. These movements build strength, endurance, and flexibility. Push-ups enhance chest and arm strength, while pull-ups improve upper body power. Squats and lunges work the legs and core, ensuring a balanced workout. Planks and dips target the core and triceps, rounding out the full-body approach. These exercises form the foundation of any effective calisthenics routine, promoting overall fitness and athleticism.

Warm-Up and Cool-Down Routines

A proper warm-up prepares your body for exercise, reducing injury risk. Start with arm circles, standing twists, and wrist circles. Add dynamic stretches like leg swings and high knees. Finish with light cardio like jumping jacks. Post-workout, cool down with static stretches, such as hamstring and chest stretches, to improve flexibility and aid recovery. A well-structured warm-up and cool-down enhance performance and support overall fitness goals.

Nutrition and Recovery

Nutrition and recovery are vital for optimal results in calisthenics. Fuel your body with a balanced diet, stay hydrated, and prioritize rest and sleep to support muscle growth and repair.

Importance of Nutrition in Calisthenics

Nutrition plays a critical role in calisthenics, as it directly impacts energy levels, recovery, and overall performance. A balanced diet rich in proteins, carbohydrates, and healthy fats ensures muscle growth and repair. Proper hydration and timing of meals are essential to fuel workouts and support physical demands. Visit www.nutrition.org for tailored meal plans and expert advice to optimize your calisthenics journey.

Recovery Tips for Optimal Results

Proper recovery is essential for maximizing calisthenics progress. Ensure adequate sleep, incorporate rest days, and prioritize stretching to prevent muscle soreness. Active recovery, such as yoga or swimming, can enhance flexibility and reduce stress. Maintain a balanced diet rich in proteins and carbohydrates to aid muscle repair. Stay hydrated, and consider using foam rollers for muscle relief. Listen to your body to avoid overtraining, and schedule recovery days to allow your muscles to rebuild. Visit ACE Fitness for more recovery tips.

Motivation and Consistency

Stay motivated by tracking progress and celebrating milestones. Consistency is key to seeing results. Join a calisthenics community for support and accountability. Visit ACE Fitness for tips on maintaining motivation.

Staying Motivated During the Workout Plan

Staying motivated requires setting achievable goals and celebrating small victories. Track your progress, reward milestones, and visualize your success. Find a workout buddy or join a community for support. Celebrate progress, no matter how small, to stay driven. Remember, consistency and patience are key to long-term results. Stay committed, and you’ll see transformation over time.

Tracking Progress and Celebrating Milestones

Regularly track your workouts, noting exercise progress and strength gains. Celebrate milestones like increased reps or mastering new moves. Use a workout log or mobile app to monitor improvements. Acknowledge achievements with non-food rewards or sharing progress with friends. This positive reinforcement keeps motivation high and encourages consistency, helping you stay committed to your fitness journey with visible results.

Equipment and Setup

Calisthenics requires minimal equipment, often just a pull-up bar, parallel bars, or a mat. Set up a dedicated workout space at home with enough room to move freely and proper flooring for comfort and safety.

Minimal Equipment Needed for Calisthenics

Calisthenics requires minimal equipment, making it highly accessible. A pull-up bar, parallel bars, and a good-quality exercise mat are essentials. Resistance bands or a bench can be optional for variations. Most exercises rely on body weight, allowing you to train anywhere. This simplicity makes calisthenics cost-effective and perfect for home workouts or outdoor sessions, ensuring you can stay fit without heavy investments in equipment.

Creating a Home Workout Space

Transforming your home into a workout area is simple. Choose a spacious room with a non-slip floor, preferably wooden or rubber. Ensure good ventilation and lighting. Install a sturdy pull-up bar and consider a mirror for form checks. Clear the area of clutter and add a workout mat for comfort. This setup allows you to follow your calisthenics PDF guide effectively, making home training convenient and motivating.

Success Stories and Community

Inspiring journeys of transformation through calisthenics motivate many. The supportive community fosters accountability, shares tips, and celebrates milestones, making the fitness journey enjoyable and rewarding for everyone.

Real-Life Success Stories from Calisthenics

Real-life success stories from calisthenics inspire and motivate individuals to embrace bodyweight training. Many have achieved remarkable progress, from performing 5-10 push-ups with good form to building noticeable muscle mass and strength. These journeys highlight the effectiveness of calisthenics in transforming lives, proving that dedication and consistent effort yield impressive results. The supportive community and structured PDF guides further empower individuals to reach their fitness goals and celebrate their achievements.

Joining the Calisthenics Community for Support

Joining the calisthenics community provides invaluable support and motivation. Connect with like-minded individuals online or locally, sharing tips, advice, and encouragement. The community fosters accountability, helping you stay consistent and overcome challenges. Participate in group workouts, events, or forums to enhance your journey. Being part of this supportive network ensures you stay inspired, gain new insights, and celebrate milestones together, making your fitness journey more enjoyable and rewarding.

Embrace the transformative power of calisthenics with our workout PDF as your guide. It empowers you to build strength, flexibility, and confidence, helping you achieve your fitness vision effectively and sustainably.

Final Thoughts on the Calisthenics Workout PDF

The Calisthenics Workout PDF is an exceptional resource for anyone seeking a structured, effective fitness journey. With its comprehensive plans, progression guides, and minimal equipment requirements, it caters to all fitness levels. Whether you’re a beginner or advanced, this guide empowers you to achieve strength, flexibility, and confidence. Download it now and transform your workouts with a proven, sustainable approach to bodyweight training.

Encouragement to Start the Journey

Embrace the transformative power of calisthenics with our workout PDF. Designed for all fitness levels, it offers a clear roadmap to strength and flexibility. Start small, stay consistent, and celebrate every milestone. With minimal equipment and proven routines, this guide makes fitness accessible and rewarding. Download now, commit to your goals, and unlock a stronger, healthier you. Your fitness journey begins here—take the first step today!

zaxby’s gluten free menu pdf

Zaxby’s offers a variety of gluten-free options, including grilled chicken, salads, and wings, prepared with care for those with dietary restrictions. While they don’t provide a dedicated gluten-free menu PDF, their items are clearly marked on their website and in-store menus for easy navigation. This ensures customers with gluten sensitivities can enjoy their meals safely and confidently.

Overview of Gluten-Free Options at Zaxby’s

Zaxby’s offers a selection of gluten-free options, catering to those with dietary restrictions. While they don’t provide a dedicated gluten-free menu PDF, their menu includes items like grilled chicken, salads, and wings that are naturally gluten-free. Customers can enjoy these options by making informed choices, such as avoiding certain sauces or dressings. The restaurant prepares dishes on shared equipment, so cross-contamination is a consideration for those with severe gluten intolerance. Despite not having a certified gluten-free menu, Zaxby’s provides flexibility for diners seeking gluten-free meals, ensuring they can still enjoy flavorful and satisfying options.

Importance of Gluten-Free Dining

Gluten-free dining is essential for individuals with celiac disease or gluten sensitivity, as consuming gluten can lead to severe health issues. It ensures they can enjoy meals safely while maintaining their dietary needs. Restaurants like Zaxby’s offering gluten-free options support inclusivity and cater to diverse dietary preferences, enhancing customer satisfaction. This approach promotes awareness and accommodates health-conscious diners, providing them with more choices. By understanding the importance of gluten-free options, Zaxby’s helps create a welcoming environment for all customers.

Available Gluten-Free Items at Zaxby’s

Zaxby’s provides a range of gluten-free options, including grilled chicken, fresh salads, and select wings. Their menu accommodates dietary restrictions while maintaining flavor and variety for health-conscious diners. Customers can enjoy these items with confidence.

Gluten-Free Wings and Sauces

Zaxby’s gluten-free wings are a popular choice, offering a variety of flavors without gluten. Their sauces, such as the Sweet & Smoky and Nuclear options, are also gluten-free, enhancing the wing experience. Customers can enjoy these options confidently, knowing they cater to gluten-free dietary needs while maintaining great taste.

Gluten-Free Salads and Dressings

Zaxby’s offers a selection of gluten-free salads that cater to dietary preferences and restrictions. The Asian Zensation Zalad and other grilled chicken salads are popular choices, provided they are ordered without croutons. Customers can customize their salads to ensure they meet gluten-free requirements. Zaxby’s also provides gluten-free dressing options, such as their signature Zax Sauce, allowing for a flavorful and safe dining experience. While the restaurant does not have a certified gluten-free menu, their salads and dressings are prepared with gluten-free ingredients, making them a reliable option for those avoiding gluten. However, it’s important to note that Zaxby’s kitchen equipment is shared with gluten-containing items, so cross-contamination is possible. For guests with severe gluten intolerance, informing the staff of dietary needs is crucial to ensure proper preparation. This attention to detail helps create a safe and enjoyable meal for all customers seeking gluten-free options.

Grilled Chicken and Protein Options

Zaxby’s grilled chicken is a standout option for gluten-free diners, as it is naturally free from gluten and prepared without gluten-containing ingredients. The Grilled Chicken Sandwich can be modified to be gluten-free by omitting the bun, and it pairs well with a side salad or gluten-free dressing. Additionally, the Grilled Chicken Zalad is a popular choice, featuring grilled chicken atop a fresh mix of greens, vegetables, and toppings. Customers can further customize their meals by requesting no croutons or gluten-containing sauces. While Zaxby’s does not have a certified gluten-free menu, their grilled chicken and protein options are inherently gluten-free and offer a safe choice for those with dietary restrictions. However, due to shared kitchen equipment, there is a risk of cross-contamination with gluten. Informing the staff of gluten-free needs can help ensure proper preparation. This makes Zaxby’s grilled chicken and protein options a reliable and flavorful choice for gluten-free dining.

Gluten-Free Sides and Extras

Zaxby’s offers several gluten-free side options to complement your meal. Their coleslaw is a popular choice, made with shredded cabbage and a hint of vinegar, and is naturally gluten-free. Additionally, the fresh veggies side, featuring carrot sticks and cucumber slices, is another safe option. For those seeking something more substantial, the fries are gluten-free, though they are cooked in a shared fryer, which may pose a risk of cross-contamination for highly sensitive individuals. While Zaxby’s does not provide a dedicated gluten-free menu PDF, their sides are clearly marked on their website and in-store menus. It’s important to note that while these sides are gluten-free by ingredients, cross-contamination risks exist due to shared kitchen equipment. Always inform the staff of your dietary needs to ensure proper preparation. This makes Zaxby’s sides and extras a convenient and flavorful addition to a gluten-free meal.

Navigating the Menu Safely

Zaxby’s does not provide a dedicated gluten-free menu PDF, but their website and in-store menus clearly indicate gluten-free options. Always inform staff of dietary needs to ensure proper preparation and avoid cross-contamination risks.

How to Order Gluten-Free at Zaxby’s

When ordering gluten-free at Zaxby’s, it’s essential to communicate your dietary needs clearly to the staff. Start by asking for modifications to menu items, such as removing croutons from salads or opting for grilled chicken without ranch sauce. Choose items like wings, salads, and grilled chicken, which are naturally gluten-free. Be sure to request that your meal be prepared in a dedicated area to minimize cross-contamination. While Zaxby’s does not offer a gluten-free menu PDF, their website and in-store menus provide clear indications of gluten-free options. Always double-check with the staff about preparation methods and ingredients to ensure your meal meets your dietary requirements. By taking these steps, you can enjoy a safe and satisfying gluten-free dining experience at Zaxby’s.

Cross-Contamination Precautions

Zaxby’s takes steps to accommodate gluten-free dietary needs, but cross-contamination remains a concern due to shared equipment and facilities. To minimize risks, inform staff of your gluten-free requirements when ordering. Request that your meal be prepared in a dedicated area to avoid exposure to gluten-containing ingredients. Avoid items like croutons in salads or sauces that may contain gluten. While Zaxby’s does not provide a gluten-free menu PDF, their website and in-store menus highlight gluten-free options, helping you make informed choices. Always double-check with staff about preparation methods and ingredient sourcing to ensure your meal is safe; By taking these precautions, you can enjoy a gluten-free dining experience at Zaxby’s with confidence.

soleil heater manual

Welcome to the Soleil Heater Manual․ This guide provides essential information for safe and effective use, covering installation, operation, and maintenance․ Ensure safety and maximize efficiency․

Overview of the Soleil Heater

The Soleil Heater is a utility heater designed for safe and efficient heating․ It operates at 110 to 120 V, making it suitable for standard household use․ Priced between $25 to $50, it offers affordability without compromising performance․ Available models include the Eurom Mon Soleil 601 WiFi and the PTC-910B ceramic fan heater․ The Quartz Infrared Heater with Remote Control (Model PH-91E-WD) is another option․ The user manual, available for download in PDF, provides detailed instructions․ Ensure proper ventilation and keep combustible items away․ Adjust the temperature control panel as needed for optimal heating․ Always follow the manual for safe operation․

Key Features and Benefits

The Soleil Heater offers advanced features for efficient and safe heating․ It includes models like the PTC-910B ceramic fan heater and the Quartz Infrared Heater with remote control․ These units are designed for portability and ease of use, with features like adjustable temperature controls and timers․ The Eurom Mon Soleil 601 WiFi model adds smart functionality․ Energy efficiency and reliability are key benefits, ensuring consistent heating while minimizing energy consumption․ Safety certifications, such as Intertek listing, provide peace of mind․ Detailed manuals and guides are available for optimal performance and troubleshooting․

Safety Precautions and Guidelines

Always follow the manual’s guidelines to ensure safe operation․ Keep the heater away from flammable materials and maintain proper ventilation․ Supervise children and pets during use․

General Safety Instructions

Always read the manual before using the Soleil heater․ Ensure the unit is placed on a stable surface, away from flammable materials․ Keep children and pets supervised․ Avoid overheating by maintaining a safe distance from combustible items․ Never operate the heater near water or in humid environments․ Plug directly into a grounded outlet rated for 110-120V․ Avoid using damaged cords or malfunctioning units․ If unusual odors or smoke appear, turn off immediately and ventilate the area․ Follow all safety guidelines to prevent accidents and ensure reliable performance․

Important Warnings and Restrictions

Never modify the heater or use it for purposes other than intended․ Operate only at the specified voltage (110-120V)․ Do not use if the cord or plug is damaged․ Keep the heater away from water and moist environments․ Avoid placing combustible materials within 3 feet․ Ensure proper ventilation to prevent carbon monoxide buildup․ Do not leave the heater unattended or running overnight․ Supervise children and pets during operation․ Follow all local safety regulations and manufacturer guidelines․ Failure to comply may result in fire hazards, electric shock, or injury․

Installation and Setup

Plug the heater into a suitable outlet․ Position it on a flat, stable surface, ensuring at least 3 feet of clearance from combustible materials․

Step-by-Step Installation Guide

Welcome to the installation guide for your Soleil Heater․ Begin by carefully unpacking the unit and ensuring all components are included․ Place the heater on a flat, stable surface, away from combustible materials․ Plug the device into a suitable 120V power outlet, ensuring proper ventilation․ For models with additional features, such as timers or remote controls, refer to the specific instructions provided․ Always follow the manufacturer’s guidelines to ensure safe and optimal performance․ If unsure, consult the manual or contact customer support for assistance․

Positioning and Placement Recommendations

Position the Soleil Heater on a stable, flat surface, ensuring it is at least 3 feet away from combustible materials like curtains or furniture․ Avoid placing it in damp environments or near water sources․ Keep the heater away from direct sunlight and flammable liquids․ Maintain a clear area around the unit to ensure proper airflow and heat distribution․ Do not place it in confined spaces or near pets and children to prevent accidental contact․ Follow these guidelines to ensure safe and efficient operation of your Soleil Heater․

Operating Instructions

Plug the Soleil Heater into a suitable outlet, ensuring proper ventilation․ Adjust settings and use the timer as needed․ Keep combustible items away and follow safety guidelines to prevent hazards․

How to Turn On and Use the Heater

To operate the Soleil Heater, first ensure it is placed on a stable, flat surface․ Plug the heater into a suitable 120V outlet, keeping it away from water and flammable materials․ Turn on the power switch located on the unit or remote control․ Use the temperature control panel to adjust heat settings or activate the fan-only mode for circulating air․ For models with a timer, set the desired duration to automate operation․ Always monitor the heater during use, especially around children or pets․ Refer to the manual for specific model instructions, such as the PTC-901 or PH-91E-WD, to ensure optimal performance and safety․

Adjusting Settings and Using the Timer

To adjust settings on your Soleil Heater, use the temperature control panel to select your desired heat level․ For models with a timer, press the TIMER button and use the +/- buttons to set the operating duration․ The remote control, available on select models like the PH-91E-WD, allows convenient adjustments․ Ensure the room is well-ventilated and free from flammable materials․ Always turn off the heater when leaving the room or when the timer expires․ Refer to your specific model’s instructions for advanced features, such as the PTC-901’s fan-only mode, to optimize comfort and energy use․

Maintenance and Care

Regularly clean the heater with a soft cloth and ensure proper ventilation for efficiency and safety․ Check air vents for blockages to prevent issues daily․

Cleaning and Upkeeping the Heater

Regular maintenance ensures optimal performance and safety․ Turn off and unplug the heater before cleaning․ Use a soft, dry cloth to wipe the exterior, avoiding harsh chemicals․ For tough stains, dampen the cloth slightly but ensure no moisture enters internal components․ Clean air vents and grills to prevent dust buildup, which can reduce efficiency․ Check for blockages in the heating element and vents․ After cleaning, allow the heater to dry completely before reuse․ Store the heater in a dry, cool place when not in use to prevent damage․ Regular upkeep helps maintain efficiency and prolongs lifespan․

Troubleshooting Common Issues

If the heater does not turn on, check the power supply and ensure it is properly plugged in․ Verify the circuit breaker has not tripped․ For unusual odors or smoke during initial use, this is normal due to factory materials․ Allow it to burn off in a well-ventilated area․ If the heater overheats, turn it off immediately and ensure proper clearance from flammable materials․ For noisy operation, check for blockages in vents or grills and clean as needed․ Consult the manual for specific solutions or contact customer support if issues persist․

Energy Efficiency and Performance

The Soleil Heater is designed for optimal energy efficiency, using advanced technology to provide consistent warmth while minimizing power consumption․ Regular maintenance ensures peak performance․

Maximizing Energy Efficiency

To maximize energy efficiency with your Soleil Heater, adjust the thermostat to the lowest comfortable setting and use the timer function to limit operation hours․ Regularly clean the heater to ensure optimal airflow and performance․ Proper placement, away from drafts and combustible materials, also enhances efficiency․ By following these guidelines, you can enjoy consistent warmth while reducing energy consumption and lowering utility bills․ Always refer to the manual for specific energy-saving tips tailored to your model․

Understanding the Heater’s Performance

Your Soleil Heater is designed to provide efficient and reliable warmth․ It operates by converting electrical energy into heat, which is then distributed evenly․ Models like the PTC-910B ceramic heater and the Quartz Infrared Heater with remote control offer advanced features for consistent performance․ The heater’s performance is optimized when used in well-ventilated areas, away from flammable materials․ Always follow the manual’s guidelines to ensure proper operation․ During initial use, a slight odor or smoke may occur, which is normal․ Regular maintenance, as outlined in the manual, helps maintain its efficiency and longevity․

Final Tips for Safe and Effective Use

Always follow the guidelines outlined in this manual to ensure safe and efficient operation․ Keep the heater away from flammable materials and out of reach of children․ Avoid overheating by maintaining a safe distance from combustible items․ Use the heater only on a stable, flat surface and plug it directly into a wall outlet․ Never leave the heater unattended or running for extended periods․ Regularly inspect the unit for damage and clean it as recommended․ If you notice unusual odors or smoke, discontinue use and contact a professional․ By adhering to these tips, you can enjoy safe and effective heating․

Where to Find Additional Resources

For further assistance, download the official Soleil Heater Manual from the manufacturer’s website or authorized retailers․ Visit the Soleil support page for detailed guides, troubleshooting tips, and FAQs․ Contact customer service for specific inquiries or concerns․ Additional resources, including instructional videos and user forums, can be found online․ Ensure all materials are genuine and approved by Soleil to maintain safety and warranty compliance․ Refer to trusted sources for accurate information to optimize your heater’s performance and resolve any operational issues effectively․

paw patrol invitation templates free download pdf

Paw Patrol invitation templates offer a fun and easy way to create personalized party invites. Available as free downloads in PDF format, these templates feature beloved characters and customizable details, making party planning a breeze for parents.

Why Paw Patrol Invitations Are Popular

Paw Patrol invitations are incredibly popular due to the global appeal of the Paw Patrol franchise, which is loved by children and parents alike. These templates are perfect for themed birthday parties, allowing kids to feel like part of the Adventure Bay team. The vibrant designs, featuring characters like Chase, Marshall, and Skye, instantly capture the excitement of the show. Parents appreciate how easy it is to customize these templates with their child’s name, age, and party details. Additionally, the availability of free downloadable PDFs makes them accessible to everyone, saving time and money. The combination of convenience, personalization, and beloved characters ensures Paw Patrol invitations remain a top choice for kids’ parties. Their popularity also stems from their versatility, as they can be printed or shared digitally, catering to both traditional and modern party planning needs.

Where to Find Free Paw Patrol Invitation Templates

Free Paw Patrol invitation templates are widely available online, making it easy for parents to find and download them. Popular platforms like Canva, Etsy, and Pinterest offer a variety of customizable designs. Websites such as birthdayinvitations.online and Ellie Rose Party Designs provide editable PDF templates that can be downloaded instantly. Additionally, marketplaces like Etsy offer unique, handmade designs that can be personalized to match your party theme. Many of these templates are available for free, with options to customize details like names, dates, and party information. Some websites also offer bundles that include matching decorations, banners, and thank-you cards. These resources are perfect for parents looking to create professional-looking invitations without the hassle and expense of hiring a designer. With just a few clicks, you can download, edit, and print your Paw Patrol invitations, ensuring your child’s party stands out.

How to Download and Edit Paw Patrol Templates

Paw Patrol templates are easily downloadable as free PDFs and can be edited using software like Adobe Acrobat. Customize details like names, dates, and colors effortlessly to create personalized invitations for your event.

Step-by-Step Guide to Downloading Templates

Downloading Paw Patrol invitation templates is a straightforward process. First, visit a trusted website offering free PDF templates. Click the “Download” button, usually labeled clearly. Choose a location on your device to save the file. Once downloaded, open the PDF using Adobe Acrobat or a compatible editor to customize details. Enter your party information, such as date, time, and location, using editable fields. Save your changes and print the invitations on cardstock for a professional look. Some templates also allow digital sharing via email or messaging apps. Ensure you have the necessary software installed to avoid any issues during editing.

Customizing Your Paw Patrol Invitation

Customizing your Paw Patrol invitation is simple and fun. Most free PDF templates are editable, allowing you to add personal details like your child’s name, party date, time, and location. Use Adobe Acrobat or similar software to fill in the fields. Many templates also let you change colors or add photos to match your party theme. Choose your favorite Paw Patrol character to feature prominently on the design. For a personal touch, include a special message or a cute illustration of your child’s favorite pup. Once customized, save the file and print it on high-quality paper for a professional look. You can also share the digital version via email or messaging apps for convenience. With these templates, creating a personalized and engaging invitation is quick and effortless, ensuring your party stands out.

Features of Paw Patrol Invitation Templates

Paw Patrol invitation templates feature customizable text, vibrant character images, and playful design elements. They are free, editable PDFs, perfect for creating personalized invites with themes and colors that match your celebration.

Design Elements of Paw Patrol Invitations

Paw Patrol invitation templates are designed with vibrant character images, signature color schemes, and themed backgrounds that bring Adventure Bay to life. They often feature beloved characters like Chase, Marshall, and Skye, making them instantly recognizable to fans. The templates include customizable text boxes to input party details, along with playful fonts and paw print icons that align with the show’s aesthetic. Many designs incorporate action-packed scenes or rescue mission themes, adding an exciting touch for kids. The use of bright colors like blue, red, and yellow ensures the invitations are eye-catching and energetic. Additionally, some templates include fun phrases like “Adventure Bay Awaits!” to set the tone for the celebration. These design elements create a cohesive and engaging look that resonates with both children and parents, making the invitations a perfect start to a Paw Patrol-themed party.

Customization Options for Personalization

Paw Patrol invitation templates offer extensive customization options, allowing parents to tailor every detail to their child’s preferences. Users can edit text fields to include the birthday child’s name, party date, time, location, and a personalized message. Many templates provide multiple character options, enabling the selection of the child’s favorite pup to feature prominently. Color schemes can be adjusted to match party themes, while fonts and layouts can be tweaked for a unique look; Some templates also include spaces for photos, allowing families to add a personal touch. Additionally, interactive PDFs let users input custom details directly before printing or sharing digitally. These customization options ensure that each invitation reflects the child’s personality and the party’s unique style, making the process both fun and efficient for parents.

Using Paw Patrol Templates for Party Planning

Paw Patrol templates simplify party planning with customizable designs and decoration ideas. They help create themed parties, ensuring a cohesive and engaging celebration that excites both kids and parents alike every time.

Tips for Matching Invitations to Party Themes

To ensure your Paw Patrol invitations align perfectly with your party theme, start by selecting a template that reflects the party’s central idea, such as Adventure Bay or a specific character’s mission. Use the signature colors of Paw Patrol, like blue, red, and yellow, to maintain consistency. Incorporate themed elements like badges, paw prints, or character illustrations to enhance the design. Consider the age and preferences of the birthday child when customizing the invitation. For a digital theme, opt for editable PDFs that can be shared online, while printable versions are ideal for physical distribution. Match the invitation’s tone to the party’s mood, whether it’s adventurous, playful, or festive. Finally, coordinate the design with other party materials, such as banners and decorations, to create a cohesive and immersive celebration. This attention to detail will make the invitation a perfect preview of the fun to come.

How to Share Digital Invitations

Sharing digital Paw Patrol invitations is convenient and eco-friendly. Once you’ve customized your template, save it as a high-quality PDF or JPG file. You can send it via email or messaging apps like WhatsApp or Facebook Messenger. For a more modern approach, upload the invitation to social media platforms such as Instagram or Facebook, creating an event page to share it with guests. If you’re using digital invitation platforms like Evite or Canva, they offer direct sharing options with tracking features to monitor RSVPs. Additionally, some templates allow you to share invitations directly from the editing software. Ensure the file format is compatible with the platform you choose and that the design looks sharp on both mobile and desktop screens. This method saves time and allows guests to respond quickly, making it an efficient way to manage your party planning.

Inspiration and Ideas

Paw Patrol invitation templates inspire creativity with customizable designs featuring your child’s favorite pups. Explore themed ideas, from Adventure Bay to jungle adventures, and pair them with matching decorations for a cohesive party look.

Creative Ways to Use Paw Patrol Invitations

Paw Patrol invitations can be creatively used beyond traditional party invites. Use them as customizable thank-you cards or decorate them with photos of your child’s favorite pups. Print them on sturdy cardstock to create keepsakes or incorporate them into DIY party decorations, such as garlands or banners. For digital invites, share them via WhatsApp or email with animated elements to make them more engaging. Additionally, pair the invitations with themed party favors, like Paw Patrol stickers or activity books, to create an immersive experience; You can also use the templates to design matching cupcake toppers or party signs, ensuring a cohesive look for the celebration. These versatile templates allow parents to express their creativity while making the party planning process fun and stress-free. They’re perfect for crafting memorable moments for both kids and adults alike!

Themed Party Ideas to Pair with Invitations

Paw Patrol invitations can be perfectly paired with themed party ideas to create an immersive experience for kids. Consider an Adventure Bay Rescue Mission theme, where decorations mimic the Paw Patrol headquarters. Use blue, red, and yellow balloons and streamers to match the pups’ signature colors. Another idea is a Pup-Tastic Obstacle Course party, where kids can participate in activities inspired by their favorite characters. For a more personalized touch, host a Pup-Themed Cake and Cupcake Decorating station with edible Paw Patrol toppers. You can also organize a Paw Patrol Scavenger Hunt, hiding pup figurines or stickers around the party area. These themes align seamlessly with the customizable invitations, ensuring a cohesive and exciting celebration. The invitations can even be designed to include a call-to-action, like “Join the Adventure!” to set the tone for the party. This approach creates a fun and engaging experience for both kids and parents.

Using free downloadable Paw Patrol invitation templates in PDF format is an excellent way to add a personal and creative touch to your child’s birthday celebration. These templates are not only cost-effective but also easy to customize, allowing parents to include essential details like date, time, and location. With a variety of designs featuring popular characters like Chase, Marshall, and Skye, these invitations can be tailored to match any party theme. Additionally, the option to edit and print them at home makes the process convenient and stress-free. Many websites offer these templates for free, ensuring accessibility for everyone. By pairing these invitations with themed party ideas and decorations, parents can create a cohesive and memorable experience for their children. Overall, Paw Patrol invitation templates are a practical and fun solution for planning a successful and enjoyable celebration.